2GIG SMKT3-345 Smoke Detector Guide
Specifications
- • Wireless signal range: 350 ft, open air with the wireless control panel
- • Transmitter frequency: 345 MHz
- • Dimensions: (D x H) 4.7 x 1.8 inch
- • Audible alarm: > 85dB (A) at 10ft minimum
- • Operating temperature: -40° to 100°F (4.4°C to 37.8°C)
- • Batteries: 2 x CR123A
- • Projected battery life: 10 years
Installation Steps
1. Using provided screws, mount the backplate to the ceiling at least 12 in. from the wall. Do not install in your kitchen near a sink, a stove, or an oven.
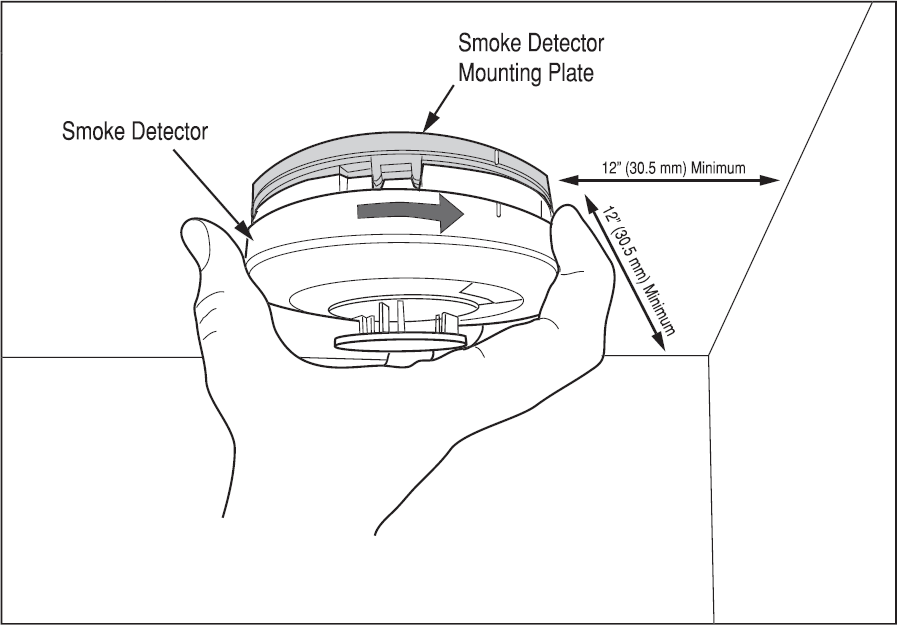
2. Place the smoke detector over the backplate, aligning the marks, then twist clockwise to lock in place.
3. Test the detector after completing the installation, and refer to the control system’s instructions for additional information concerning the use of wireless devices.
4. The sensor is now ready to be added to your panel using the following instructions.
Connect the Smoke Detector to Your 2GIG GC2 Panel:
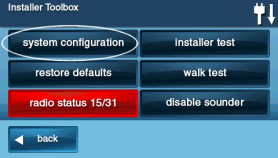
1. Press the bottom right logo, enter the default installer code 1561 or 1171, then press System Configuration.


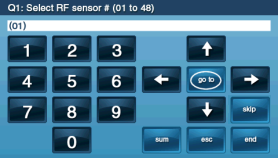
2. From here, you've entered Q1: RF sensor programming. Press go to, enter a 2-digit location number between 01 and 60, then press the down arrow to continue.

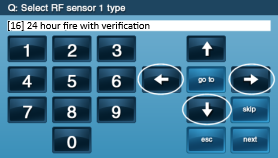
3. To select your sensor type, enter 16, or press the arrow buttons to scroll to (16) 24 hour fire with verification. Next, press the down arrow to continue.
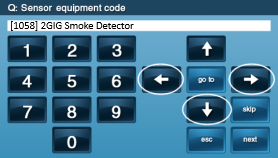
4. To specify the equipment type, press the arrow buttons to scroll to (1058) 2GIG Smoke Detector SMKT3-345, or if encrypted, scroll to (2058) eSeries Smoke Detector. Press the down arrow to continue.
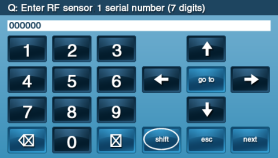
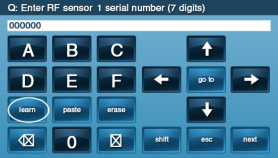
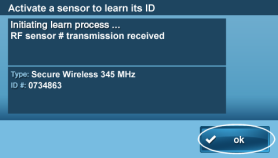
5. Enter the serial number from the sensor sticker. Alternatively, you can press shift, then press learn, then tamper/activate the sensor, and then press ok. Once the serial number is entered manually or through the alternative process, press the down arrow to continue.
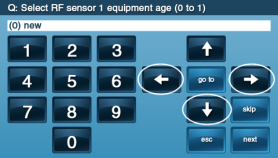
6. Enter 0, then press the down arrow to continue.
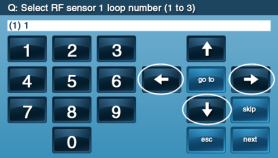
7. Enter 1 if using an external switch or 2 if using an internal reed switch, then press the down arrow to continue.
8. Enter 1 to enable the 30-second dialer delay, then press the down arrow to continue.

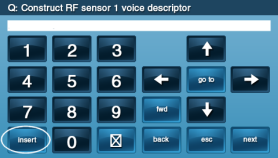
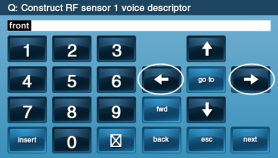
9. Press insert and use the arrows to select a voice descriptor for the sensor, then press the down arrow to continue. Note: multiple words can be added by pressing insert again.
10. Enter 1 to enable central station reports, then press the down arrow to continue.

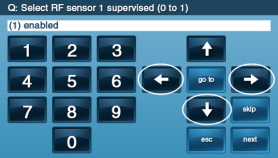
11. Enter 1 to enable sensor supervision, then press the down arrow to continue.
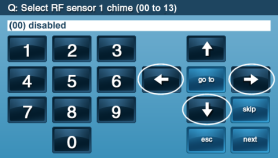
12. Press the arrow buttons to scroll through numbered chime sounds, then press the down arrow to continue.
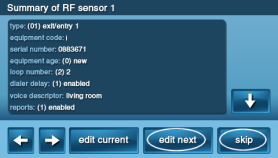
13. Press the down arrow to complete the process or press edit next to program in the next sensor.
For additional information relating to your device, click the following link to view the original manufacturer's user guide or installation manual: 2GIG SMKT3-345 Smoke Heat Freeze Detector Manual