T25 Smart Thermostat Guide
This guide covers everything you need to know about the T25 Smart Thermostat, including features, setup, troubleshooting, and tips for getting the most out of your thermostat.
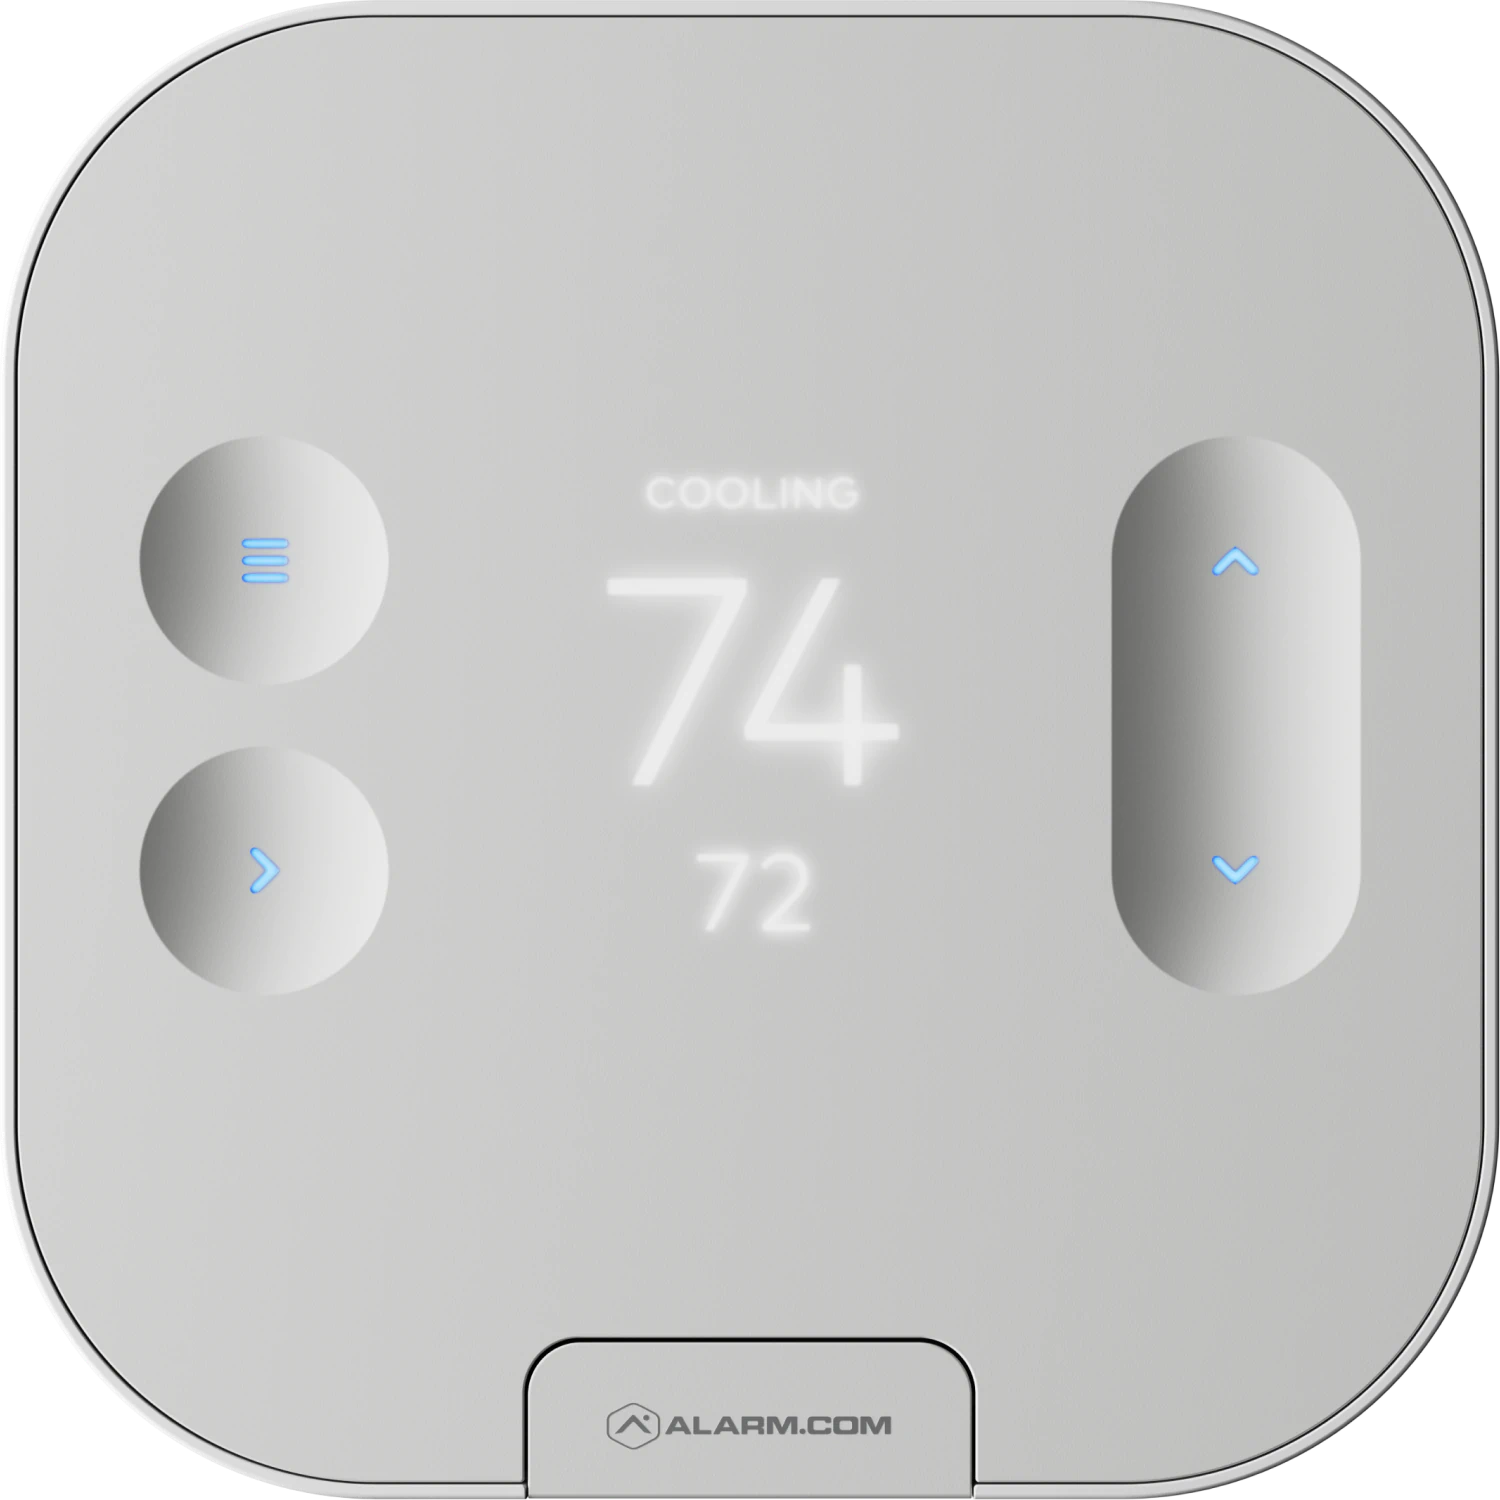
Navigate to the section you're looking for using the links below:
Features
- Rich OLED display for simple configuration
- HVAC Wire Detection and Auto Configuration
- Long battery life. No C-wire required
- Z-Wave SmartStart, S2 and LongRange Compatible
- Full integration with the Alarm.com platform including Scenes, Energy Saving Schedules, and Pro HVAC Monitoring
- Humidity control
- Vent control
- Compatible with Alarm.com Temperature Sensor
Specifications
- Power: 24 VAC/ 4x AA Batteries
- Dimensions: (H x W x D) 4.7 x 4.7 x 1" (12 x 12 x 2.6 cm)
- Operating temperature: 41°F to 95°F (5°C to 35°C)
- Communication:
- Z-Wave SmartStart Z-Wave S2
- Authenticated/Unauthenticated
- Z-Wave Long Range
Installation
Compatible Systems
- Near Universal 24 VAC Compatibility: Yes
- Humidifier: Yes
- Dehumidifier: Yes
- Forced Air: Yes
- Heat pump: Yes - Compatible with both O and B systems
- Heat: Up to 3 stages
- Cool: Up to 2 stages
- Dual Fuel: Yes
- Ventilation Control: HRV, ERV, External Air Baffle
Installation Location
- If replacing an existing thermostat, the new Smart Thermostat can be mounted in its place.
- If a new location is desired, it will be necessary to move the wiring. New installations and relocations should follow the accompanying guidlines to ensure the most accurate temperature reading and ease of use.
- Mount on an inside wall, approximately 5 ft (1.5 m) above the floor in a frequently used room.
- Do not install in locations near appliances or devices that affect the local temperature such as televisions, lamps, or dryers.
- Avoid areas that are exposed to large temperature variances, such as: direct sunlight, near an AC unit, above or below auxiliary heat and air vents, and drafts from windows or exterior doors. Be aware of what is on the other side of the wall where the installation is occurring. Do not install on walls adjacent to unheated rooms, stoves, or housing hot water pipes. Exterior walls are also not ideal locations for installation.
- Damp areas will not only affect the humidity reading but could lead to corrosion and shorten the lifespan of the thermostat.
- Install in a location with good air circulation. Stagnant air will not accurately reflect the rate of temperature change in the room.
- Avoid areas behind open doors, corners and alcoves.
- Wait until construction and painting are finished before installing.
Installation Preparation
- If you will add the Smart Thermostat to a Z-Wave network, power on the controller and verify it is communicating.
- Test the existing system.
- Verify that the heating and/or cooling system is operating properly before you try to install the new Smart Thermostat.
- Turn off power to the HVAC unit.
- Turn all heating and cooling systems off. This can be done at the circuit breaker.
- Remove the existing thermostat.
- Remove the cover from the existing thermostat. Do not disconnect the wires yet.
- Make sure the wires are identified correctly. If you have an unidentified wire, it may be necessary to identify where the wire connects to the heating or air conditioning equipment.
- Take a picture of the wires before you detach them from the existing thermostat for future reference.
- After all wires are identified and a picture has been taken, disconnect all the wires and remove the existing thermostat. Remember to secure the wires so they do not fall into the wall.
- Prep wires (if needed).
- Ensure the wires are a proper gauge between 16-24 AWG (1.3-0.5 mm).
- Make sure wires have exposed straight ends of the appropriate length.
Caution: Do not test the system by shorting electric terminals. Do not test the cooling system if it is cold outside, as this may harm the compressor.
Caution: Do not remove the existing thermostat until power has been turned off at the circuit breaker.
Caution: Wiring can vary for each manufacturer. Identify all wiring designations before removing it from the existing thermostat.
Thermostat Installation
- Level and mount the backplate to the wall with supplied hardware.
- Insert wires into their designated terminals. See Terminal Guide for details.
- If there is only R, connect to RC. The following image displays the terminal layout with the sticker on it direction which terminal to connect for R.
- If there is RH and RC, peel the sticker for RH & RC and remove the black jumper in the top right corner of the backplate as shown in the following images:
- Z can be used for the following options:
- W2
- Y2
- H
- DH
- O/B Zoning or Ventilation
- If you have extra wires, do not install them in the new thermostat. Please contact a local HVAC professional for additional assistance.
- Add batteries to the Thermostat (4x AA).
- After all wires are in their final locations, restore power to the HVAC system.
- Connect the Thermostat to the Back Plate.
- Follow the on-screen setup instructions to configure the thermostat and connect it to a Z-Wave network. The Smart Thermostat will automatically detect connected wires. Fllow the on-screen instructions to complete the thermostat configuration.


Caution: Do not insert more than one wire to a terminal.


Caution: If the thermostat screen does not show all the connected wires, remove the thermostat from the wall and verify that all wires are properly connected. If issues persist, there may be a problem with automatically detecting the wiring. See invalid wiring in the Troubleshooting section.
Terminal Guide
Setup
Depending on the system type and configuration, the thermostat may request the following information during setup:
Heat Type
Tells the thermostat whether it should turn on the fan during a heating cylce.
- Forced air heating: Electric
- Radiant floor heating: Fossil
- Fossil/electric baseboard heating: Fossil
- Radiators: Fossil
- If unsure: Unsure
Backup Heat Type
Tells the thermostat what type of auxiliary/backup heating the heat pump uses.
- Electric: This is the most common type of backup heating.
- Dual Fuel: Some heat pumps use a fossil furnace (for example, natural gas, oil, or propane) for backup heating.
- If unsure: The system will automatically detect which heat type is appropriate for the system.
Z-Terminal
A "dynamic" terminal that can be used for a variety of different system functions. If using the Z terminal, you must specify its function.
Note: Z uses the RC power and W2 is not available in a dual power system configuration where the RC-RH jumper is removed. Accessories powered by the transformer connected to RH will not operate if the RC-RH jumper is removed.
- W2: Second stage of heat or aux
- Y2: Second stage of cool or heat pump
- H: Humidifier
- DH: Dehumidifier
- EX: Ventilation (HRV, VRV, air baffle)
Test the System
Caution: Do not test the cool mode during cold weather. Wait for mild weather to fully test the system.
- After successfully installing and setting up the new Smart Thermostat, please test the Smart Thermostat and HVAC system.
- If the Smart Thermostat will control a heating system, test the heating system by changing the mode to Heat and adjusting the setpoint to be higher than the current room temperature. Verify the heating system turns on and that the room is starting to warm up.
- If the Smart Thermostat will control a cooling system, test the cooling system by changing the mode to Cool and adjusting the setpoint to be lower than the current room temperature. Verify the cooling system turns on and that the room is starting to cool down.
Z-Wave Setup
Refer to the Panel's documentation on adding/removing devices from the network. Once the panel is in add/remove mode:
- Press the
 button.
 - Use the ^ and v arrows to locate Settings, then use the > button to select it.
- Use the ^ and v arrows to locate Network, then use the > button to select it.
- Use the ^ and v arrows to locate Add/Remove, then use the > button to select it.
 button.
Operation
Press any button to wake up the thermostat. After waking, the display will show the current mode and ambient temperature. Setpoint is only in Heat/Cool mode. The display will turn off after 10 seconds to conserve energy. The thermostat will continue to operate while the display is off.
Changing the Mode and Setpoint
- Press the button.
- Use the ^ and v arrows to locate Mode, then use the > button to select it.
- Use the ^ and v arrows to scroll through the different modes, then use the > button to select the mode.
- The available modes are:
- Heat
- Cool
- Auto
- Emer
- Off
- Once the desired mode has been selected, use the ^ and v buttons to select the temperature setpoint.
Note: In Auto, the active setpoint is indicated by the operating state above the ambient temperature. The buttons on the display will also be illuminated to indicate the active setpoint. The LEDs will be illuminated red when heating is active and blue when cooling is active.
Note: Emer mode is available for Heat Pump systems. When in Emer mode, the display will read EMER when the thermostat wakes up.
Troubleshooting
Heating or cooling does not turn on when the setpoint is above or below the room temperature
To prevent damaging the compressor, the Thermostat inserts a delay when cycling the compressor. This delay is only a few minutes long.
- Change the setpoint to 2 degrees beyond the current setpoint and wait 5 minutes, at which point the system should turn on.
- If this does not work, contact a local HVAC professional.
Heat pump appears to heat when it should be cooling, or cooling when it should be heating
Some heat pumps use the O terminal, while others use the B terminal for their reversing valve. The heat pump may be the opposite type from how the thermostat is wired.
- Try switching the O/B configuration setting through your account.
- If this does not fix the problem, contact a local HVAC professional for help.
Smart Thermostat says the wiring is invalid
The wiring setup on the Smart Thermostat cannot be confirmed if any of the following is true:
- No wires detected.
- No RC wire detected.
- Y detected without G.
- OB detected without Y.
Check wiring against the provided terminal guide and ensure all wires are fully inserted into the back plate wire terminals. Re-configure the Smart Thermostat. If the problem persists, contact a local HVAC professional for help.
Fuel Type cannot be selected during wiring setup
The fuel type can only be configured if a W wire is present.
Ensure the wiring setup meets the minimum requirements and re-configure the Smart Thermostat.
Reconfigure the Smart Thermostat
Either:
- The wiring has changed and the thermostat needs to be re-configured
- A mistake was made during wiring configuration and the thermostat needs to be reconfigured
To reconfigure the Thermostat:
- Press the button.
- Select Settings.
- Select Installer.
- Select Wiring.
- Select Re-Configure.
"Low Battery" appears even after a recent battery replacement in the Smart Thermostat
The thermostat may be powered by the HVAC systems common wire or batteries. If the thermostat batteries are low or not installed, the thermostat will notify you when it is turned on.
You are encouraged to install batteries even when running with a common wire. This allows the thermostat to still communicate with the Z-Wave controller when the HVAC system has lost power. The thermostat is capable of reporting these power losses and other issues.
- Ensure the batteries are properly installed.
- Always use fresh alkaline batteries.
- Do not use Lithium batteries with the Smart Thermostat.
- If the problem persists, contact a local HVAC professional for help.
If you need further assistance, text us at 469.513.8685 or chat with us 24/7 for an immediate response.