ADC-VDB780B Video Doorbell Camera Guide
Summary: The ADC-VDB780B is a fully wireless, battery-powered video doorbell camera that delivers 1080p HD video, a wide 160°×90° field of view, and infrared night vision up to 15 ft. It includes advanced motion detection, two-way audio, and works seamlessly with the Brinks Home™ Mobile App and the included ADC-W115C Smart Chime. This guide covers specifications, features, common terms, factory reset, Smart Chime installation (mobile, desktop, WPS, AP modes), doorbell pairing, troubleshooting tips, and a detailed LED status reference (including charging states).
Table of Contents
- Specifications
- Features
- Common Terms
- Factory Default
- Smart Chime Overview
- Connect Smart Chime via Mobile App
- Connect Smart Chime via Desktop App
- Connect Smart Chime via WPS Mode
- Connect Smart Chime via AP Mode
- Placing Your Smart Chime
- Connect Video Doorbell to Chime & Wi-Fi
- Troubleshooting
- LED Status Reference
Specifications
- Video resolution: Full HD 1080p
- Field of view: 160° vertical × 90° horizontal
- Night vision: Infrared up to 15 ft
- Audio: Two-way via app
- Battery: 9540 mAh rechargeable (micro USB)
- Operating temperature: –4 °F to 122 °F (–20 °C to 50 °C)
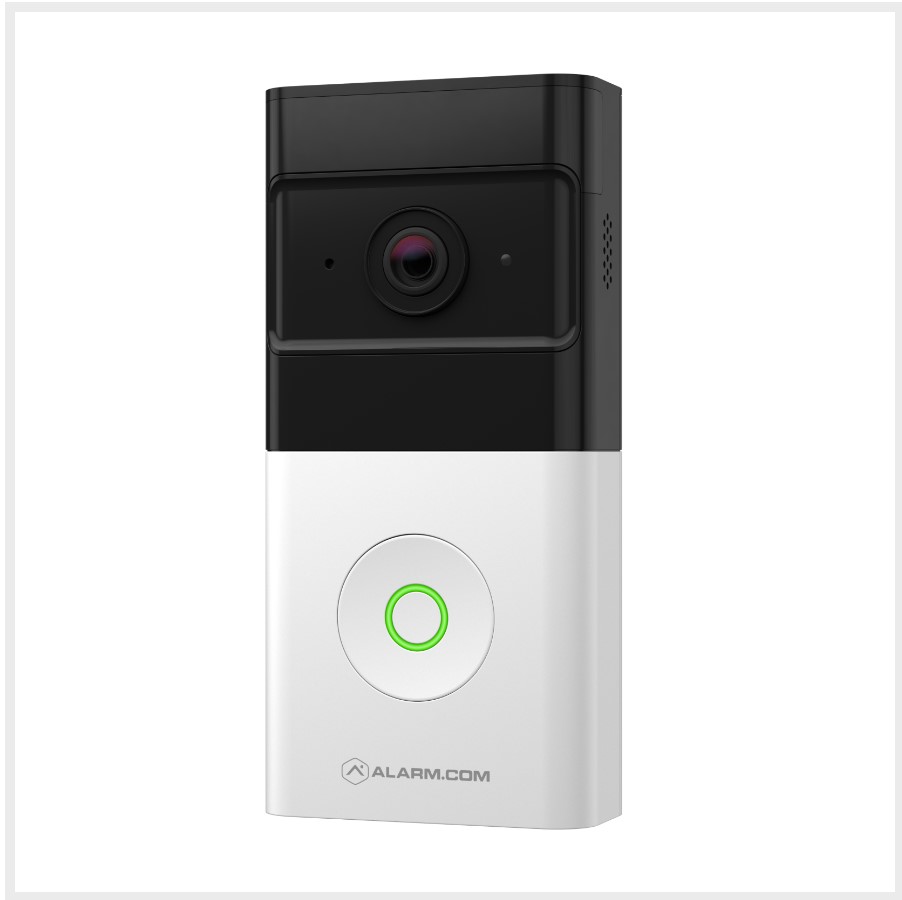
ADC-VDB780B Video Doorbell Camera
Features
- Completely wireless installation—no existing doorbell wiring required
- Rechargeable battery pack via micro USB (up to 6 months per charge)
- Advanced motion detection with customizable zones and timely push alerts
- Two-way audio through the Brinks Home™ Mobile App
- Flexible mounting options for optimal viewing angle
- Includes ADC-W115C Smart Chime for indoor notifications
Common Terms
- Smart Chime (ADC-W115C)
- An indoor plug-in speaker that rings when your doorbell detects motion or a button press.
- MAC Address
- A unique hardware identifier printed on the back of each device—used to add it to your account.
- WPS Mode
- Wi-Fi Protected Setup: a quick pairing method by pressing a button on both router and device.
- AP Mode
- Access Point: the device creates its own temporary Wi-Fi network to configure your home SSID/password via a browser.
- Firmware Update
- Software loaded on the device to add features or fix bugs; may take up to 15 minutes and should not be interrupted.
- Battery Pack
- The removable 9540 mAh rechargeable unit inside the doorbell; must be charged via micro USB.
Factory Default
Warning: This completely erases Wi-Fi settings, pairing, and customizations. You must re-add both the Smart Chime and the doorbell afterward.
- Press and hold the doorbell button for 76–180 seconds until the LED alternates red / green.
- Release the button and wait for the device to reboot (LED will go off, then flash white, then enter pairing mode).
LED alternating red/green indicates factory reset in progress
Smart Chime Overview
The included ADC-W115C Smart Chime must be installed and paired before adding your ADC-VDB780B. It plugs into any standard outlet and connects to your Wi-Fi to play motion and doorbell notifications.
You can install the Smart Chime using the Brinks Home™ Mobile App, a desktop browser, WPS mode, or AP mode. Choose the method most convenient for you.
Connect Smart Chime via Mobile App
Prerequisite: Your phone must be connected to the same Wi-Fi network you plan to use for the chime.
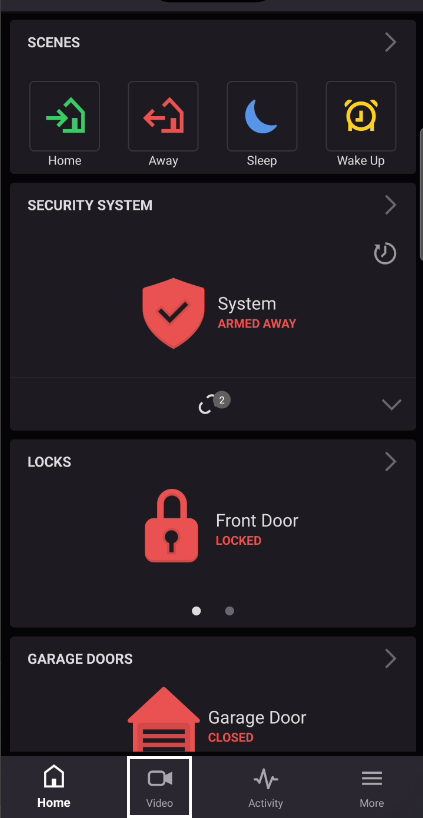
Mobile App: Video Section
- Open the Brinks Home Mobile App and log in.
- Tap the Menu icon (three horizontal lines) at the top-left.
- Select Add Device.
- Choose Video Camera (this also covers the Smart Chime).
- Tap Enter MAC Address and type in the MAC printed on the chime’s back.
- Follow the on-screen prompts to complete pairing (the chime’s LED will flash during setup).
After the Smart Chime is added, you’re ready to pair your video doorbell. Jump to doorbell pairing.
Connect Smart Chime via Desktop Browser
- Go to www.alarm.com and log in to your account.
- Click Video in the left menu.
- Click the gear icon (Settings) in the top-right corner of the Video page.
- Scroll down and click Add Video Device.
- Select Smart Chime (ADC-W115C) from the tutorial list.
- Follow the on-screen instructions (you’ll be prompted to hold the chime’s WPS button until its LED blinks slowly).
Once the chime is online, continue to doorbell pairing.
Connect Smart Chime Using WPS Mode
For best results, keep the chime within 3 ft of your router during setup.
- Plug the Smart Chime into a non-switched outlet and wait for its power LED to go solid.
- Press and hold the chime’s WPS button for ~5 seconds until its LED slows its flash rate.
- Within 2 minutes, press your router’s WPS button. The chime’s router LED will flash during pairing and then stay solid when connected.
- Open a browser and visit www.alarm.com/addcamera.
- Enter your Brinks Home credentials, then type in the chime’s MAC address when prompted.
- Follow the remaining prompts (you may be asked again to hold the WPS button). Once complete, the chime is ready.
- Unplug and move the chime to its final location.
Next, pair your video doorbell.
Connect Smart Chime Using AP Mode
Use this if WPS isn’t supported by your router. Keep the chime near your router until setup finishes.
- Plug the Smart Chime into an outlet; wait for its power LED to go solid.
- On your phone or PC, join the Wi-Fi network Chime Config (XX:XX:XX) (no internet). The password is printed on the chime label.
- Open a browser and go to http://connect.alarm.com (or 192.168.173.1).
- Follow the on-screen instructions to select your home SSID and enter its password. The chime’s router LED will flash and then stay solid.
- Visit www.alarm.com/addcamera and log in.
- Enter the chime’s MAC address and follow the prompts (including holding WPS if requested) to complete pairing.
- Unplug and relocate the chime to its permanent outlet.
Now you’re ready to pair the video doorbell.
Placing Your Smart Chime
- Move the chime to an outlet near your video doorbell camera.
- Wait for the router LED to go solid—this confirms a strong Wi-Fi signal.
- If the LED never goes solid, choose an outlet closer to the router and repeat pairing.
- Once solid, open the app and verify signal strength on the chime’s settings page.
Connect the ADC-VDB780B to Your Smart Chime & Wi-Fi
Important: Complete Smart Chime pairing before this step. Keep your doorbell and chime within 10 ft of each other.
- Press and release the WPS button on the Smart Chime—its WPS LED will flash rapidly.
- Immediately press and hold the doorbell camera’s button for at least 30 seconds.
- Watch the doorbell’s LED: it will flash blue, blink three times, then turn solid—indicating successful pairing.
- In the Brinks Home App, go to Video > Add Device and verify the ADC-VDB780B appears online.
Troubleshooting
- No Video Feed:
- Ensure the doorbell has charge: check LED indicates power and charging status.
- Verify Wi-Fi is up—try loading a webpage on another device.
- Move doorbell or router to improve signal, or add a Wi-Fi extender.
- No Chime Sound:
- Confirm Smart Chime is plugged into an outlet and its LED is solid.
- Check volume settings in the Brinks Home App under chime device settings.
- Poor Audio Quality:
- Move phone or camera away from electronic interference.
- Ensure microphone permission is granted to the Brinks Home App.
- Battery Drains Quickly:
- Reduce motion sensitivity or shorten recording length in app settings.
- Check for constant recording schedules; disable if unnecessary.
- Failed Pairing:
- Repeat factory reset on both Smart Chime and doorbell, then re-pair.
- Use AP mode on the doorbell: hold its button until LED flashes white, then connect via 192.168.1.1 in a browser.
LED Status Reference
| Pattern | Status | Recommended Action |
|---|---|---|
| Off | Standby / no power | Recharge battery or check battery pack installation; ensure power switch is ON. |
| Flashing Red | Booting up | Wait 1–2 minutes until initialization completes. |
| Solid Green | Connected online | Verify live feed in app; if blank, refresh or power cycle device. |
| Flashing Blue | WPS pairing mode | Press router’s WPS button within 2 minutes; LED should turn solid green. |
| Flashing White | AP pairing mode | Connect to SSID ADC-VDB780B (xx:xx:xx) and complete setup at 192.168.1.1. |
| Flashing Red/Blue | Low battery | Recharge via micro USB until charging LED indicates sufficient level. |
| Solid Red | No Wi-Fi / Internet | Check Wi-Fi SSID/password; power cycle router; move doorbell closer to router. |
| Flashing Red/Green | Factory reset in progress | Allow 2 minutes; LED will enter pairing mode when complete. |
| Flashing Yellow | Power cycling | Wait until LED changes pattern; do not interrupt. |
| Flashing Yellow (rapid) | Firmware update | Wait up to 15 minutes; do not unplug or interrupt. |
Charging LED Indicators
| Pattern | Battery Level | Recommended Action |
|---|---|---|
| Solid Orange / Solid Green | ≥ 75 % | You may unplug—battery is mostly charged. |
| Solid Orange / Solid Orange | 15 %–74 % | Continue charging until ≥ 75 %. |
| Solid Orange / Flashing Red/Blue | < 15 % | Recharge immediately; plug in for at least 2 hours. |
| Solid Green / Solid Green | 100 % | Fully charged—unplug and reinstall. |
| Solid Green / Flashing Red/Yellow | Temperature too cold | Bring battery pack to room temperature before charging. |
| Solid Green / Flashing Red | Temperature too hot | Allow battery pack to cool before charging. |
| Flashing Red/Green / Flashing Red/White | Charging stopped (over-charge or fault) | Unplug, wait 1 hour, retry. If issue persists, text Support at 469 513 8685. |