How to Program a Thermostat to Your Panel
Steps for adding your thermostat to your panel vary for each panel type. Click on the image of your panel below for instructions on connecting your thermostat to your panel. If your panel is not represented below, consult your user manual, or you can text a Support Representative any time at 469.513.8685.
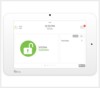

The following instructions are panel-specific steps for adding a thermostat to each specific panel. If your panel is not represented, refer to your user's manual or text a Support Representative any time at 469.513.8685.
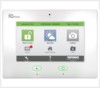
2GIG GC2 Thermostat Programming Instructions:
- On the GC2 panel press Service, press the Z-Wave logo, then press the settings icon, which is a wrench on the bottom right.
- Enter the default installer code 1561, then press Add Devices.
- Press the Mode button to display temperature, press Mode until the heat/cool icons disappear.
- Hold down the arrow until the radio icon appears, which will enable device add mode. When the radio icon turns solid, the thermostat has been added.
- Learn the temperature sensor separately by pressing the mate button on the side.
- Once the device is discovered, you can press Back to exit the menu.


2GIG GC3 Thermostat Programming Instructions:
- Press System Settings, enter the default installer code 1561, then press Smart Home Settings.
- Press Add Devices, then you will be prompted to trigger your thermostat.
- Press the Mode button to display temperature, press Mode until the heat/cool icons disappear.
- Hold down the arrow until the radio icon appears, which will enable device add mode. When the radio icon turns solid, the thermostat has been added.
- Learn the temperature sensor separately by pressing the mate button on the side.
- As the thermostat is added to the system, press OK to view. Press Back or the home button to exit, or press Rename to edit the thermostat name.


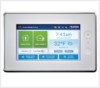
Qolsys IQ Panel Thermostat Programming Instructions:
- Press Settings, enter the default installer code 1111 or 2222, then press Installation.
- Press Home Control Devices, press Add Devices, then press Pair.
- The panel will enter learn mode and await a signal from the thermostat.
- Press the Mode button to display temperature, press Mode until the heat/cool icons disappear.
- Hold down the arrow until the radio icon appears, which will enable device add mode. When the radio icon turns solid, the thermostat has been added.
- Learn the temperature sensor separately by pressing the mate button on the side.
- Select a name from the list or, for a custom name, press Custom Name. Click and enter a name for your thermostat, then press Done.
- Press Add to finish, then press Back or the home button to exit.


Qolsys IQ2 Thermostat Programming Instructions:
- Press the clock display at top, press Settings, then press Advanced Settings.
- Enter the default installer code 1111 or 2222, press Installation, then press Devices.
- Press Z-Wave Devices, press Add Device, then press Pair to begin the panel's learning process.
- Press the Mode button to display temperature, press Mode until the heat/cool icons disappear.
- Hold down the arrow until the radio icon appears, which will enable device add mode. When the radio icon turns solid, the thermostat has been added.
- Learn the temperature sensor separately by pressing the mate button on the side.
- You may optionally press Automation, then select if your thermostat will automatically turn on at a specific time, then press OK.
- Press Name and enter a name from the list, or select Custom Name to enter a name.
- If you opt to enter a custom name, enter up to 10 characters, and press Check or the keyboard icon. Press Add to finish, then press the home icon to exit.


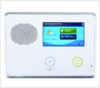
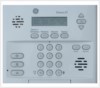
Simon XT Thermostat Programming Instructions:
- Hold * for 10 seconds, at which point the keypad beeps and displays the main Z-Wave menu.
- Select 1 and hold for 10 seconds to select Add.
- The Simon XT will enter Z-Wave add mode.
- Press the Mode button to display temperature, press Mode until the heat/cool icons disappear.
- Hold down the arrow until the radio icon appears, which will enable device add mode. When the radio icon turns solid, the thermostat has been added.
- Learn the temperature sensor separately by pressing the mate button on the side.
- The keypad beeps and displays added device when successful.
- Hold # for 10 seconds to exit.


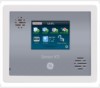
Simon XTi Thermostat Programming Instructions:
- Press the gear icon at the bottom right of the panel, press the down arrow three times until you get to programming, then press Enter next to programming.
- Enter the default installer code 4321, then press OK. Press Interactive Services, then press Z-Wave.
- Press Add Device.
- Press the Mode button to display temperature, press Mode until the heat/cool icons disappear.
- Hold down the arrow until the radio icon appears, which will enable device add mode. When the radio icon turns solid, the thermostat has been added.
- Learn the temperature sensor separately by pressing the mate button on the side.
- The Simon XTi beeps and displays that the device is added when successful. Press Close three times to exit to the main menu.


