How to Program a Garage Door Sensor to an IQ Panel 2
Sensor Installation:
1. Remove the battery tabs then apply adhesive tape to the bottom of the sensor.
2. Mount the sensor horizontally with the arrow facing down pointing to the door.
IQ Panel 2 Programming:
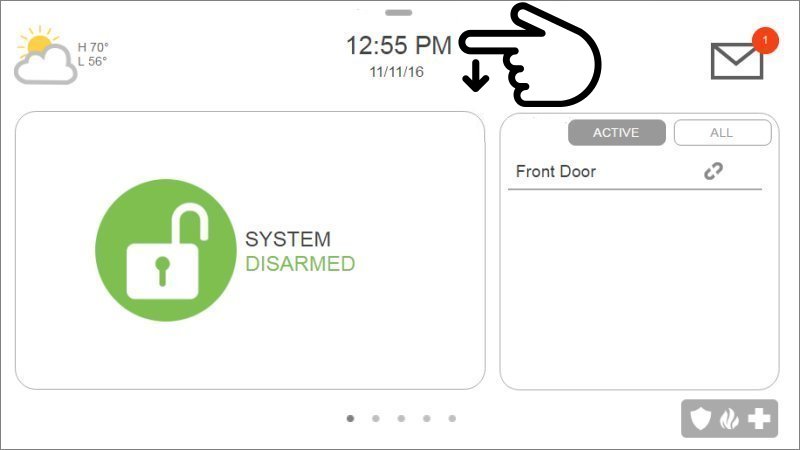
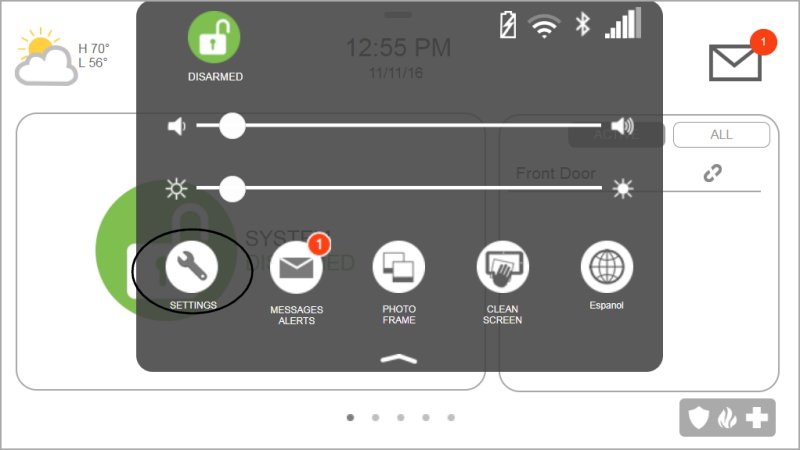
1. Swipe down from the clock display at the top of the screen, then press Settings.
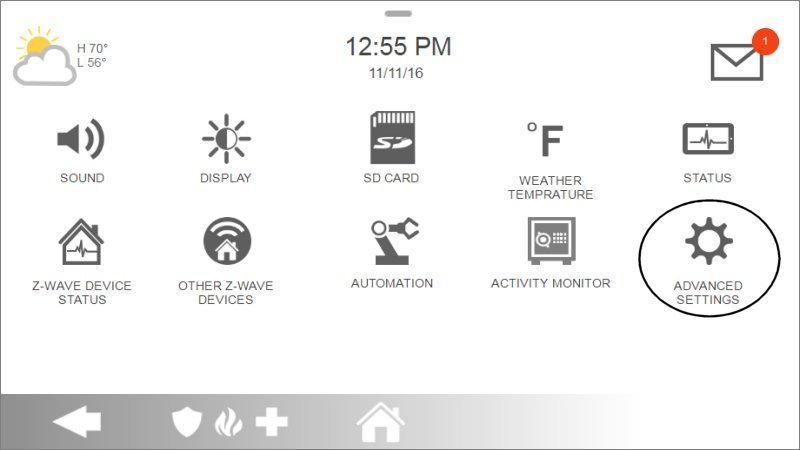
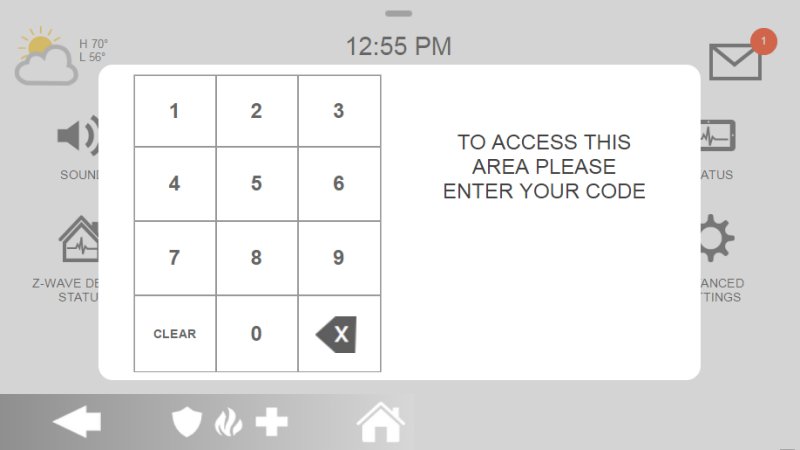
2. Press Advanced Settings, then enter the default installer code 1111 or 2222.
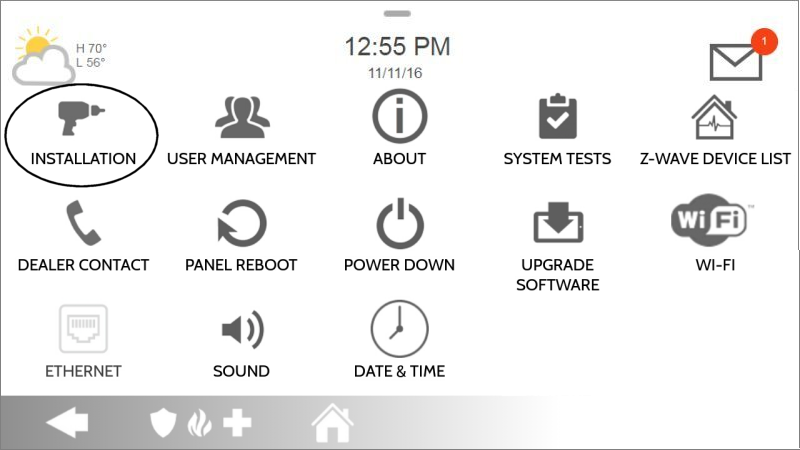
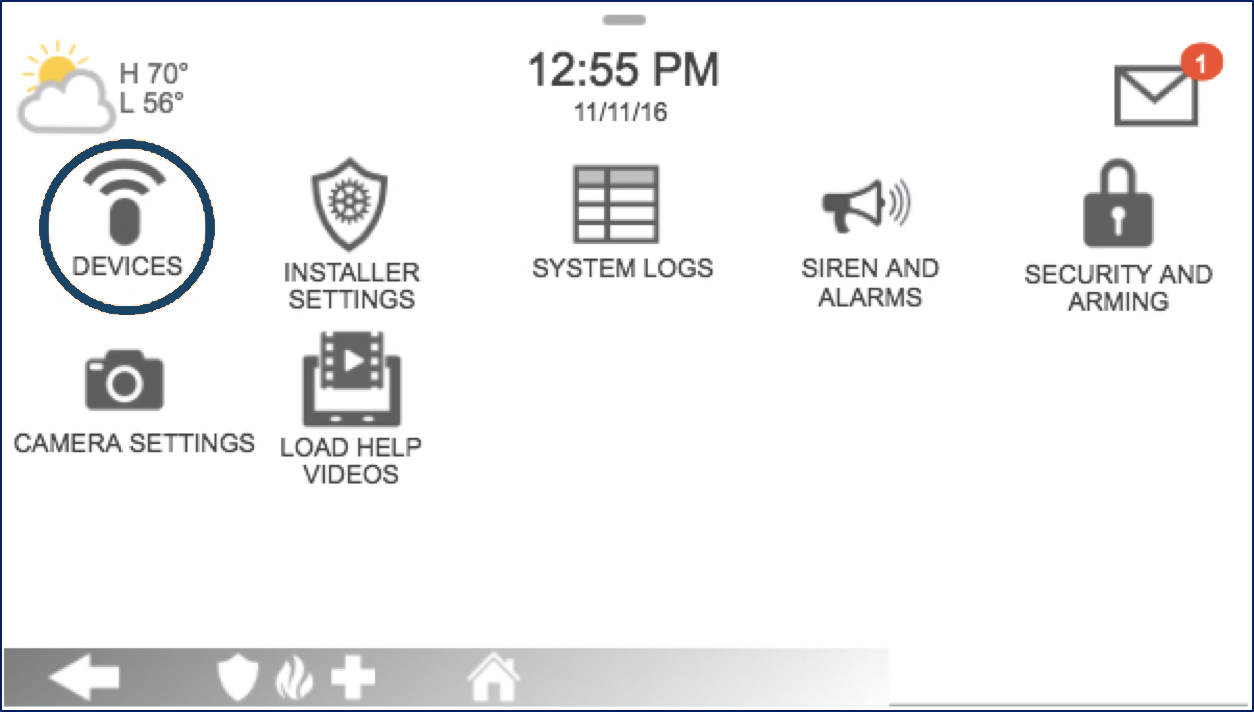
3. Press Installation, then Devices.
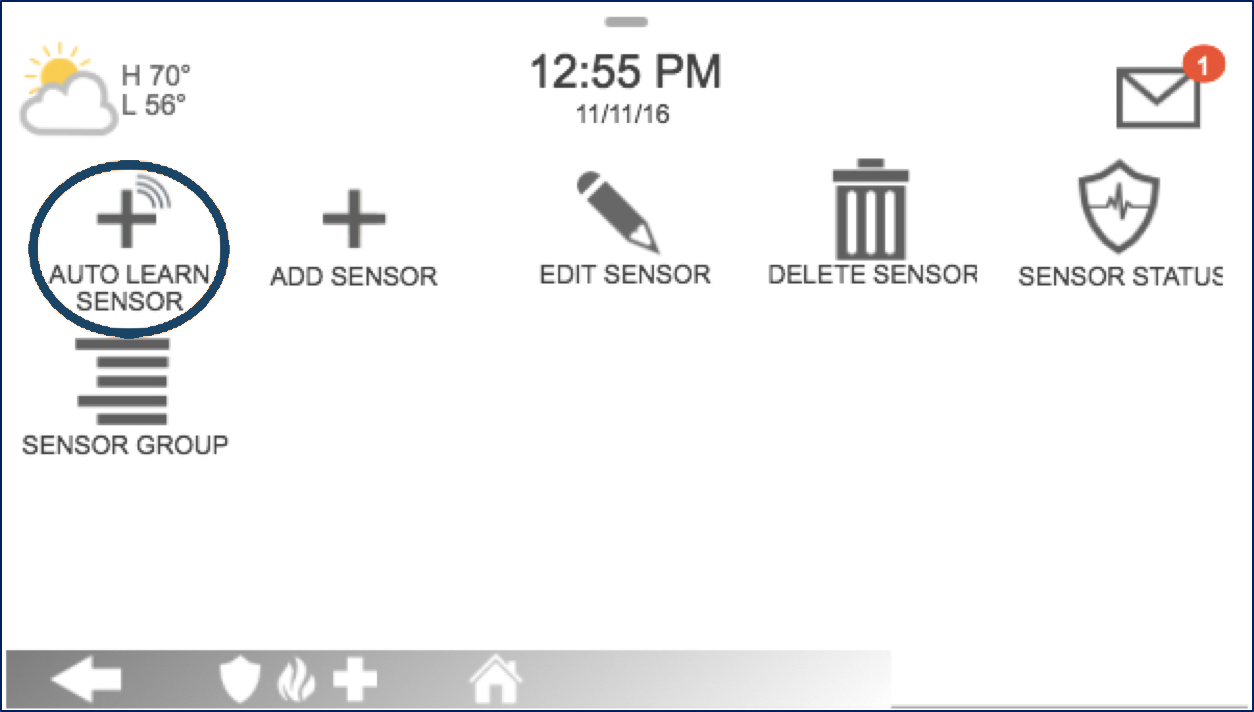
4. Press Security Sensors, then Auto Learn Sensors.

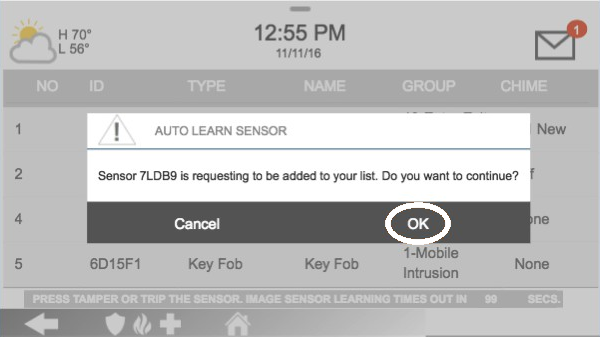
5. Open the sensor cover to learn, then press Ok to confirm.

6. Enter sensor settings with the information below, then press Add New to save, then Home to exit.


Sensor Information:
- • Sensor DL ID: Don't touch this option
- • Sensor Type: Select Tilt
- • Sensor Name: Select an appropriate name or create a custom description
- • Chime Type: This allows you to apply a specific sound to your device when it’s used
- • Sensor Group: Choose 10 for an entry delay or 13 for instant
- • Voice Prompts: This allows you turn on or off the vocal chime
Once you have completed all steps, it is recommended that you trigger the sensor to ensure it chimes twice.