How to Program the Honeywell 5800COMBO to the GC2 Panel
The Honeywell 5800COMBO can support 4 separate functions. To program all functions, you will need to follow the steps below four times, one time for each function. Users can omit functions not needed. Each function is based on the serial number and loop number entered.
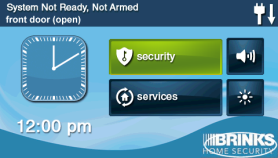
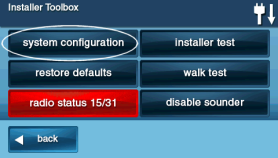
1. Click the logo in the lower-right corner of the screen. Enter the default installer code 1561. Select System Configuration.

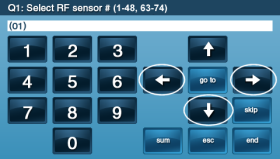
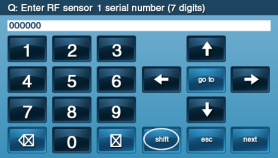
2. Choose an available sensor number by using the left and right arrows. Press the down arrow when you find a sensor number that has not yet been assigned.
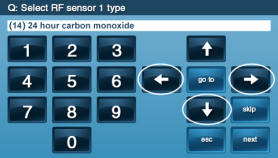
3. Use the left or right arrow buttons to select sensor type, then press the down arrow to move on to the next selection.
- a. Smoke/heat detection = (09) 24-Hour Fire or (16) 24-Hour Fire Verification*
- b. CO detection = (14) 24-Hour Carbon Monoxide
- c. Freeze detection = (08) 24-Hour Auxiliary Alarm
- d. Maintenance = (05) Day Zone
*Sensor type 16 requires the sensor be activated a second time after 30 seconds before an alarm will occur.
4. Use the left or right arrow buttons to select the equipment code, then press the down arrow to move on to the next selection.
- a. Smoke/heat detection = 0859 – HW Smoke 5808W3
- b. CO detection = 0692 - Existing CO Detector
- c. Freeze detection = 0859 – HW Smoke 5808W3
- d. Maintenance = 0859 – HW Smoke 5808W3

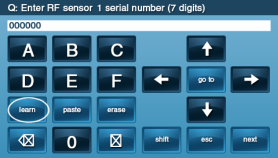
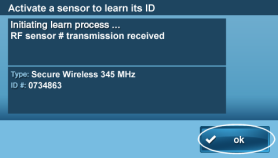
5. Before starting this step, ensure batteries are installed and functioning in the 5800COMBO. Enter the serial number, preferably through auto-enrollment. Press Shift, then press Learn. The system will begin searching for an RF signal transmission. Trigger the button detailed below for each function. The GC2 panel will display the sensor is recognized. Press the down arrow to move on to the next selection.
- a. Smoke/heat detection = Smoke Test button
- b. CO detection = CO Test button
- c. Freeze detection = Smoke Test button
- d. Maintenance = Smoke Test button
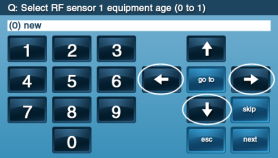
6. Use the left or right arrow buttons to select the equipment age as (0) for new or (1) for an existing device, then press the down arrow to move on to the next selection.
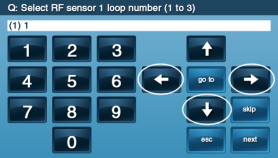
7. Use the left or right arrow buttons to select the loop number, then press the down arrow to move on to the next selection.
- a. Smoke/heat detection = 1
- b. CO detection = 1
- c. Freeze detection = 2
- d. Maintenance = 3
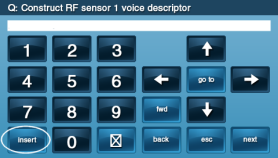
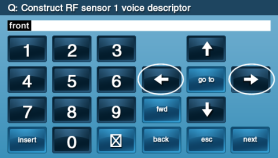
8. Use the left or right arrow buttons to select the voice descriptor. Press the insert button to add each new word (up to 16 words). Press the down arrow to move on to the next selection.
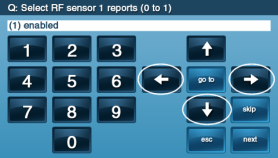
9. Use the left or right arrow buttons to select the sensor reports to enabled, then press the down arrow to move on to the next selection.
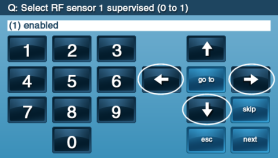
10. Use the left or right arrow buttons to select the sensor supervision to enabled, then press the down arrow to move on to the next selection.
11. Use the left or right arrow buttons to select the sensor chime to disabled*, then press the down arrow to move on to the next selection.

*The system will trigger an alarm upon activation in most cases.
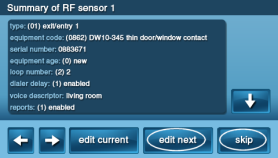
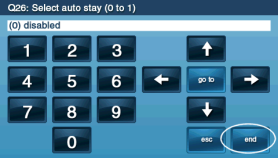
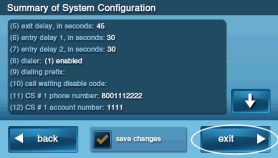
12. From the summary screen, select Edit Next to continue enrollment, then select End. Another summary screen will be displayed. Ensure that the box next to Save Changes is checked, then press Exit. The GC2 panel will reboot to complete the process.
Again, repeat all steps above to enter each of the 4 sensor functions desired.