ADC-V520 Indoor Camera Guide
Summary: Welcome! This guide will help you set up and get started with your ADC-V520 Indoor Camera. Even though this model is discontinued, it's still a capable camera for your Alarm.com system. We'll cover understanding its specifications, connecting it to your network (using Wi-Fi WPS or Ethernet), adding it to your Brinks Home™ account, checking its connection status, understanding its status lights, and troubleshooting common issues.
Table of Contents
Click these links to jump to a specific section for your ADC-V520 camera.
- Common Terms
- Specifications
- Network Setup (Wi-Fi WPS & Ethernet)
- Adding the Camera to Your Account
- Checking Wi-Fi Signal Strength
- LED Reference Guide
- Troubleshooting Common Issues
- Factory Default Reset
- Optional Accessories
- Further Assistance
Common Terms
Here are definitions for some terms we use in this guide to help you understand your ADC-V520 camera.
- ADC-V520
- The model number of your indoor security camera.
- Alarm.com
- The platform that powers many security and smart home services, including video camera integration with systems like Brinks Home™.
- Resolution
- The clarity of the video image, measured in pixels (e.g., 1280x800p for this camera).
- Field of View (FOV)
- The extent of the observable world that is seen at any given moment through the camera lens, measured in degrees.
- Wi-Fi
- Wireless networking technology (802.11 b/g/n for this camera) used to connect the camera to your internet router.
- Ethernet Connection
- A wired network connection using an Ethernet cable between the camera and your router, often providing a more stable connection.
- Factory Default Reset
- A process to restore the camera to its original out-of-the-box settings, erasing all configurations including Wi-Fi settings.
- Reset Hole/Button
- A small recessed button on the camera used to initiate a factory default reset.
- WPS (Wi-Fi Protected Setup)
- A network security standard that allows easy connection of Wi-Fi devices to a router, often with a button press, without manually entering the password. This camera supports WPS for Wi-Fi setup.
- Router
- Your home's device that provides internet access and manages your local network (both Wi-Fi and wired Ethernet connections).
- Brinks Home™ App / Website
- The application (mobile or web-based) used to view live video, manage recordings, and control your camera through your Alarm.com powered account.
- VMD (Video Motion Detection)
- A feature, configurable through Alarm.com, that allows the camera to detect motion in its view and trigger recordings or alerts based on that motion.
- Transformer (Power Adapter)
- The external power supply unit that plugs into an electrical outlet to power your camera.
- Wi-Fi Extender
- A device that can boost your Wi-Fi signal to extend its range, useful if the camera is far from your router and using a Wi-Fi connection.
- LED (Light Emitting Diode)
- A small indicator light on the camera that shows its status (e.g., power, network connection).
Specifications
Learn about the technical details of your ADC-V520 Indoor Camera.
- Device Model: ADC-V520
- Video Resolution: 1280 x 800 pixels (often referred to as 720p/WXGA variant)
- Field of View: 47° horizontal, 31° vertical
- Night Vision: No built-in infrared night vision capability. Requires ambient light for visibility in low-light conditions.
- Wireless Connectivity: Wi-Fi (IEEE 802.11 b/g/n), 2.4 GHz band
- Wired Connectivity: Ethernet port (RJ-45) for hardwired network connection
- Operating Temperature: 32°F to 104°F (0°C to 40°C)
- Power: Requires included AC power adapter (specifications vary, typically 5V DC or 12V DC).
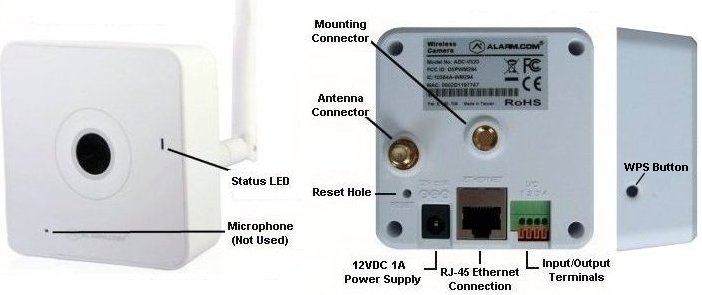
ADC-V520 Indoor Camera
Network Setup (Wi-Fi WPS & Ethernet)
Follow these steps to connect your ADC-V520 camera to your network. This is the first crucial step before adding the camera to your account.
Method 1: Wi-Fi Setup by WPS Mode
Use this method if your router supports WPS push-button connection and you prefer a wireless setup.
- Ensure the camera is powered on.
- Locate the WPS button on the side of the ADC-V520 camera. Press and hold this WPS button for about five seconds, until the camera's LED begins to flash blue. Release the button. The camera is now in WPS pairing mode for approximately two minutes.
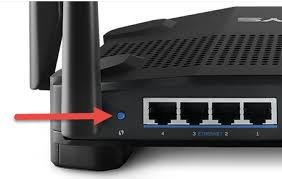
- Within those two minutes, activate WPS mode on your Wi-Fi router. This is usually done by pressing a physical WPS button on the router itself or enabling it through the router's software programming interface. Consult your router’s manual if unsure.
- The camera will attempt to connect to your Wi-Fi network. Wait for this process to complete.
- The camera's LED will turn solid green when the connection to your Wi-Fi network and the internet is successful. Refer to the LED Reference Guide for more details.
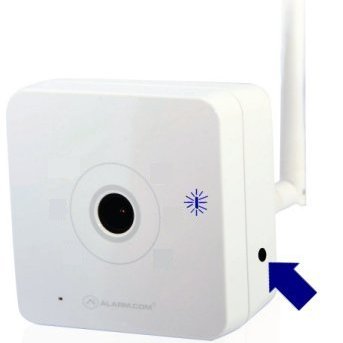
Camera WPS Button
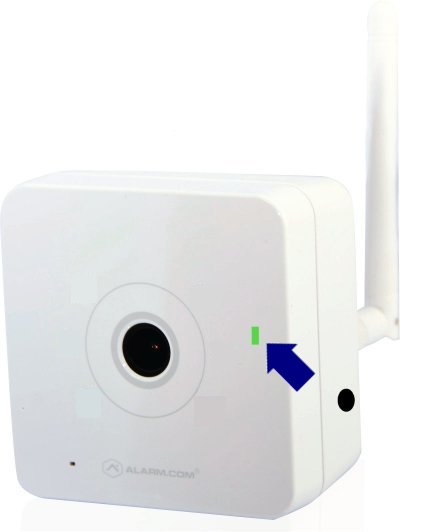
Connected (Solid Green LED)
Method 2: Hardwire Connection to Router (Ethernet)
For a potentially more stable connection, you can connect your ADC-V520 directly to your router using an Ethernet cable.
- Ensure the camera is powered off or unplugged before connecting cables.
- Plug one end of a standard Ethernet cable into the Ethernet port on the back of the ADC-V520 camera.
- Plug the other end of the Ethernet cable into an available LAN port on your Wi-Fi router or network switch.
- Connect the camera's AC power adapter and plug it into an electrical outlet.
- The camera should automatically obtain network settings from your router via the Ethernet connection. The LED will typically turn solid green once it has established a network and internet connection. Refer to the LED Reference Guide.

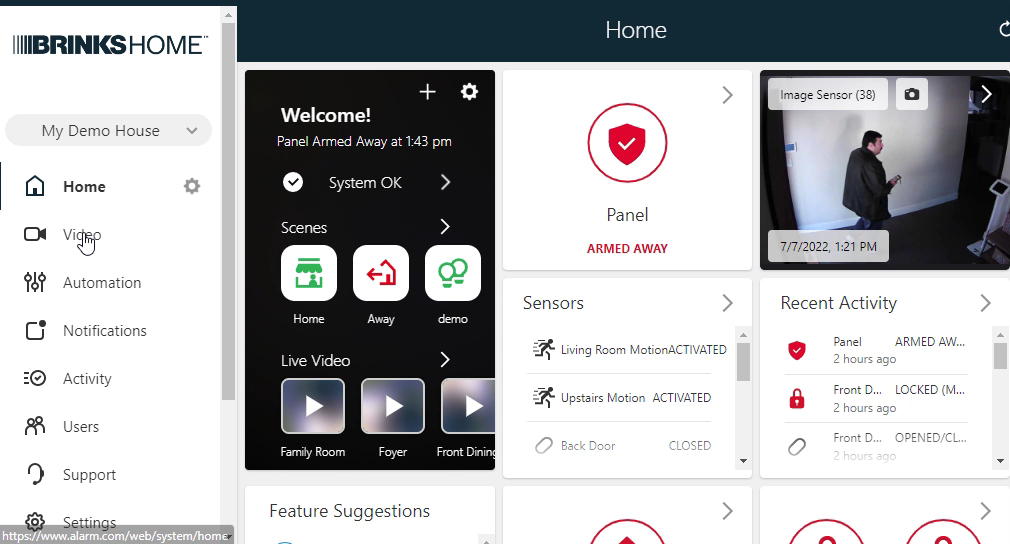
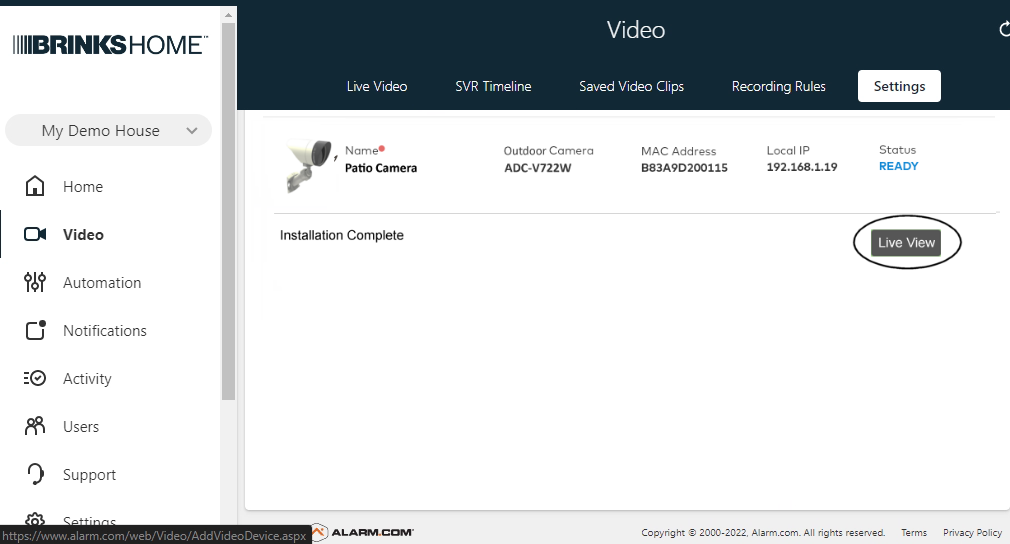
Adding the Camera to Your Account
Once your ADC-V520 camera is successfully connected to your network (indicated by a solid green LED), you need to add it to your Alarm.com account through the Brinks Home™ App or website to view video and manage settings.
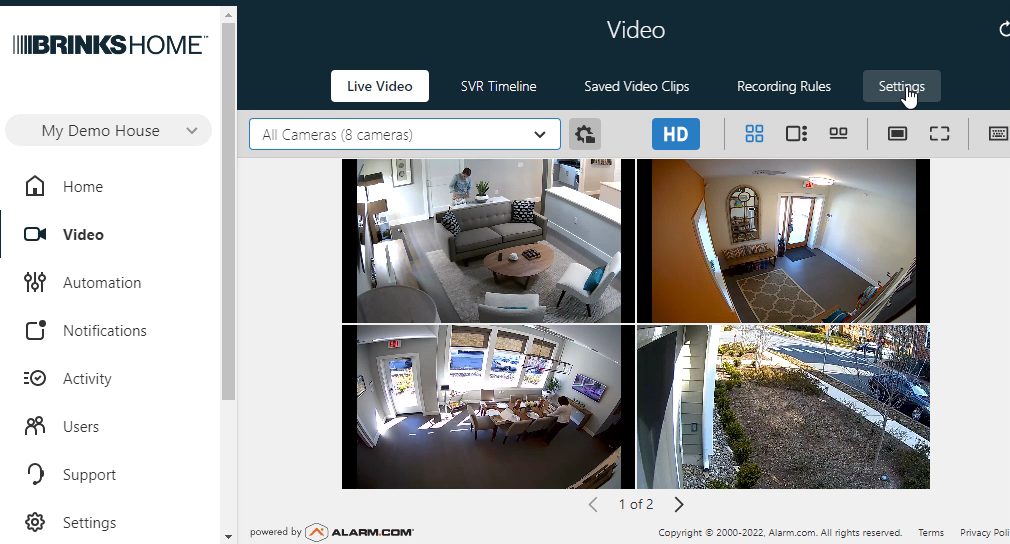
Add Camera via Desktop Website (Brinks Home™ App Website)
-
Log in to the Brinks Home App on a desktop browser.
-
Navigate to the Video section from the main menu.
-
Go to Settings (often a gear icon ⚙️ or a menu item within the Video section).
-
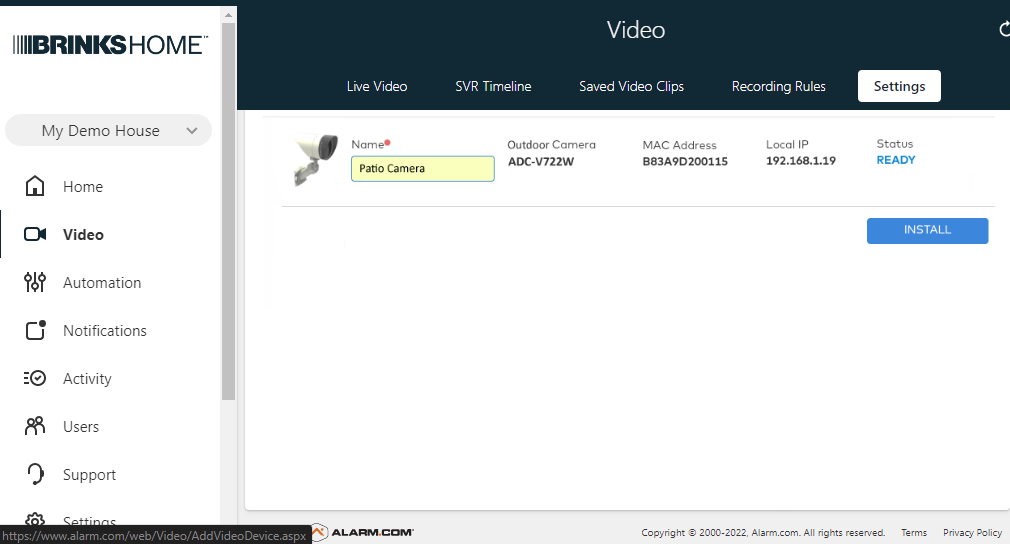
Scroll to the bottom of the Video Settings page (if necessary) and select Add Video Device.

-
The system will search for new cameras on your network. Your ADC-V520 should appear in the list if it's properly connected. Select it.
-
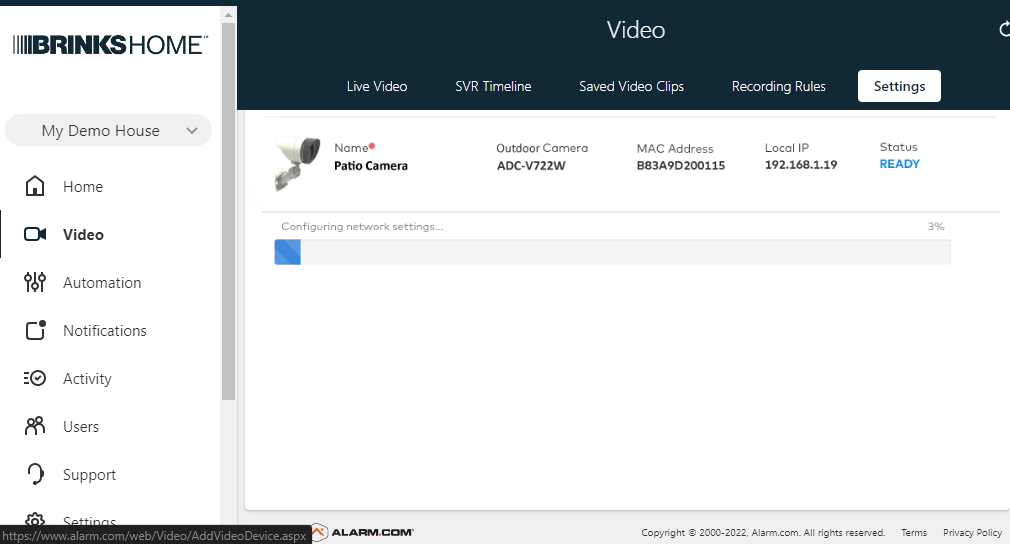
You will be prompted to enter a name for your camera (e.g., "Living Room Camera"). Type in your desired name, then select Install or Next.
-
Wait for a few minutes while the camera configures with your Alarm.com account.
-
Once the configuration is complete, you can select Live View to confirm the camera feed is accessible and working.
Add Camera via Brinks Home™ Mobile App
-
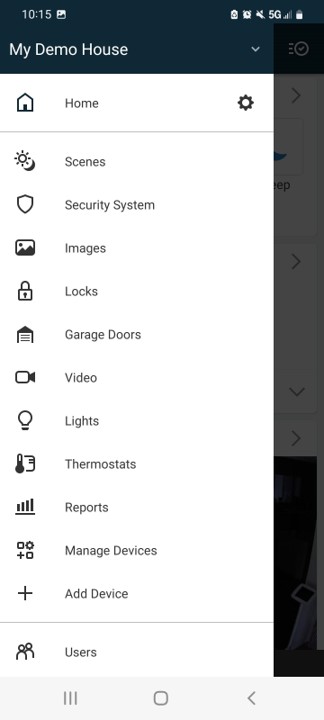
Log in to the Brinks Home™ Mobile App on your smartphone or tablet. From the main screen or side menu, tap on the Video section.
-
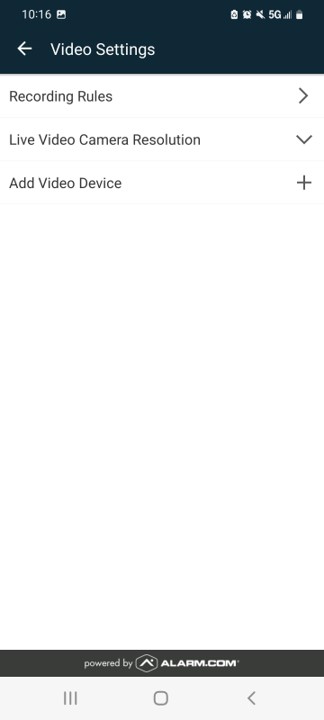
In the Video section, tap the Settings icon (usually a gear ⚙️) located in the upper right-hand corner of the screen.

-
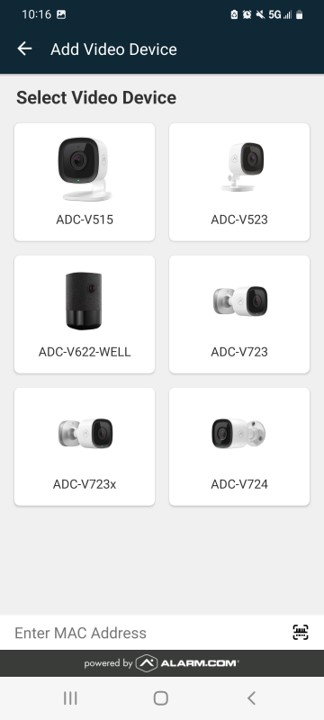
Select Add Video Device from the settings menu. The app will then prompt you to select your camera type. Choose the ADC-V520 or a similar compatible indoor camera option if listed.
-
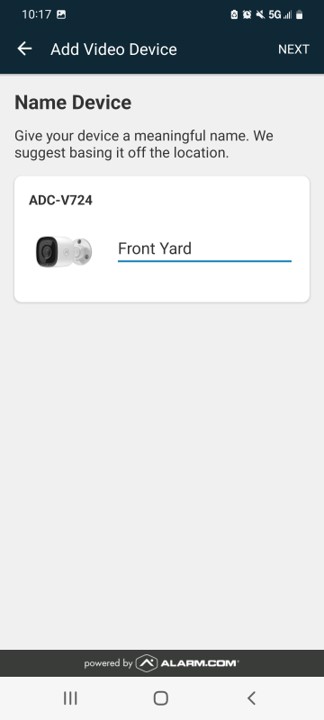
The app will begin searching for new cameras on your local network. Your ADC-V520 should be detected automatically. If prompted, enter a name for your camera (e.g., "Office Camera"), then select Next or Install.
-
Allow a few moments for the app to configure the camera with your Alarm.com account. Follow any on-screen prompts, which may include verifying the camera's LED status is solid green.

-
Once the configuration is complete and the camera has been successfully added to your account, you should be able to select Live View to access the camera's video feed through the app.
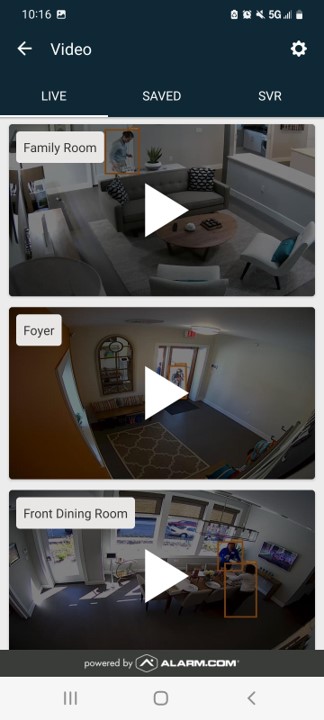
Accessing the Video Section in the Mobile App
Checking Wi-Fi Signal Strength
If your ADC-V520 is connected via Wi-Fi, a good signal is crucial for reliable video. Here's how to check it. (This step is less critical if you are using a hardwired Ethernet connection).
You can typically check your camera's Wi-Fi signal strength through the Brinks Home™ App or website:
- Log in to your Brinks Home™ App or the Alarm.com website.
- Navigate to the Video section.
- Go to Settings (gear icon ⚙️).
- Select your ADC-V520 camera from the list of Video Devices or under Video Device Info.
- Look for a Signal Strength indicator. This is often displayed as a percentage or a qualitative description (e.g., Good, Fair, Poor).
Use this table to understand what the signal strength values generally mean for Wi-Fi connected cameras:
For best Wi-Fi performance with your ADC-V520, aim for a signal strength of 60% or higher.
LED Reference Guide
Understand what the different LED light patterns on your ADC-V520 camera mean and what actions to take.
Troubleshooting Common Issues
Address common problems you might encounter with your ADC-V520 camera.
Camera Not Connecting to Network (Wi-Fi or Ethernet)
- Check Power: Ensure the camera's AC power adapter is securely plugged into both the camera and a working electrical outlet. Verify the outlet has power. The LED should not be Off (see LED Reference Guide).
- For Ethernet Connection:
- Confirm the Ethernet cable is undamaged and securely plugged into both the camera and your router/switch.
- Check for link/activity lights on the router/switch port where the camera is connected.
- Try a different Ethernet cable or a different port on your router/switch.
- For Wi-Fi Connection (WPS):
- Ensure you are pressing the WPS button on the camera for the correct duration (about five seconds until LED flashes blue).
- Activate WPS on your router within the two-minute window after starting WPS on the camera.
- Make sure the camera is within a reasonable range of the router for Wi-Fi signal.
- Router and Internet Service: Confirm your router is powered on and your internet service is active (check if other devices on your network can access the internet).
- Reboot Equipment: Perform a sequential reboot: first, your modem (if separate), then your router. Wait for each to fully come back online. Then, power cycle your camera by unplugging its power adapter for 30 seconds and plugging it back in. Allow several minutes for it to attempt reconnection.
- Consult LED Status: Observe the camera's LED light and compare it to the LED Reference Guide for more specific diagnostic clues (e.g., a Solid Red LED often indicates a persistent network connection problem).
Camera Offline in App/Website After Initial Setup
- Verify the camera's LED is solid green, indicating it has established a good network and internet connection. If not, troubleshoot the network connection first.
- If using Wi-Fi, the signal might be weak or unstable at the camera's location. Try moving the camera closer to the Wi-Fi router for testing, or consider using a Wi-Fi extender. You can check the reported Wi-Fi signal strength in your Alarm.com app/website settings for the camera.
- Power cycle the camera (unplug power, wait 30 seconds, plug back in). Allow it a few minutes to come back online.
- If the issue persists frequently, you may need to remove the camera from your Alarm.com account and then re-add it. If other steps fail, a Factory Default Reset of the camera might be necessary before re-adding.
Poor Video Quality (Pixelated, Lagging, or Discolored)
- Check Network Connection Stability:
- If using Wi-Fi, a weak or fluctuating signal is a common cause. Refer to the Checking Wi-Fi Signal Strength section and aim to improve it if it's low.
- If using Ethernet, ensure the cable is in good condition and securely connected.
- Internet Upload Speed: Insufficient internet upload speed from your service provider can significantly impact the quality of video streamed from your camera to the cloud. Check your internet plan's upload speed (HD video often requires at least 1-2 Mbps upload bandwidth per camera, though the V520 is not full HD, it still requires stable upload).
- Network Congestion: If many devices are using your home network simultaneously for high-bandwidth activities (e.g., multiple video streams, online gaming, large file downloads), this can reduce the available bandwidth for your camera and affect video quality.
- Clean Camera Lens: Gently wipe the camera lens with a clean, soft microfiber cloth to remove any dust, smudges, or fingerprints that could be causing blurriness or image artifacts.
- Lighting Conditions: The ADC-V520 does not have built-in night vision. In low light, the video quality will naturally degrade or become very dark. Ensure adequate ambient lighting for the best possible image. Strong backlighting (e.g., camera pointing towards a bright window) can also affect image quality for cameras without advanced HDR.
Factory Default Reset
Learn how to reset your ADC-V520 camera to its original factory settings. This is an advanced troubleshooting step.
Warning: Resetting the camera erases all its current settings, including any Wi-Fi configurations. After a factory reset, the camera must be removed from your Alarm.com account (if previously added) and then re-added as if it were a new device. You must contact us after reset: 469-513-8685.
Perform a factory reset if you are experiencing persistent issues that other troubleshooting steps haven't resolved, if you need to prepare the camera for a new setup on a different account or Wi-Fi network, or if directed by technical support.
- Ensure the camera is powered on.
- Locate the reset hole on the back of the camera. You will need a paperclip or a similar small, pointed object (do not use anything sharp that could damage the button).
- Gently insert the pin into the reset hole to press the internal reset button. Press and continue to hold the button.
- Keep the button held for approximately sixty seconds.
- Release the button. The camera's LED should eventually flash red (or cycle through a pattern) indicating the reset process has begun or completed.
- The camera will then reboot with its factory default settings. This process may take a few minutes. After rebooting, it will be ready for network setup (typically indicated by a specific LED pattern, see LED Reference Guide).
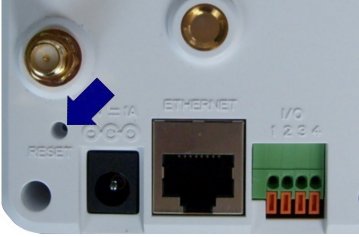
Reset Button Location
Optional Accessories
Consider these accessories if needed for your ADC-V520 camera setup.
- Ethernet Cable: If you choose to use the hardwired connection for greater stability, you will need a standard Ethernet cable (Cat5e or Cat6 recommended) of the appropriate length if one was not included with your camera.
- Power Extension Cable: If the included power adapter cable is not long enough to reach your desired camera location from a suitable electrical outlet, you might be able to find a compatible DC power extension cable. Ensure it matches the camera's voltage requirements and connector type to avoid damage or malfunction.
- Wi-Fi Extender or Mesh System: If you are connecting the camera via Wi-Fi and its intended location has a weak or unreliable signal from your main router, using a Wi-Fi extender (also known as a repeater) or upgrading your home network to a mesh Wi-Fi system can help improve connectivity.
- Mounting Hardware: While the ADC-V520 typically comes with a stand, alternative or more robust mounting brackets might be available from third parties if you require a specific wall or ceiling placement.
Further Assistance
How to get more help with your ADC-V520 Indoor Camera.
If you have followed the steps in this guide and are still experiencing issues with setting up or using your ADC-V520 camera, or if you have questions not covered here, our support team is ready to help. You can text a Support Representative anytime at 469-513-8685. Please be ready to describe the problem, the LED status of your camera, and any troubleshooting steps you have already attempted.