ADC-700X Outdoor Camera Guide
Summary: The Alarm.com ADC-V700X Outdoor Bullet Camera is a discontinued, Ethernet-only, day/night IP camera that still works with your Brinks Home account. This guide covers specs, factory reset, wiring & PoE setup, adding to your Brinks Home account (desktop & mobile), common terms, optional accessories, troubleshooting, LED status reference, and further assistance.
Table of Contents
- Common Terms
- Specifications
- Features
- Factory Default
- Wiring & PoE Setup
- Add via Desktop App
- Add via Brinks Home App
- Optional Accessories
- Troubleshooting
- LED Reference Guide
- Further Assistance
Common Terms
- Transformer (Power Brick)
- The low-voltage power supply that plugs into your wiring to power devices.
- Wi-Fi Extender (Range Booster)
- A device that amplifies and extends your wireless network’s coverage.
- AP Mode (Access Point Mode)
- A router setting that lets your device act as a Wi-Fi hotspot for other devices.
- WPS (Wi-Fi Protected Setup)
- A quick way to connect devices to your Wi-Fi network without entering a password.
- VMD (Video Motion Detection)
- A camera feature that triggers recording or alerts when motion is detected.
- Perimeter Guard (Perimeter Detection)
- An Alarm.com rule that monitors predefined zones for motion or entry.
- PoE (Power over Ethernet)
- Supplies both power and network data over a single Ethernet cable.
- IR (Infrared)
- Infrared LEDs that enable night vision in zero-light conditions.
- IP66 (Ingress Protection Rating)
- Weatherproof rating: dust-tight and protected against powerful water jets.
- FOV (Field of View)
- The camera’s horizontal and vertical viewing angles.
Specifications
- Video resolution: 640 × 480 pixels (VGA)
- Night-vision range: up to 40 ft (0 lux IR)
- Field of view: 56° H × 42° V
- Connectivity: Ethernet only (no Wi-Fi)
- Power: PoE (802.3af) or included AC adapter
- Operating temperature: –4 °F to 122 °F; up to 90% humidity
Features
- Weatherproof housing (IP66)
- Day/night IR with auto IR-cut filter
- Adjustable video motion detection zones
- Offsite cloud storage—no local DVR needed
- Remote live view & playback via your Brinks Home account
- Event-triggered recording with compatible panels
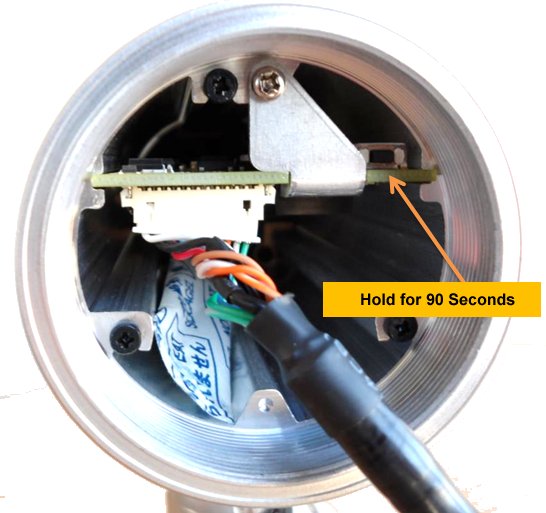
Factory Default
- Remove the wiring cover and rubber insert, then unscrew and remove the rear housing.
- Press and hold the reset button for 90 s until the LED flashes rapidly red.
- Reassemble the housing and wait for the camera to reboot.
Disclaimer: After factory reset, please contact us to update your Brinks Home account with the camera’s new settings. You can text 469-513-8685 or call 469-391-4024.
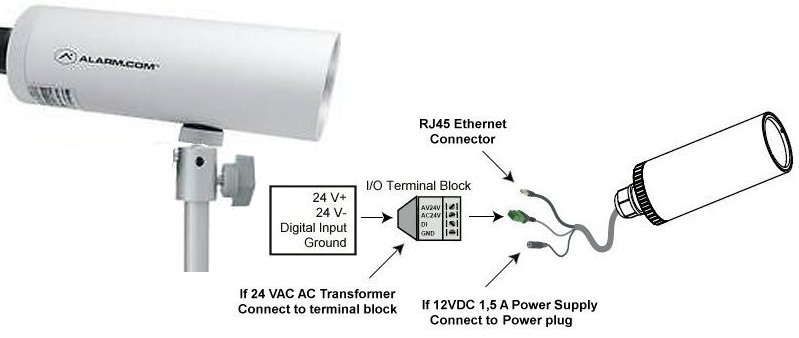
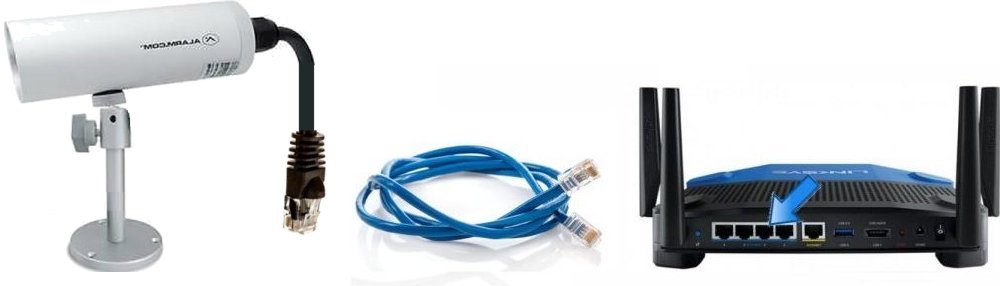
Wiring & PoE Setup
- Connect an Ethernet cable from the camera’s RJ45 port to your router or network switch.
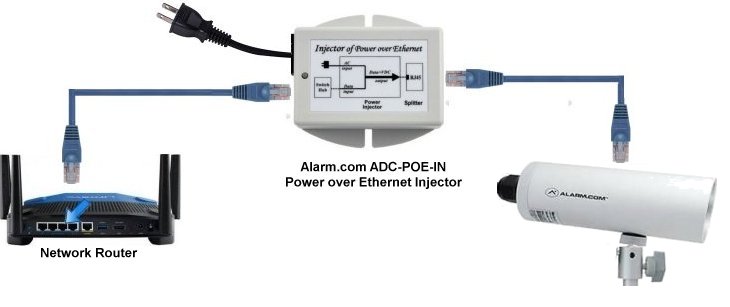
- For PoE, plug the camera cable into the PoE injector’s LAN port, then connect the injector to your switch:
- Alternatively, use the included AC adapter if PoE isn’t available.
Add via Desktop App
Note: Ensure the camera is powered and network-connected.
- Open a web browser and go to alarm.com.
- Log in with your Brinks Home credentials.
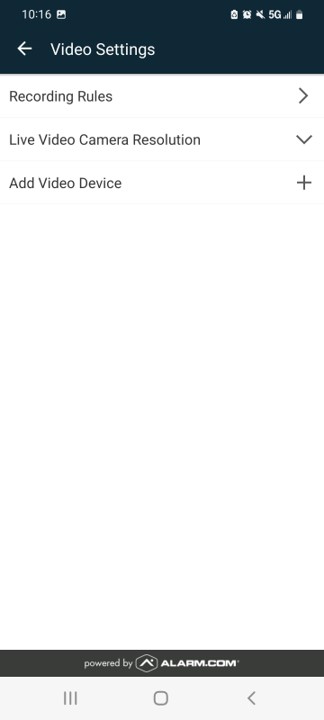
- Click Video in the top navigation.
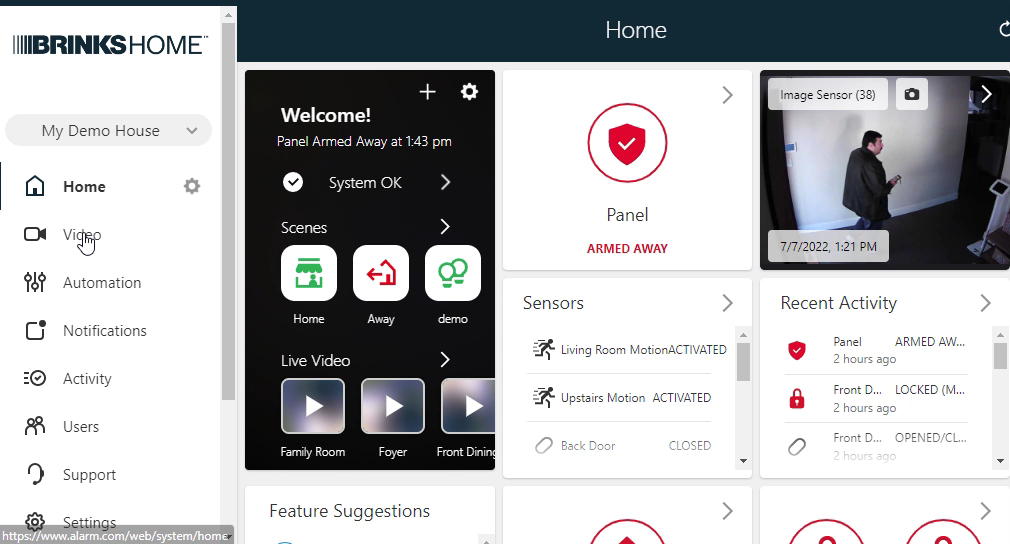
- Click Settings.
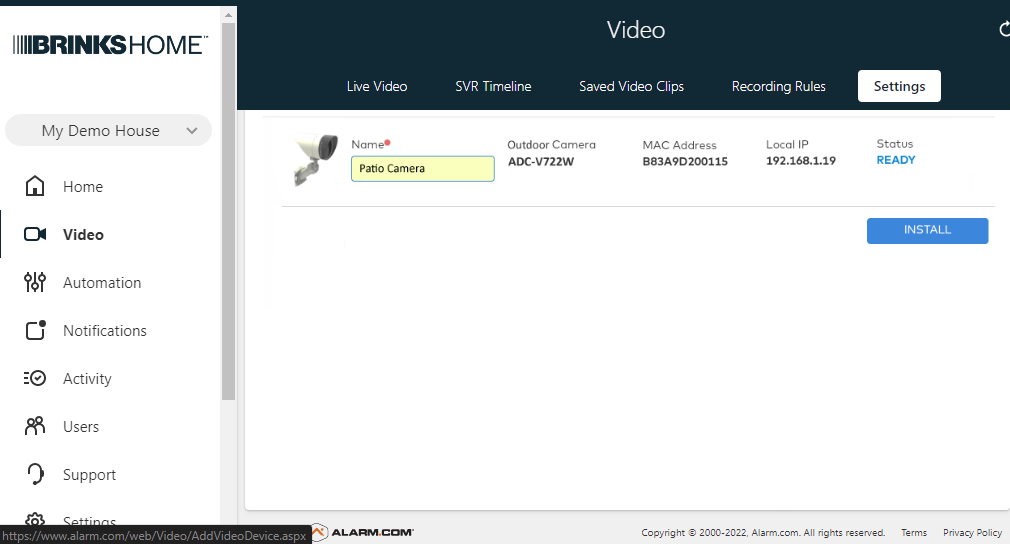
- Scroll down and click Add Video Device.

- Select ADC-V700X, enter a name, then click Install.
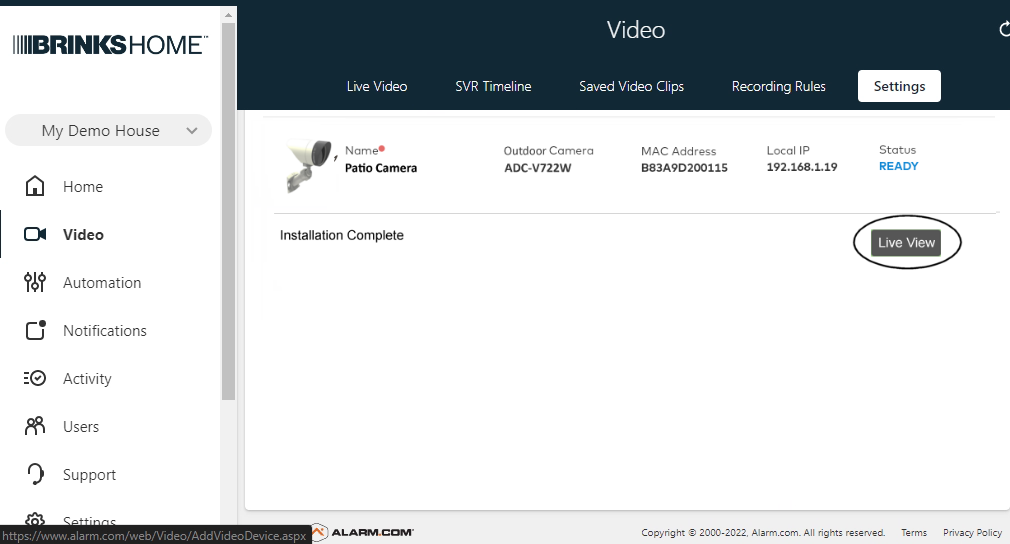
- Wait for setup to finish, then click Live View to confirm.
Add via Brinks Home App
Note: Camera must be online first.
- Open the Brinks Home App on your smartphone.
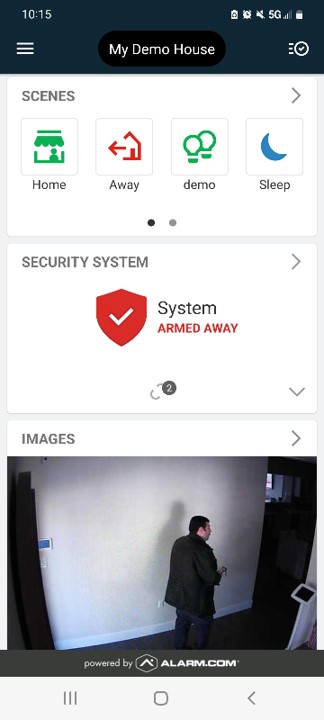
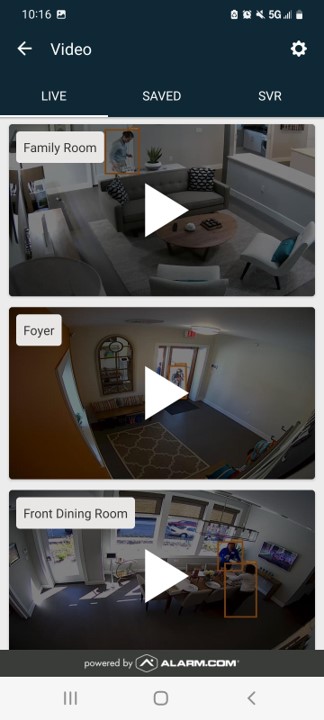
- Tap the bottom-bar icon labeled Video.
- Tap the ⚙️ gear icon in the top-right corner.
- Select ADC-V700X, enter a name, then tap Next.
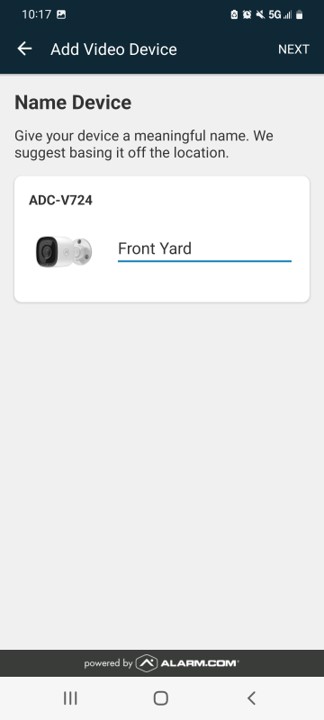
- Wait for configuration to finish, then tap Live View.
Optional Accessories
- ADC-VPE: 9′ DC power extension cable
- ADC-POE-INJ: PoE injector
- Waterproof RJ45 connector kit
Troubleshooting
- Is the camera offline in your Brinks Home app?
- Yes:
- Check that the Ethernet cable is securely plugged in.
- Verify PoE injector or AC adapter is powered.
- Reboot your router or switch.
- No: Continue below.
- Yes:
- Is there no live view image?
- Confirm the camera lens is unobstructed.
- Ensure the camera has fully rebooted after power-cycle.
- Check your Brinks Home app settings for any disabled video streams.
- Are recordings not appearing?
- Make sure your panel or plan supports event-triggered recording.
- Verify VMD zones are properly configured in your Alarm.com rules.
LED Reference Guide
| LED Pattern | Meaning | Action |
|---|---|---|
| Off | No power or link |
|
| Solid green | Ethernet link established |
|
| Blinking green | Network activity |
|
| Solid red | IR LEDs active (night vision) |
|
| Rapid red flash | Factory reset in progress |
|
Further Assistance
If you need additional help, please contact us at 469-513-8685. We’re here to help!