ADC-V610PT Indoor Pan Tilt Camera Guide
Summary: The ADC-V610PT Pan/Tilt Camera is discontinued but can still be added and viewed on your Brinks Home™ account. This guide covers common terms, signal strength (only for Wi-Fi users), specs, factory reset, hardwired setup, adding via desktop & mobile apps, troubleshooting, and LED reference.
Table of Contents
- Common Terms
- Signal Strength Guidance
- Specifications
- Factory Default
- Hardwire Connection
- Add via Desktop App
- Add via Brinks Home App
- Troubleshooting
- LED Reference Guide
Common Terms
- FOV (Field of View)
- The horizontal and vertical viewing angles (43.6° H × 33.4° V).
- Pan/Tilt Range
- The mechanical movement range (90° H × 57° V).
- PoE (Power over Ethernet)
- Supplies power and network data over one Ethernet cable.
- WPS (Wi-Fi Protected Setup)
- One-touch method to join a Wi-Fi network.
- AP Mode (Access Point Mode)
- Camera creates its own Wi-Fi network for manual setup.
Signal Strength Guidance
Applies only if you’re using the camera’s Wi-Fi—Ethernet/PoE users can skip this section.
Navigation Steps
- Open the Brinks Home™ App and tap Video.
- Tap the ⚙️ Settings icon in the top-right.
- Select your ADC-V610PT camera.
- Scroll to view the Signal Strength percentage.
Signal Level Table
| Signal Range | Status | Action |
|---|---|---|
| 80–100% | Excellent | No action needed. |
| 60–79% | Good | Monitor; slight repositioning may help. |
| 40–59% | Fair | Move camera closer to router or remove obstructions. |
| 0–39% | Poor | Reposition camera, add extender, or contact us. |
Specifications
- 640 × 480 pixel video resolution
- 43.6° horizontal × 33.4° vertical FOV
- 90° horizontal × 57° vertical pan/tilt
- Wi-Fi 802.11 b/g
- Ethernet connection
- Operating temperature: 32 °F to 104 °F

Factory Default
Warning! Erases everything; you must re-add to your Brinks Home account and reconfigure Wi-Fi.
- Insert a pin into the reset hole and hold for 60 s until the front LED flashes red.


Disclaimer: After reset, contact us to re-add: text 469-513-8685 or call 469-391-4024.
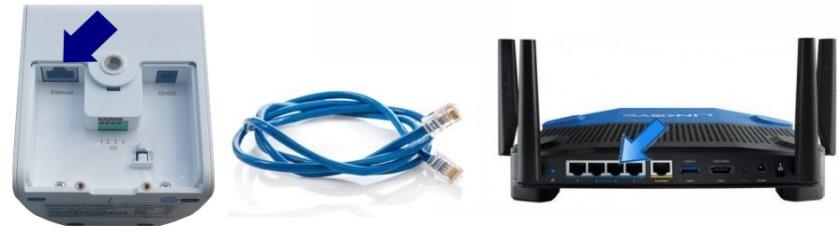
Hardwire Connection to Router
Note: Required to configure Wi-Fi and add to your account.
- Plug an Ethernet cable into the camera’s LAN port and into your network router.

Add Camera via Desktop App
Note: Ensure camera is online.
- Log in to your Brinks Home account at alarm.com → tap Video.
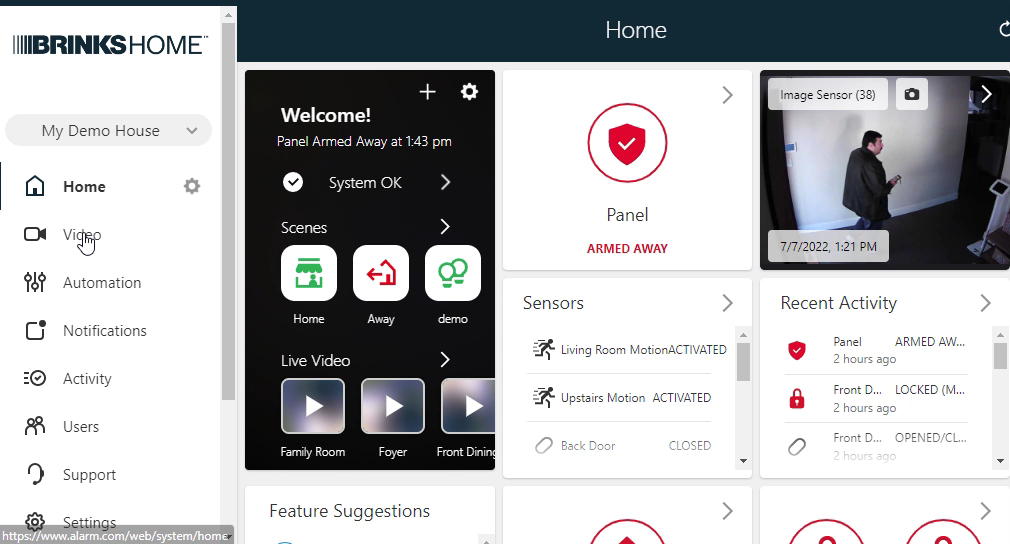
- Select Settings → scroll down → Add Video Device.

- Choose ADC-V610PT, enter a name → click Install.
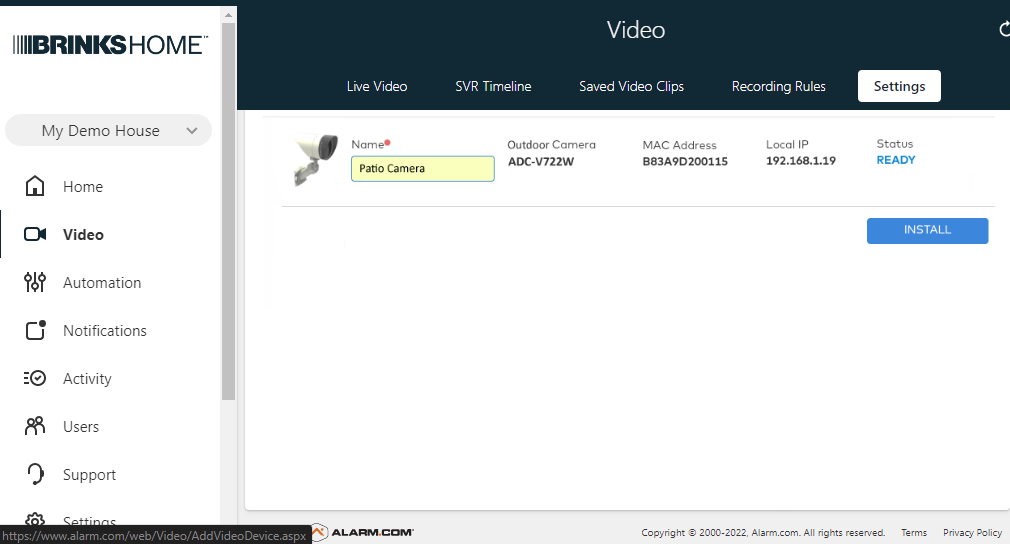
- Wait a few minutes → click Live View to verify.


Add Camera via Brinks Home App
Note: Ensure camera is online.
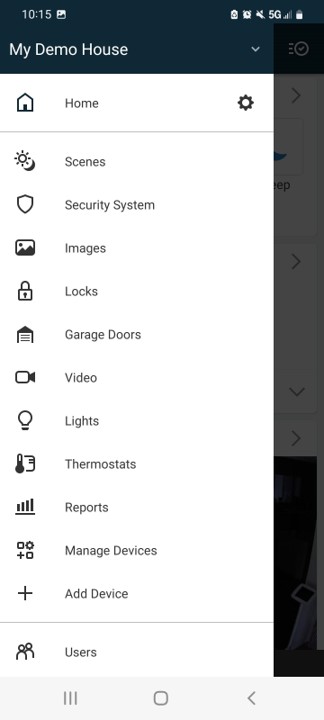
- Open the Brinks Home App → tap Video (menu in top-left).
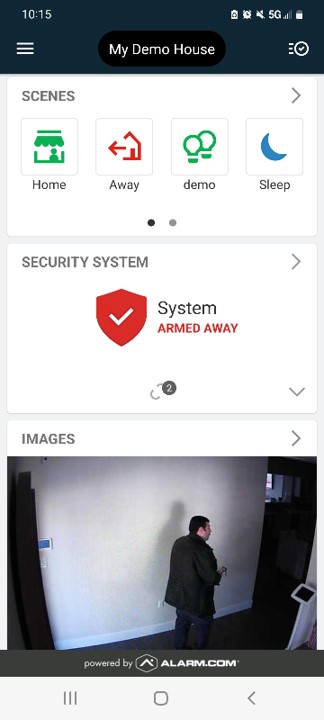
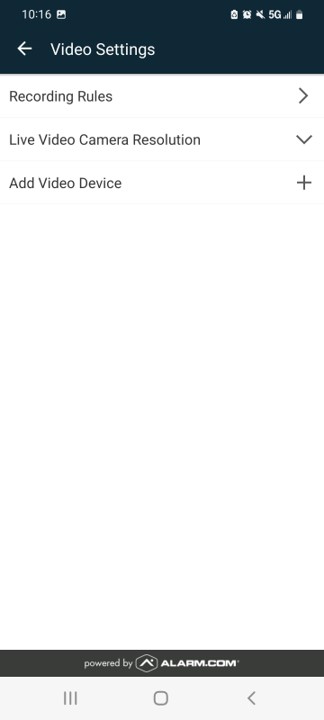
- Tap ⚙️ Settings → Add Video Device.
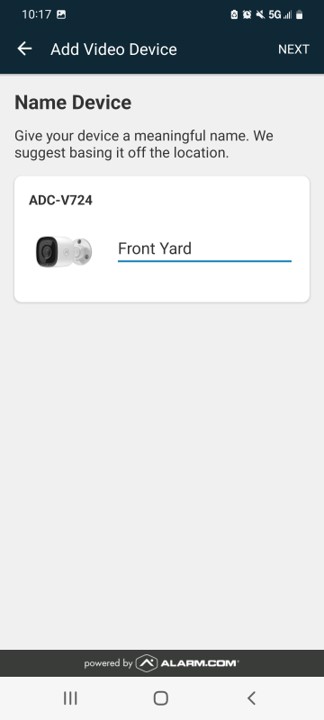
- Select ADC-V610PT, enter a name → tap Next.
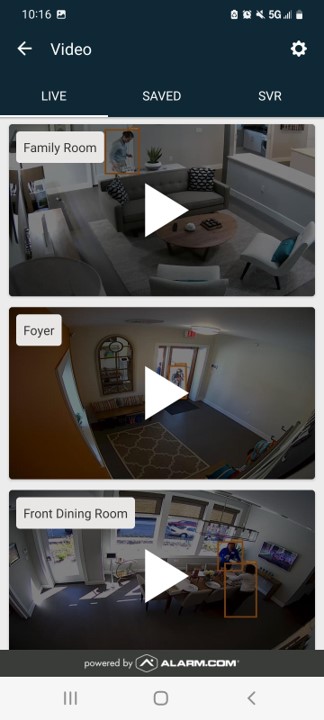
- Wait a few minutes → tap Live View to verify.


Troubleshooting
Power & Connectivity
- No LED:
- Check PoE injector/adapter power.
- Reseat Ethernet cable.
- No network:
- Verify router port & restart router.
- For Wi-Fi, move camera within 10–20 ft of router.
App Issues
- Not detected:
- Confirm camera is online & on same network.
- Refresh the Video > Settings list.
- Poor video:
- Lower resolution/frame rate in the app.
- Switch to wired if interference persists.
LED Reference Guide
| LED Pattern | Meaning | Action |
|---|---|---|
| Solid green | Connected | No action needed. |
| Solid red | Wi-Fi/Ethernet error | Check network & cables. |
| Flashing red | Factory reset/upgrade | Wait for process to finish. |