ADC-V521IR Indoor Camera Guide
Summary: The ADC-V521IR indoor camera delivers 1080p HD video, two-way audio, and infrared night vision. Though discontinued, it can still be installed and viewed in your Brinks Home™ account. This guide covers specifications, setup options (Wi-Fi and Ethernet), adding the camera in the Brinks Home™ App, signal strength guidance, optional accessories, LED patterns, and step-by-step troubleshooting.
Table of Contents
- Common Terms
- Specifications
- Factory Default
- Wi-Fi Setup (WPS Mode)
- Wi-Fi Setup (Access Point Mode)
- Signal Strength Guidance
- Hardwired Ethernet Setup
- Add via Desktop App
- Add via Brinks Home™ App
- Optional Accessories
- Troubleshooting
- LED Reference Guide
- Further Assistance
Common Terms
- Transformer (Power Brick)
- The low-voltage power supply that plugs into your wiring to power the camera.
- Wi-Fi Extender (Range Booster)
- Expands your wireless signal’s reach to improve connectivity.
- AP Mode (Access Point Mode)
- Allows you to connect directly to the camera’s Wi-Fi network for manual setup.
- WPS (Wi-Fi Protected Setup)
- A quick setup method using the WPS button on your router and camera—no password required.
- VMD (Video Motion Detection)
- Triggers recording or alerts when the camera senses motion.
- Perimeter Guard (Perimeter Detection)
- A smart rule that monitors defined areas for movement or intrusion.
Specifications
- 1920 × 1080p HD resolution
- 112° horizontal × 100° vertical field of view
- Up to 20 ft infrared night vision
- Two-way audio
- Wi-Fi (802.11 b/g/n) and Ethernet (10/100 Mbps)
- Operating temperature: 32 °F to 104 °F

Factory Default
Warning: Resetting your camera erases all settings. You must contact us after a reset to reconnect it to your account. Call 469-513-8685.
- Press and hold the button on the back of the camera for 15 seconds.
- Release when the front LED flashes red and green.

Wi-Fi Setup (WPS Mode)
- Plug in the camera and wait about 2 minutes until the LED is solid red.
- Hold the back button for 5 seconds until the LED flashes blue.
- Within 30 seconds, press your router’s WPS button.
- Wait up to 2 minutes. A solid green LED means success; a red LED means try again or use AP Mode.

Camera LED turns red when ready
Wi-Fi Setup (Access Point Mode)
- Hold the back button for 6 seconds until the LED flashes white.
- On your device, join the Wi-Fi network named Alarm xx:xx:xx.
- Open a browser to 192.168.1.1.
- Tap Scan, select your network, enter your password, then tap Submit.
- Wait for the LED to turn solid green.
Signal Strength Guidance
- Open the Brinks Home™ App.
- Tap the Video icon.
- Tap ⚙️ in the top-right corner.
- Select your camera.
- Scroll to Signal Strength percentage.
Hardwired Ethernet Setup
- Connect the LAN port on the camera to your router using an Ethernet cable.
- Power on the camera and wait for the LED to turn solid green.

Add via Desktop App
- Go to Brinks Home™ login and sign in.
- Click Video, then the Settings gear icon.
- Click Add Video Device and select ADC-V521IR.
- Name your camera and click Install.
- After installation, click Live View to verify your feed.
Add via Brinks Home™ App
- Open the Brinks Home™ App and tap the Video icon.
- Tap the Settings gear icon, then tap Add Video Device.
- Select ADC-V521IR and name the camera.
- Tap Next and wait for setup to complete.
- Tap Live View to confirm the video feed.
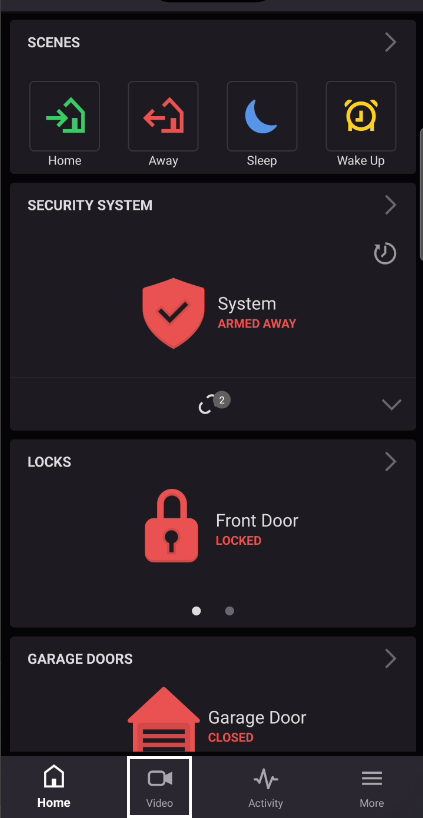
Mobile App: Video Section
Optional Accessories
- PoE Adapter Kit (power and data over one cable)
- Wall Mounting Bracket (flexible installation angles)
- Ethernet Extension Cable (for longer runs)
- USB Power Adapter (spare power brick)
Troubleshooting
- Camera not powering on:
- Ensure the power adapter is securely plugged in.
- Test the outlet with another device.
- Try a different power adapter if needed.
- Solid Red LED (No network):
- If wired, reseat the Ethernet cable and use another router port.
- If wireless, repeat WPS or AP Mode setup.
- Flashing Green LED (Local network only):
- Reboot your internet router.
- Power cycle the camera (unplug 10 seconds, then plug back in).
- Poor image quality:
- Clean the lens with a soft, lint-free cloth.
- Avoid pointing at bright lights or reflective surfaces.
- In the Brinks Home™ App, adjust resolution or brightness.
- For Wi-Fi issues, check the Signal Strength section above.
LED Reference Guide
| LED Pattern | Meaning | Action |
|---|---|---|
| Solid Green | Online |
|
| Flashing Green | Local network only |
|
| Solid Red | No network |
|
| Flashing Red | Booting or error |
|
| Flashing Blue | WPS mode active |
|
| Flashing White | AP Mode active |
|
Further Assistance
If you need additional help, please contact us at 469-513-8685.