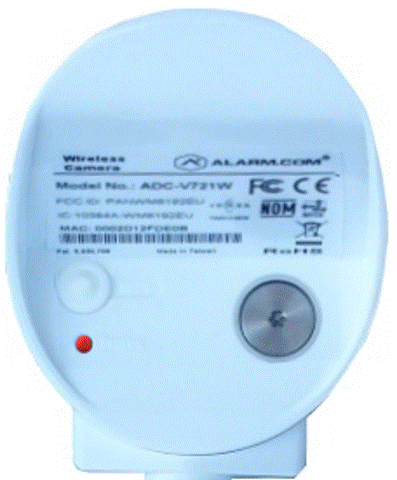
ADC-V721/V722 Outdoor Video Camera Guide
Summary: The ADC-V721 and ADC-V722 are outdoor HD 1080p cameras (1920 × 1080) with an 88° horizontal & vertical field of view, 40 ft infrared night vision, and Wi-Fi 802.11 b/g/n connectivity. Although discontinued, they remain supported on your Brinks Home™ account. This guide covers specifications, features, common terms, factory default, Wi-Fi setup (WPS & AP), signal strength, Ethernet setup, adding via desktop and mobile apps, optional accessories, expanded troubleshooting, a detailed LED status reference, further assistance, and additional resources.
Table of Contents
- Specifications
- Features
- Common Terms
- Factory Default
- Wi-Fi Setup via WPS
- Wi-Fi Setup via AP Mode
- Signal Strength
- Ethernet Setup
- Add Camera via Desktop App
- Add Camera via Mobile App
- Optional Accessories
- Troubleshooting
- LED Status Reference
- Further Assistance
- Additional Resources
Specifications
- Video Resolution: 1920 × 1080 pixels
- Field of View: 88° horizontal & vertical
- Night Vision: Infrared up to 40 ft
- Connectivity: Wi-Fi 802.11 b/g/n
- Operating Temp: –4 °F to 122 °F (–20 °C to 50 °C)
Features
- HD 1080p video streaming
- IP66 rated: waterproof & dust-tight
- Infrared night vision
- Wide Dynamic Range (WDR)
- Adjustable compression: high/medium/low
- Brinks Home™ Mobile App integration
Common Terms
- AP Mode
- The camera broadcasts its own SSID (“Alarm (xx:xx:xx)”) so you can configure your home Wi-Fi via a browser.
- WPS
- Wi-Fi Protected Setup: hold the camera’s back button to enter pairing mode, then press your router’s WPS button within 2 minutes.
- WDR
- Wide Dynamic Range—balances bright and dark areas for clearer images.
- IP66
- Ingress Protection rating: dust-tight and protected against powerful water jets.
Factory Default
Warning: Resetting erases all settings. You must re-add the camera to your account afterward.
- Press and hold the back button for 15 seconds until the LED alternates red & green.
- Release: camera reboots and enters AP mode (red/green flash).
Red & green flash → factory reset
Wi-Fi Setup via WPS Enrollment
- Press and hold the back button for 5 seconds until the LED flashes blue.
- Press your router’s WPS button (or enable WPS in router settings).
- Within 2 minutes, the LED turns:
- Solid green if pairing succeeds.
- Solid red if pairing fails.

Blue flash → WPS mode
Wi-Fi Setup via Access Point
- Hold the back button for 6 seconds until the LED flashes white.
- On your smartphone, open Wi-Fi settings and connect to Alarm (xx:xx:xx).
- Open a browser to 192.168.1.1 and select language if prompted.
- Click Scan for Wi-Fi Networks, choose your home SSID, then enter its password under Security key.
- Click Save, then OK. LED turns:
- Solid green if setup succeeds.
- Solid red if setup fails.

White flash → AP mode
Signal Strength
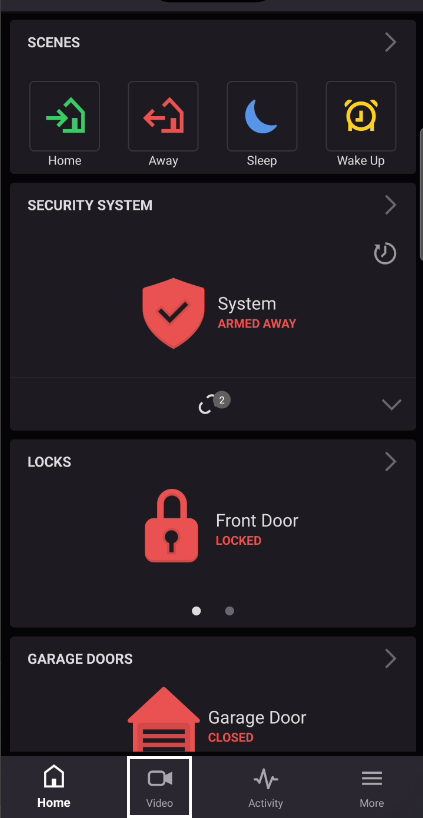
- Open the Brinks Home™ Mobile App.
- Tap Video.
- Tap the Settings gear icon.
- Select your ADC-V721/722 camera.
- View the Signal Strength percentage.
Ethernet Setup
Connect the camera’s LAN port to your router using an Ethernet cable, then power on the camera. It will automatically configure network settings.
Add Camera via Brinks Home™ Desktop App
Prerequisite: Camera must be on your network.
- Log in at Alarm.com and click Video.
- Click the gear Settings icon.
- Scroll down and click Add Video Device.
- Select ADC-V721/722, name it, then click Install.
- Wait a few minutes, then click Live View.
Add Camera via Brinks Home™ Mobile App
Prerequisite: Camera must be on your network.
- Open the Brinks Home™ Mobile App.
- Tap Video at the bottom.
- Tap the gear Settings icon.
- Select Add Device.
- Choose ADC-V721/722 or scan the QR code/enter serial.
- Name the camera and follow prompts.
- Tap Live to confirm feed.
Mobile App: Video Section
Optional Accessories
- Wi-Fi Extender
- SD Card Module
- Weatherproof Housing
- Surge Protector
Troubleshooting
No Video Feed
- Confirm power: test outlet and adapter continuity.
- Inspect wiring: tighten screws under transformer terminals.
- Power-cycle camera: unplug 30 s, replug, wait for reboot.
- Check signal: if <65%, move router closer or add extender.
Poor Video Quality
- Test upload speed—aim ≥2 Mbps.
- Set compression to “High” in Video → Settings.
- Clean lens; avoid direct sunlight glare.
Wi-Fi Setup Failures
- Re-enter SSID/password exactly.
- Use AP Mode: follow AP steps above.
- Use WPS Mode: follow WPS steps above.
- Factory reset and retry.
App Doesn’t Show Camera
- Log out/in of Brinks Home™ App.
- Verify under Video → Settings → Video Device.
- Add again via Desktop Portal if needed.
LED Status Reference
Further Assistance
Need help? Contact us.
For complete details, refer to the ADC-V722W Outdoor Camera Manual (PDF).