How to Program a Door/Window Sensor to the IQ Panel 2
Summary
Learn how to program sensors on your IQ Panel 2 with a clear video walkthrough, step-by-step instructions, and detailed explanations of each menu option so you can easily add and configure your security sensors.
Table of Contents
Video Instructions
Watch this video to learn how to program sensors on your IQ Panel 2. It shows each tap and menu step clearly.
Step-by-Step Instructions
Follow each step slowly. If your screen doesn’t match, stop and double-check you’re in the right menu.
-
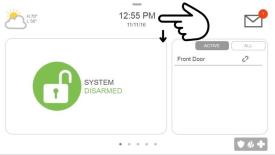
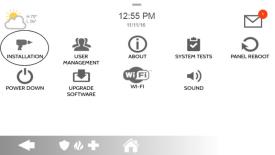
Open Advanced Settings:
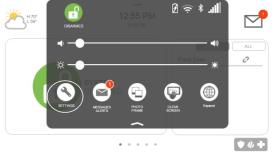
Swipe down from the top of the clock screen to reveal the gear icon.
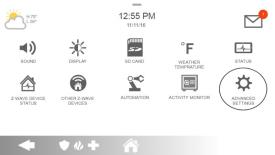
Tap Settings, then tap Advanced Settings.
-
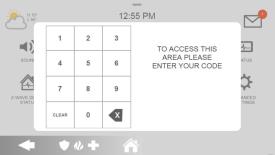
Enter Installer Code:
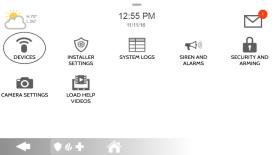
On the keypad, enter 1111 (default) or 2222 (dealer).
Tap Installation, then tap Devices.
-
Access Auto Learn Sensors:
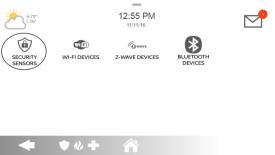
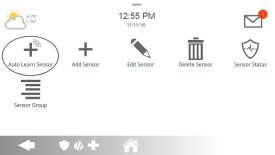
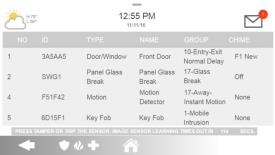
Tap Security Sensors, then tap Auto Learn Sensors. The panel will listen for a sensor signal.
-
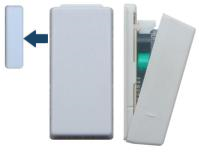
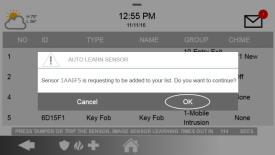
Learn Your Sensor:
Trigger the sensor (open and close the door/window). The panel will beep and display sensor details.
Tap Ok to save.
-
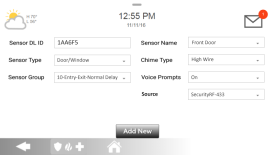
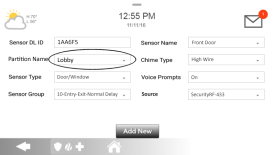
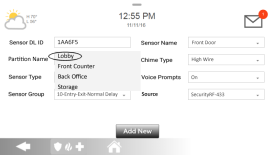
Assign a Partition (if used):
If your system has multiple areas, tap Partition Name and select the correct one.
-
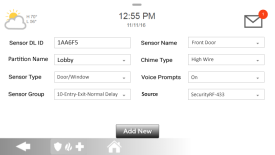
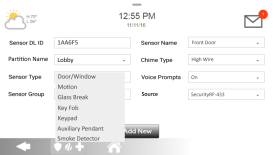
Select Sensor Type:
Tap Sensor Type and choose the matching type (e.g., Door/Window).
-
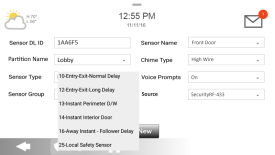
Choose Sensor Group:
Tap Sensor Group, then pick 10 for entry-delay or 13 for instant alarm.

-
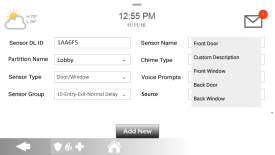
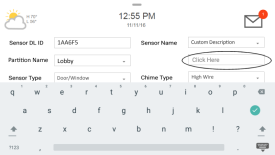
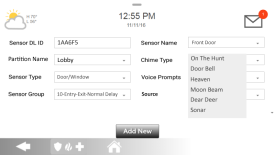
Name Your Sensor:
Tap Sensor Name, choose a preset label or tap Custom Description and type your own.
-
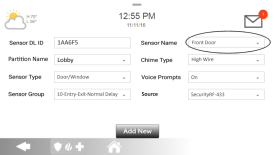
Select Chime Type:
Tap Chime Type, then choose the sound you prefer.

-
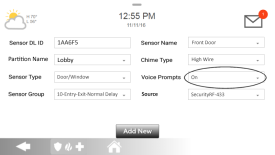
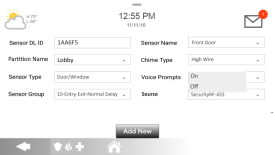
Set Voice Prompts:
Tap Voice Prompts, choose On for spoken guidance or Off to silence, then tap Add New.

-
Return to Home:
Press the Home Button (house icon) to return to the main screen.
To test, place the magnet next to the sensor marker, then pull it away—you should hear two chimes.


Sensor Information
This section explains each menu choice so you know what it does:
- Sensor DL ID: An internal code for the panel. Do not change.
- Sensor Type: Defines the device type (usually Door/Window).
- Sensor Name: The label you’ll see when this sensor triggers (e.g., “Front Door”).
- Chime Type: The sound the panel makes when the sensor is activated.
- Sensor Group: Choose 10 for a delay or 13 for instant alarm.
- Voice Prompts: Spoken alerts—set On for guidance, Off to mute.
Need help mounting or placing your sensors? Click here.