GC3/GC3e Panel Guide
Specifications
- • Touchscreen: 7" capacitive LED
- • Security: supports up to 100 wireless zones
- • Communications: built-in dual-band Wi-Fi 802.11
- • Operating temperature: 32˚F to 104˚F
- • Battery requirements: lithium-polymer backup battery 823990 10-000014-001 (3800mAh/3.7V) rated for 24 hrs

Features
- • 5-day weather forecast
- • Photo slideshow display when idle
- • Integrated Z-Wave Plus radio supports lights, locks, thermostats, and more
- • Backward compatible with all 2GIG legacy sensors
- • Intuitive user interface
User Functions
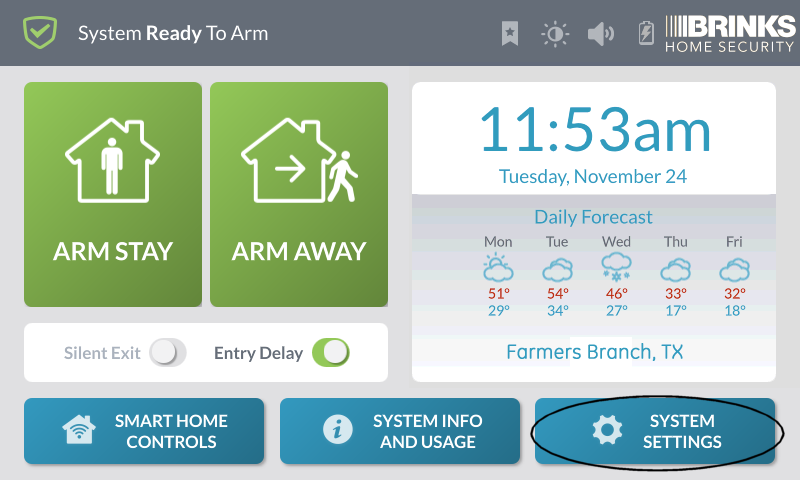
Arm Away: arm away is used when you plan on arming the system and leaving the home. This should activate all exterior and interior sensors.
- Press Arm Away on your panel.
- A countdown timer will begin until the system is armed. This is an entry/exit delay allowing you time to exit the home.


Arm Stay: arm stay is used when you plan on arming the system staying home. This will typically arm exterior sensors while bypassing interior sensors.
- From a disarmed state, press Arm Stay on your panel.
- A countdown timer will begin until the system is armed.


Instant Arm: removes entry delay from entry/exit doors.
- Press Entry Delay to toggle the switch left, then press Arm Away or Arm Stay.
- Countdown timer displays during exit delay.


Disarm System: this will disarm your system, and it will silence and reset any active alarm.
- Upon entry onto your property, if the system is Armed Away, simply enter your user code to disarm the system.
- If your system is Armed Stay, first press Disarm, then enter your user code to disarm the system.


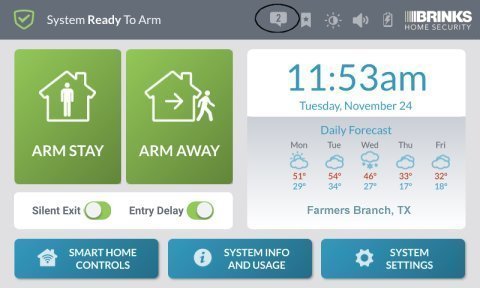
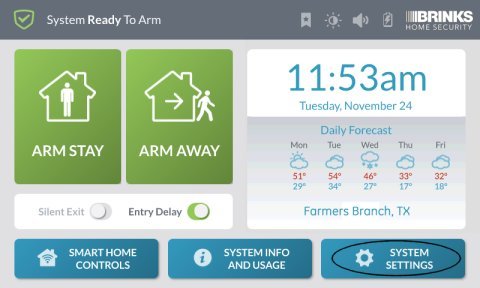
Check Your System Status: checking your system's status will display which sensors are currently open or if any of your sensors are experiencing a trouble condition, such as a low battery.
- The top of your GC3 home screen will display a message that says either System Ready to Arm or System Not Ready to Arm depending on whether any of your sensors are still open.
- Any open sensors will be listed underneath this message.

Check Sensor Status: review a list of sensors connected to your system to ensure all are communicating and trouble free.
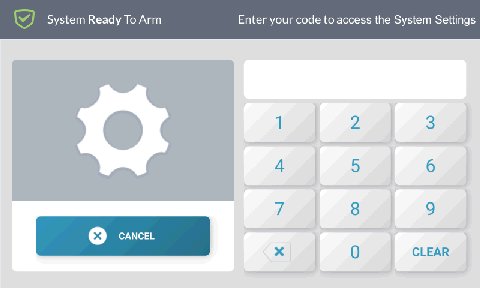
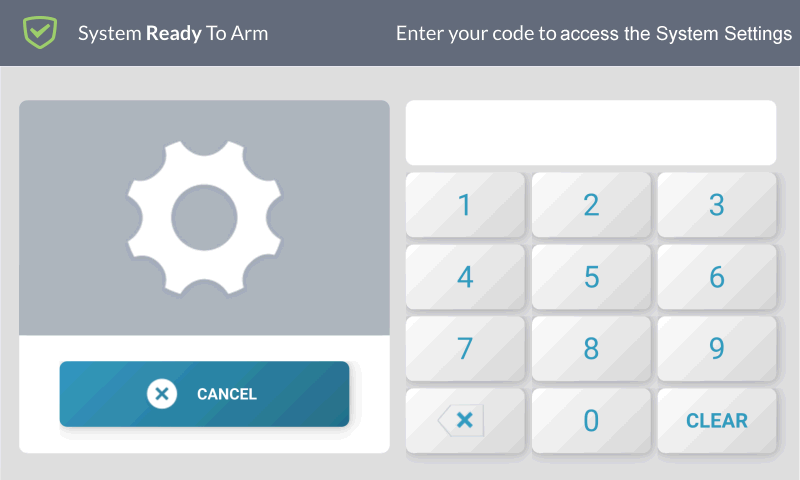
- Press System Settings, then enter your master code.
- Press System Tests, then press Sensor Test.
- Activate all sensors. You will know this is done correctly, as the GC3 panel will beep when each sensor is activated.
- When finished, press the left arrow twice or press Home to exit.


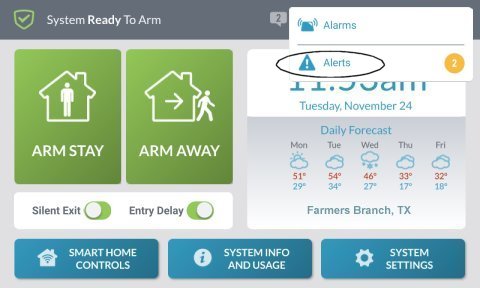
Silence and Reset Trouble Alerts
- Press the Message icon at top, then press Alerts.
- Press the back arrow or the Home button to exit.
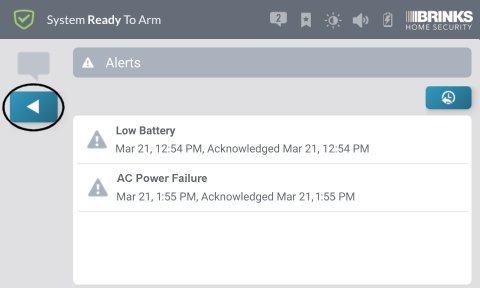

Note that alerts will return if the condition has not been corrected with the sensor itself, unless you have opted to bypass the sensor entirely, such as when you are waiting for a replacement.
If you need further assistance, you can text a Support Representative any time at 469.513.8685.
Change Your Master Code:
- Press System Settings, then enter your master code.
- Press Users, press Edit (the pencil icon) to the right of Master User.
- Press Edit (the pencil icon) to the right of Code, enter your new master code, then press Next.
- Re-enter your new master code again to confirm, press Next, then press Back (the left arrow icon) to exit.
- Press Back (the left arrow icon) again or press Home to exit.


Delete a User Code:
- Press System Settings, then enter your master code.
- Press Users, then press Delete (the trash can icon) next to the user you want to delete.
- Press Delete to confirm, then press Back (the left arrow icon) or press Home to exit.


Bypass Sensors: allows you to arm your system while omitting specific sensors.
How to Bypass a Sensors from Open Sensors List:
- Open your door or window, then press Bypass All.
- Enter your user code, then bypass appears as a numbered circle over the arming buttons.
- Press Arm Stay or Arm Away to arm your system with the selected sensor bypassed.


How to Bypass a Specific Sensor:
- Press System Settings, then enter your master code.
- Press Bypass Sensors, then toggle the switch right next to the sensor you want to bypass.
- Press Back (the left arrow icon) or press Home to exit.
- Press Arm Stay or Arm Away to arm.


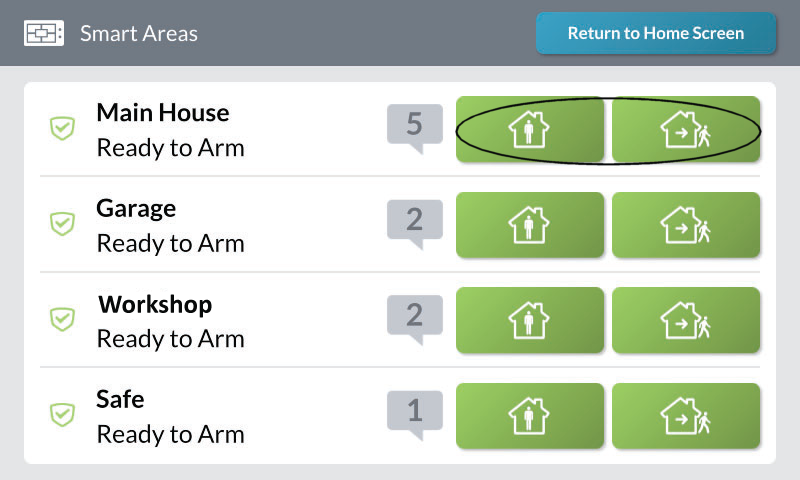
Using Partitions: select systems can be enabled to arm or disarm areas without affecting other areas.
To Arm a Partition:
- Press Smart Areas, then enter your master code.
- Press Arm Stay or Arm Away by the partition you want to arm.


To Disarm a Partition:
- Press Smart Areas, then enter your master code. Note: you may also use a specifically authorized user code.
- Press Disarm by the partition you want to disarm.


Panic Buttons:
- Press Panic (+) on the right side of the panel.
- Hold either Police, Fire, or Medical for two seconds to activate that panic alert.


Change Display Settings:
- Press System Settings, then enter your master code.
- Press Screen, then move Screen Brightness and Dim Brightness sliders to adjust.
- Press Screen Timeout, then set the length of time after no activity before the screen goes blank.
- Press Back (the left arrow icon) or press Home to exit.


Change Chime Volume:
- Press System Settings, then enter your master code.
- Press Sounds, then move sliders to adjust volume.
- Press Back (the left arrow icon) or press Home to exit.
- Press System Settings, then enter your master code.
- Press Date/Time, then move the Set Date sliders up or down to set the current date.
- Move the Set Time sliders up or down to set the time, then tap Check to save. Press Home to exit.
- To remove alert press Delete, then press Yes, Delete This Message.
- Press Back (the left arrow icon) or press Home to exit.
- Press System Settings, then enter your master code.
- Press Sounds, then adjust the slider bars to your preferred volume. Press Back (the left arrow icon) or press Home to exit.


Set Time And Date:


Severe Weather Alerts: severe weather alerts are issued by the National Weather Service as an incoming message.


Volume Control and Door Chimes:
Bookmarks: bookmarks navigate to an often used screen after 20 seconds of no activity.
- At any screen, hold Bookmark (the bookmark icon), then press Ok.
- A star will appear on the bookmark icon.
- To remove the bookmark, hold Bookmark (the bookmark icon), then press Ok to confirm.


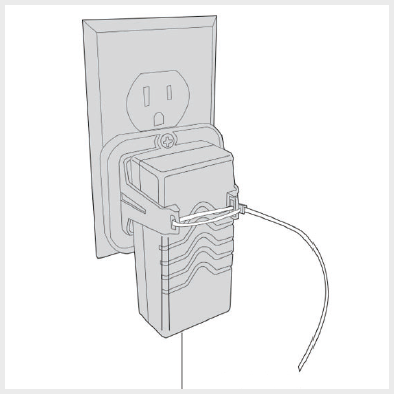
How to Power Cycle the Panel:
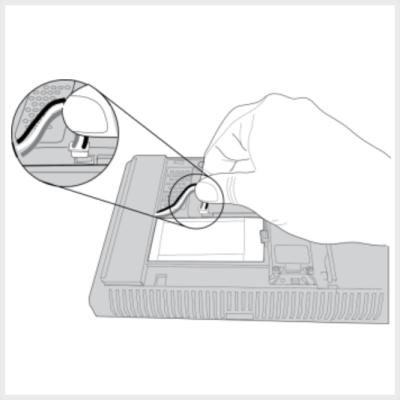
- Remove AC power from the outlet.
- Remove the panel from its mount, then disconnect battery backup power.
- Wait 2 minutes, then reconnect battery backup power.
- Return the panel to its mounted location before you return AC power. Resecure the AC power adapter with a ziptie.
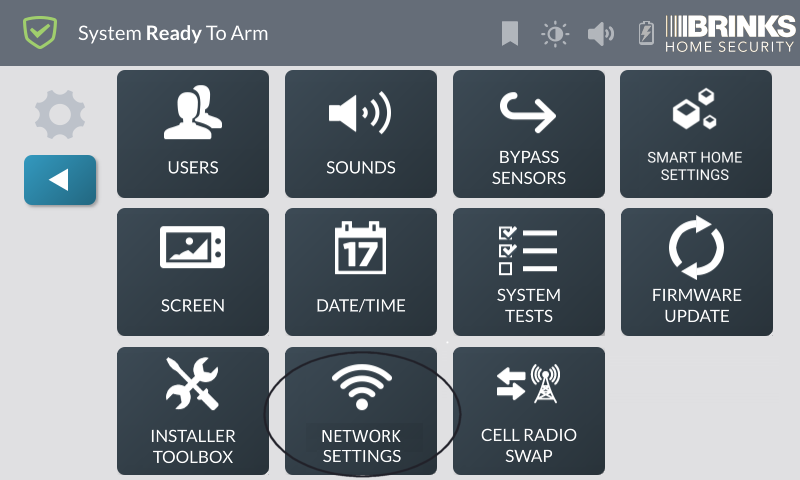
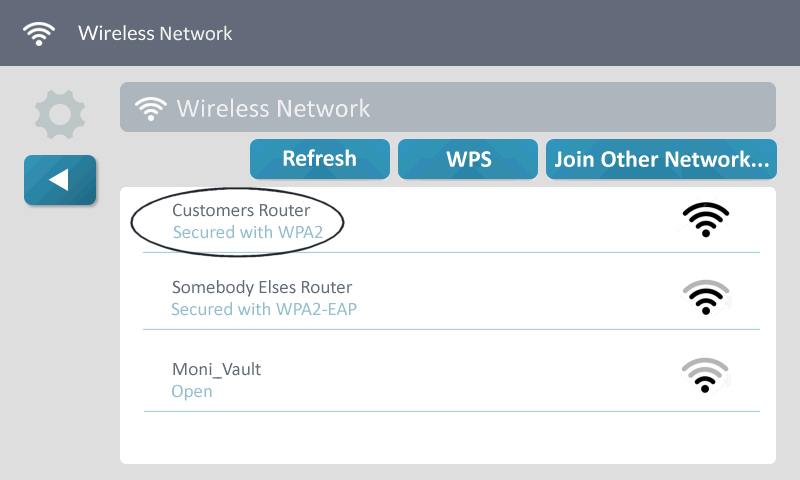
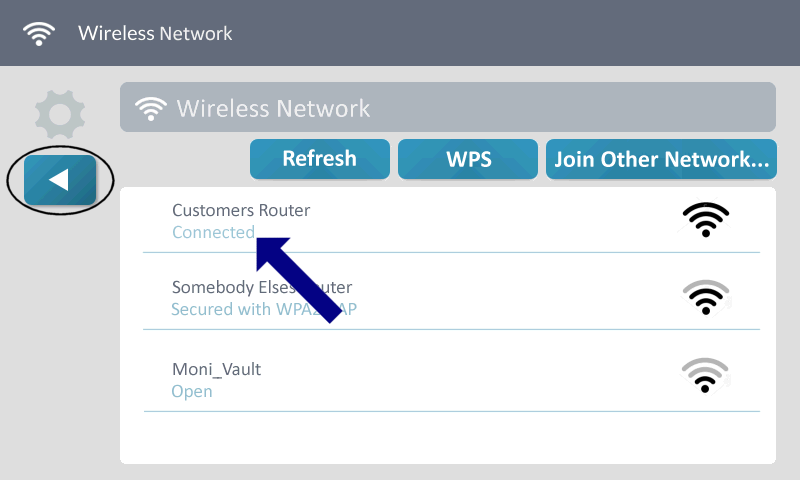
How to Reconnect Your Panel to Wi-Fi:
1. Press System Settings, then enter your master code.
2. Press Network Settings, then Wireless.
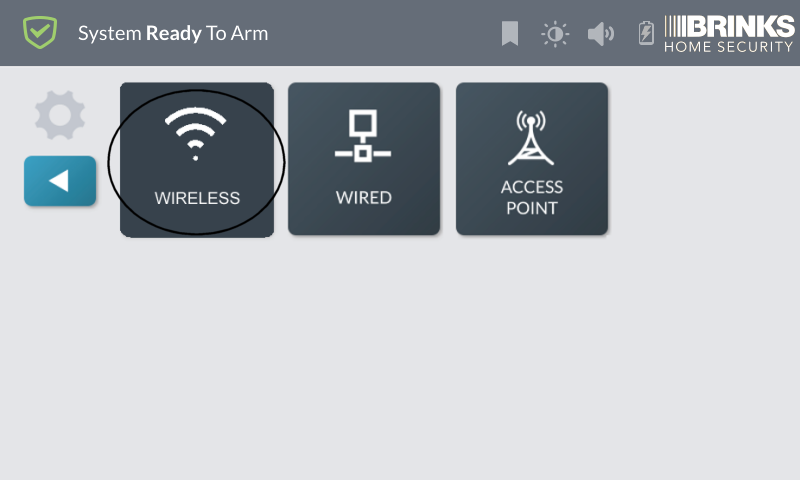
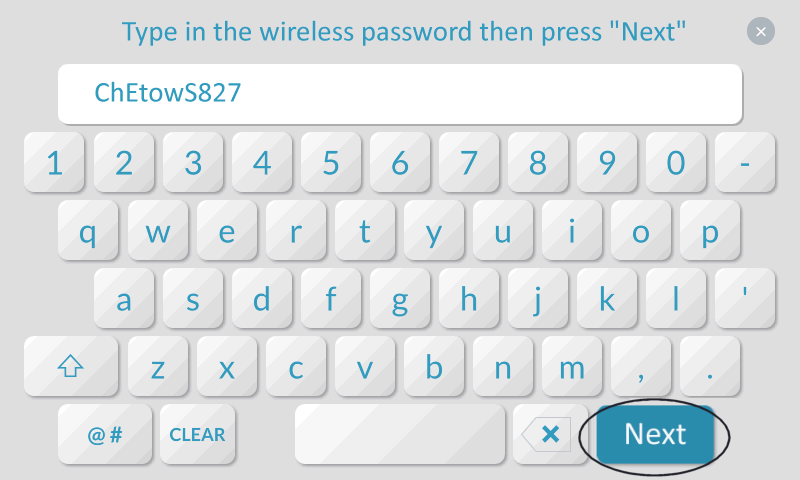
3. Select your Wi-Fi network, then enter your password. Press Next.
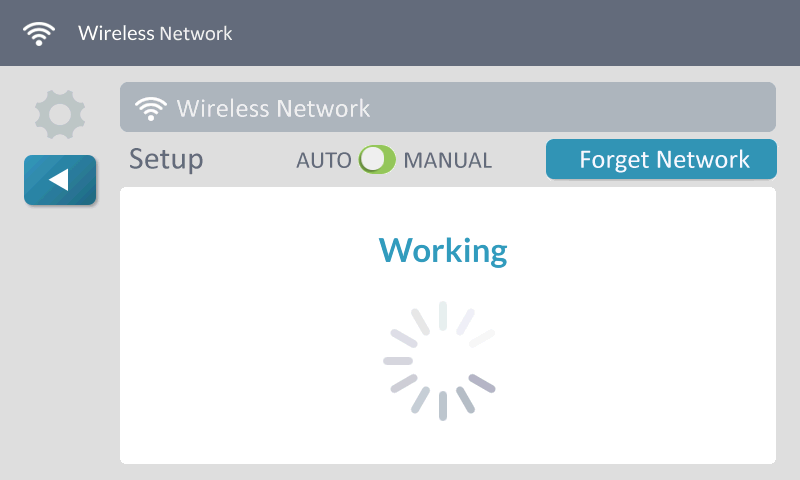
4. Once the GC3 connects to your network and displays network settings, press the back button to exit.
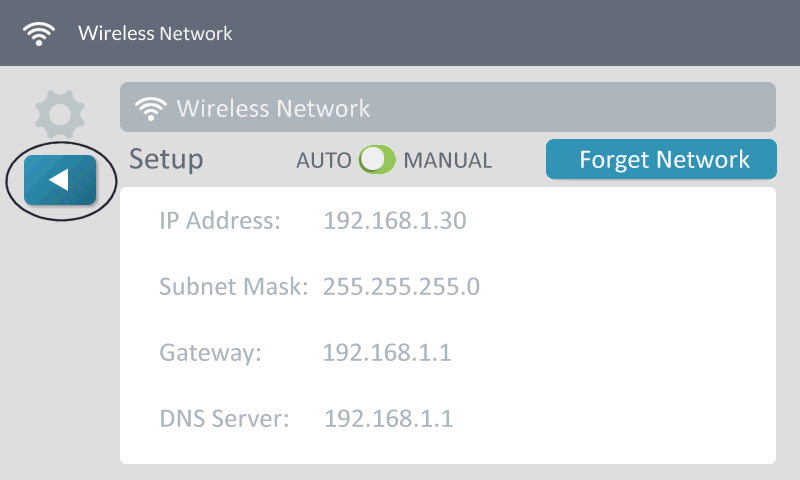
5. If successful, Connected shows on screen. Press the back button or Home to exit.

If you need further assistance, you can text a Support Representative any time at 469.513.8685.
For additional information relating to your device, click the following link to view the original manufacturer's user guide or installation manual: GC3 User Manual