2GIG-HD100 Indoor Camera Guide
Summary: The 2GIG-HD100 is a 720p indoor security camera with a 75°×75° field of view, up to 16′ infrared night vision, and both Wi-Fi & Ethernet connectivity. In this guide, you’ll find specifications, installation & mounting steps, network setup (WPS & Ethernet), Brinks Home™ App integration, advanced tips, signal strength testing, a full LED status reference, and detailed troubleshooting procedures.
Table of Contents
- Common Terms
- Specifications
- Factory Default
- Wi-Fi Setup
- Signal Strength
- Ethernet Setup
- Add via Desktop App
- Add via Mobile App
- Optional Accessories
- Troubleshooting
- LED Status Reference
- Further Assistance
Common Terms
- Transformer (Power Brick)
- The 5 V DC adapter that powers your camera.
- Wi-Fi Extender
- A device that boosts your wireless coverage when signal is weak.
- AP Mode
- The camera broadcasts its own SSID so you can configure Wi-Fi in a browser.
- WPS
- Wi-Fi Protected Setup: press the camera’s WPS button then your router’s to pair without entering a password.
- VMD (Video Motion Detection)
- The camera’s motion-trigger settings—adjust sensitivity, zones, and schedules.
- Perimeter Guard
- An alert zone feature that triggers only when motion crosses a defined boundary.
Specifications
Factory Default
Warning: Resetting erases network, name, and recording settings. You must re-add the camera afterward.
- Press and hold the B button on the back for 15 seconds.
- Release when the LED glows solid yellow; wait for it to power-cycle.

Hold “B” until yellow LED → reset
Wi-Fi Setup
WPS Mode
- Press and hold the A button for 3 seconds until the LED flashes yellow.
- Within 2 minutes, press your router’s WPS button.
- LED flashes yellow while pairing, then turns solid green when connected.
- Open Brinks Home™ App → Video → Live to confirm the feed.

Press “A” to enter WPS mode
Ethernet Setup
- Plug a CAT5e/6 cable into the camera’s RJ45 port.
- Connect to your router or non-PoE switch.
- Camera auto-obtains an IP address via DHCP.
- Link LED next to the port glows solid or blinking green.
Signal Strength
Check your Wi-Fi signal in the Brinks Home™ App:
- Open the Brinks Home™ App.
- Tap Video and select your 2GIG-HD100 camera.
- Tap the gear Settings icon.
- Scroll to Signal Strength (%) and note the value.
Add Camera via Brinks Home™ Desktop App
Prerequisite: Camera must be on your network.
- Log in at Alarm.com.
- Click Video.
- Click the gear Settings icon.
- Select Add Device.
- Scan the camera’s QR code or enter its serial number.
- Name the camera and follow the prompts.
- Go to Live View to confirm your video feed.
Add Camera via Brinks Home™ Mobile App
Prerequisite: Camera must be on your network.
- Open the Brinks Home™ Mobile App.
- Tap the Video icon at the bottom.
- Tap the gear Settings icon.
- Select Add Device.
- Scan the QR code or enter the serial number.
- Name your camera and follow prompts.
- Tap Live to ensure the feed displays.
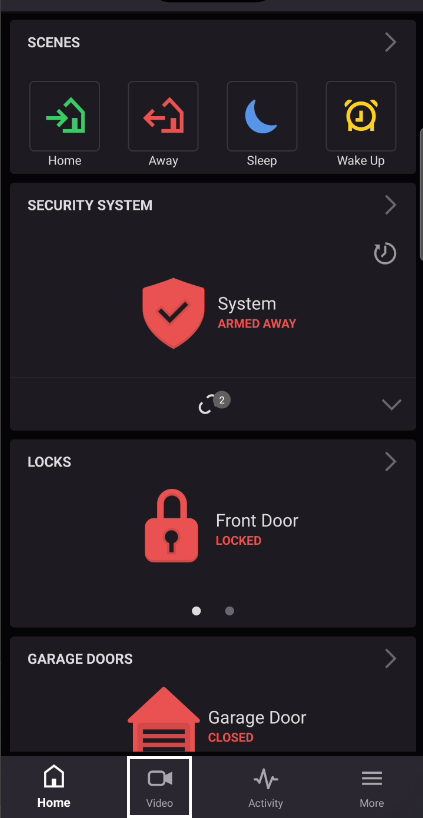
Mobile App: Video Section
Optional Accessories
- Wi-Fi Extender
- Power Extension Cable
- Tabletop Stand
- Cable Clips
Troubleshooting
No Video Feed
- Confirm the adapter is plugged into a live outlet—test with another device.
- Inspect the cable for cuts or kinks; tighten any loose connectors.
- Unplug the camera for 30 s, then plug back in and wait 1–2 minutes to boot.
Poor Video Quality
- Run a speed test near the camera; aim for ≥ 2 Mbps upload.
- In the Brinks Home™ App, go to Video → Settings → Compression and select “High.”
- Wipe the lens gently with a microfiber cloth to remove smudges.
Wi-Fi Connection Issues
- Re-enter your SSID and password exactly, including uppercase/lowercase.
- Move the camera within 15 ft of the router and retry WPS or AP Mode.
- Check for router MAC-filter or guest-network restrictions.
No Live View in App
- Log out and back into the Brinks Home™ App to refresh your session.
- Verify the camera appears under Video → Settings → Video Device.
- If missing, re-add via the Desktop App and confirm in Live View.
Intermittent Connectivity
- Ensure your router’s 2.4 GHz band is enabled—it offers better range.
- Keep the camera > 1 ft from large metal objects or electronics.
- Consider a Wi-Fi extender or switch to Ethernet for stable link.
LED Status Reference
Further Assistance
Need help? Contact us.