How to Program a Door/Window Sensor to the GC3 Panel
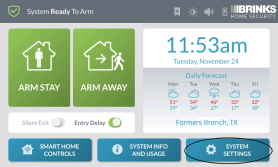
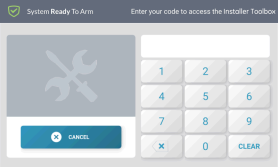
1. Press System Settings, enter the default installer code 1561, then press Installer Toolbox.

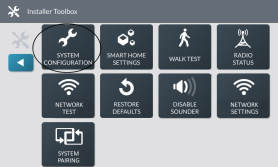
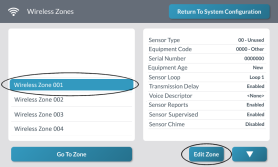
2. Press System Configuration, press Wireless Zones, select Wireless Zone 001 to 100 on the left, then press Edit Zone.

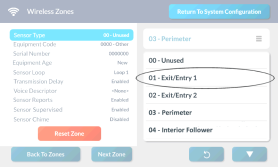
3. Press Sensor Type, then choose from the list of sensor types.
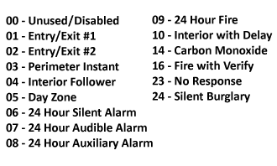
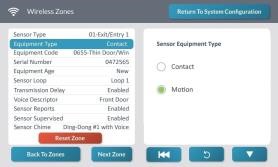
4. If sensor type 04, 06, 07, 08, 10, or 23 was selected, enter Sensor Equipment Type.
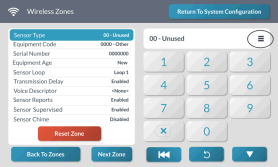
5. Press Equipment Code, then choose from list of all equipment codes.
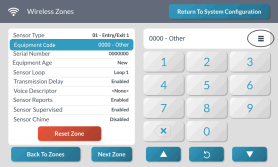

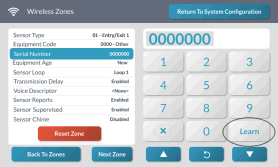
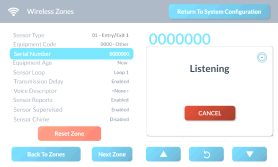
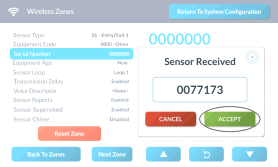
6. Press Serial Number, enter the device serial number. Alternatively, press Learn, activate the sensor, then press Accept to finish.
7. If partitions are enabled, press Smart Areas, then select which partition between 1 to 4 has access. Otherwise, skip this step.

8. Press Equipment Age, then select if the sensor is new or previously existing. This does not affect performance.

9. Press Sensor Loop, then select loop number.


10. Press Transmission Delay, then set to enabled or disabled. Enabled is ideal for entryways used to exit the home after arming.

11. Press Voice Descriptor, press Edit Voice Descriptor, enter 1st letter of word, select your descriptor up to 6 words from the list, then press Done to finish.


12. Press Sensor Reports, then select to enable or disable reports.

13. Press Sensor Supervised, then select to enable or disable. Leave on for all but panic alerts.

14. Press Sensor Chime, select from the list, then press Next Zone to add another sensor or press Return to System Configuration to exit.

