IQ Panel 4—Add Sensors
Add Sensors
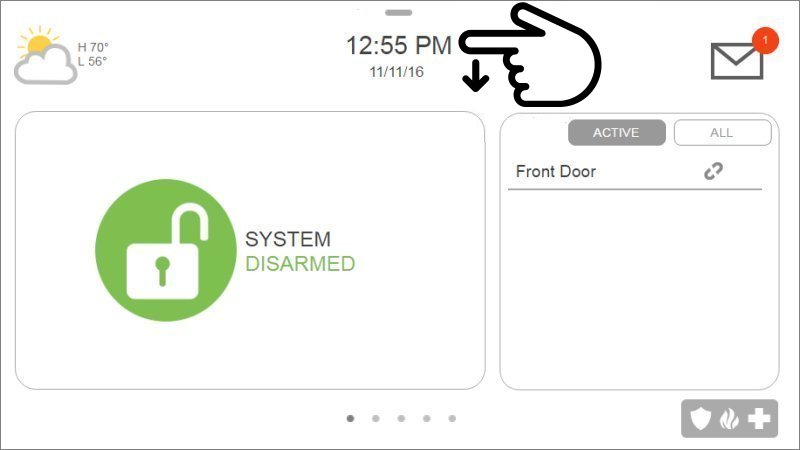
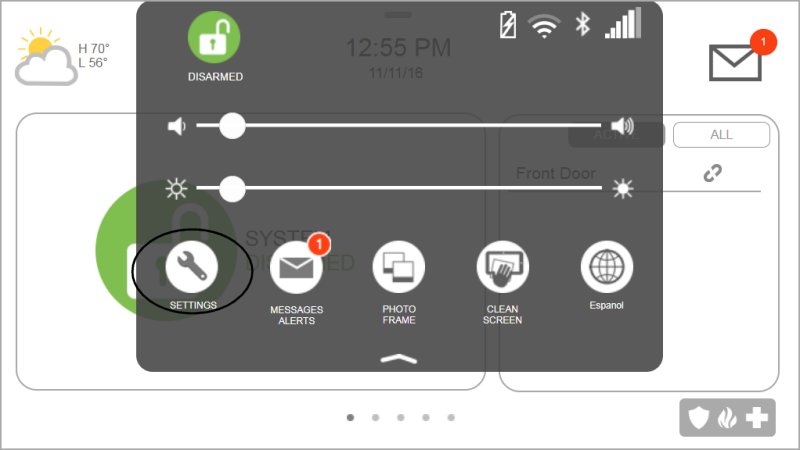
1. Swipe down from the time display to open the Settings drop-down, then press Settings.


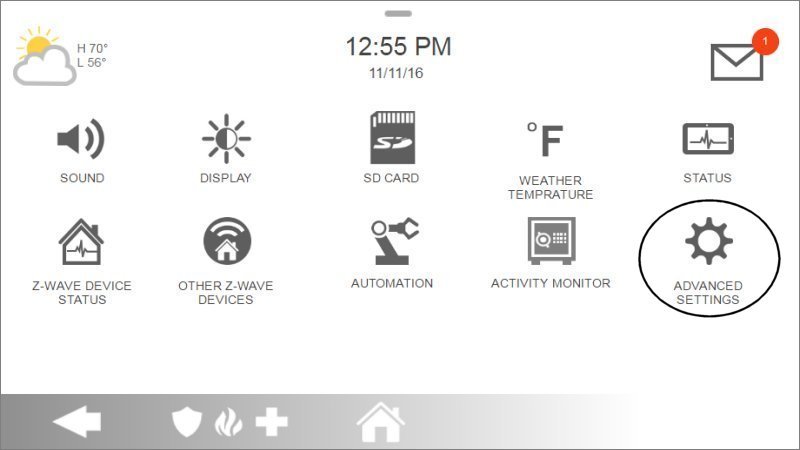
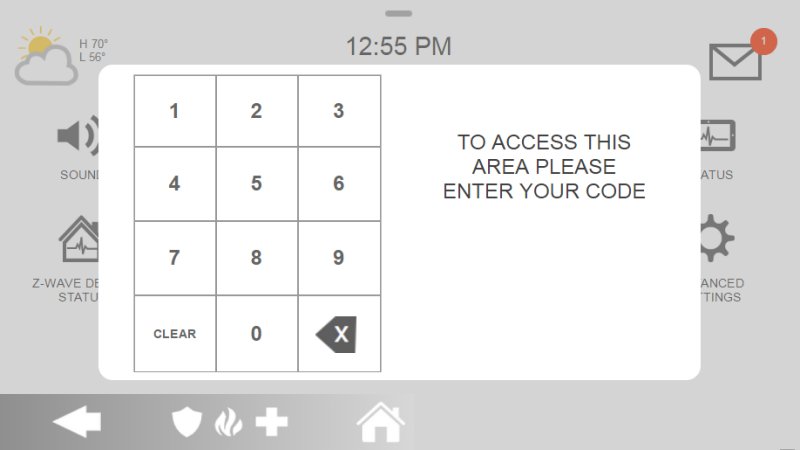
2. Press Advanced Settings, then enter your default installer code 1111 or 2222.


3. Select Installation, then Devices and Security Sensors.

4. Select Add Sensor.

5. Select the appropriate source based on the frequency of the device being manually learned.
6. Enter each of the following:
Sensor Information:
- • Sensor DL ID: don't touch this option.
- • Sensor Type: select the sensor type that best fits the device being added.
- • Sensor Name: select an appropriate name or create a custom description.
- • Chime Type: this allows you to apply a specific sound to your device when it’s used.
- • Sensor Group: choose 10 for an entry delay, 13 for no delay, or a third option if appropriate.
- • Voice Prompts this allows you turn on or off the vocal chime.
7. Click “Add New” to save the information and complete the process

Auto Learn Sensors
1. Swipe down from the time display to open the Settings drop-down, then press Settings.


2. Press Advanced Settings, then enter your default installer code 1111 or 2222.


3. Select Installation, then Devices and Security Sensors.

4. Select Auto Learn Sensor.

5. Trip the sensor to learn the device. For PowerG contacts, hold the enroll button until the yellow LED flashes.
6. Panel will chime and display the sensor's DL code. Select Ok to confirm.
7. Configure the partition name, sensor type, sensor group, sensor name, chime type, and voice prompts with the smart filtering drop-down lists.
8. Click Add New to save the information and complete the process.
