Simon XTi Panel Guide
Summary: Welcome to your Interlogix Simon XTi security panel! This guide helps you get started by covering its key specifications and features, understanding the touchscreen interface, performing basic operations like arming and disarming, checking system status, running essential tests, and basic troubleshooting including how to power cycle the panel.
Table of Contents
Navigate through the sections to learn about your Simon XTi panel.
- Common Terms
- Panel Overview: Specifications & Key Features
- Understanding Your Panel's Touchscreen Interface
- Basic Operations: Arming, Disarming, & Bypassing
- System Status, Alerts, and Chime Settings
- System Testing Procedures
- Key Panel Settings (Brief Overview)
- Using the Panic Feature
- Basic LED Status Reference
- Troubleshooting Common Issues (incl. Power Cycle)
- Further Assistance & Resources
Common Terms
Understanding these terms will help you use your Simon XTi panel.
- Simon XTi Panel
- Your Interlogix security system's main control unit, featuring a 5-inch color touchscreen.
- Sensor/Zone
- Devices that detect events (e.g., door/window opening, motion). Each is a "zone."
- Arm (All/Doors & Windows Only)
- To activate the security system. "Arm All" (Away mode) activates all sensors. "Arm Doors & Windows Only" (Stay mode) typically activates perimeter sensors, leaving interior motion sensors off.
- Entry/Exit Delay
- Programmable time periods allowing you to leave after arming (exit) or disarm after entering (entry) without an immediate alarm. "Instant" arming eliminates the entry delay.
- Disarm
- To deactivate the security system using a valid user code.
- User Code/Master Code
- Your 3 to 6-digit personal code used to operate the system. The Master Code has higher privileges.
- Installer Code
- A special code (default 4321 for Simon XTi) for advanced system programming.
- System Status
- Information about the current state of your system, including armed status, open zones, or trouble conditions.
- Trouble Beeps/Alerts
- Audible or visual notifications from the panel about system issues.
- Cellular Module
- An optional internal component for communication with Brinks Home.
- Two-Way Voice
- Allows voice communication with Brinks Home personnel via the panel during an emergency (requires compatible module/service).
- Transformer
- The external power supply providing main power to the panel.
- Backup Battery
- Internal battery (6VDC, 2100mAh, NIMH for Simon XTi) that powers the panel during AC power loss.
- Bypass Sensors
- Temporarily deactivating a sensor for one arming period.
- Chime
- An audible tone or voice announcement when a door/window is opened while the system is disarmed.
Panel Overview: Specifications & Key Features
Learn about the capabilities of your Interlogix Simon XTi panel.
Specifications
- Backup Battery: 6VDC, 2100mAh, NIMH (Part No. 600-XTI-BAT). Provides up to 24 hours of backup when fully charged.
- Touchscreen: 5-inch diagonal color LCD; 480x272 resolution.
- Sensor Capacity: Up to 80 wireless zones (two of these can be configured as hardwired zones using normally-closed loops).
- Operating Temperature: 32°F to 122°F (0°C to 49°C).
- User Codes: 1 master access code and 8 programmable user access codes (3 to 6 digits each).
Key Features
- Touchscreen Interface: All interactions occur via the 5-inch color LCD; no physical number buttons.
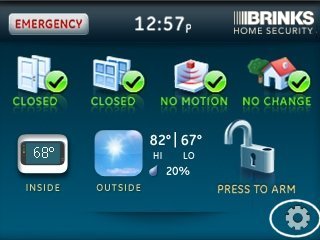
- Selectable User Interface (UI): Can match the Brinks Home™ Mobile App interface for consistency.
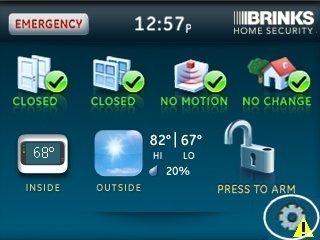
- At-a-Glance Status: Displays home and property status clearly with actionable icons (e.g., door/window open, last motion detected).
- Menu-Based Programming: System programming and tests are accessed through on-screen menus.
- Two-Way Voice: Built-in PSTN two-way voice capability; can also function over cellular with an optional compatible module and service plan.
- Sensor Compatibility: Supports crystal and SAW LearnMode sensors and repeaters. Some versions support 2-way RF products.
- Chime Feature: For monitoring door, window, or motion activity when the system is disarmed.
- Communication: Reports in SIA or CID formats. Supports Voice Event Notification via PSTN (native) and/or optional Cellular and IP modules.
- Remote Services: Supports Internet-based interactivity (e.g., via Brinks Home™ App / Alarm.com) with a compatible communication module and service plan.
- Expansion Options: Supports on-premises remote control with optional talking touchpad or touchscreen accessories; compatible with Interlogix Image Sensor V3 (on-screen display).
Understanding Your Panel's Touchscreen Interface
Get familiar with the Simon XTi's touchscreen for easy operation.
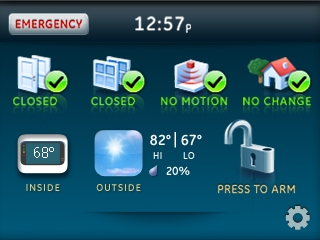
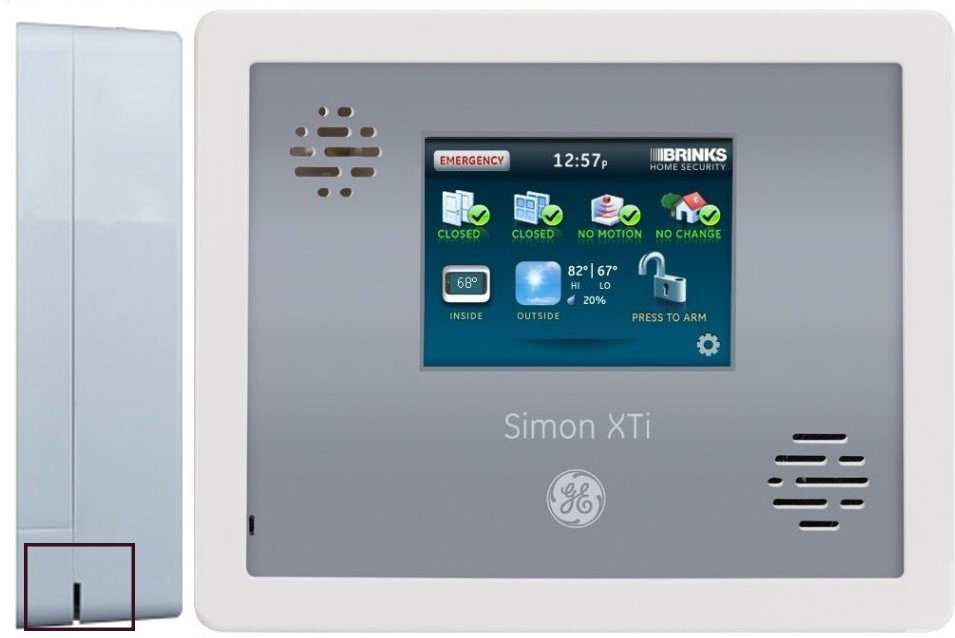
The Simon XTi uses a 5-inch color LCD touchscreen for all system interactions. Key areas and icons include:
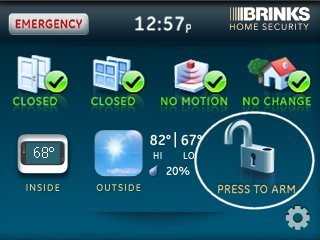
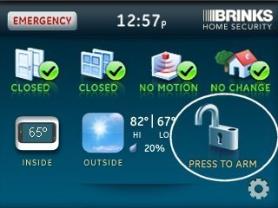
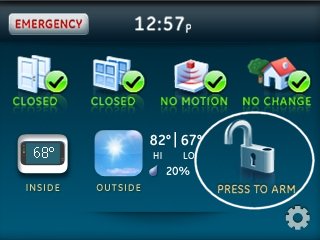
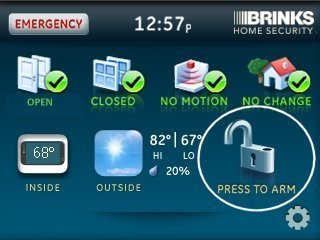
- Home Screen: Displays current system status (Disarmed, Armed Stay, Armed Away), date, time, and often icons for quick access to arming or settings.
- Lock Icon: Typically pressed to access arming options (Arm All, Arm Doors & Windows Only).
- Settings Icon (Gear): Usually found on the home screen or by swiping down, provides access to user settings, system tests, and advanced programming (with appropriate codes).
- Status Icons: Visual indicators for doors/windows open, motion detected, or other system states. These are often actionable (tapping them might provide more details).
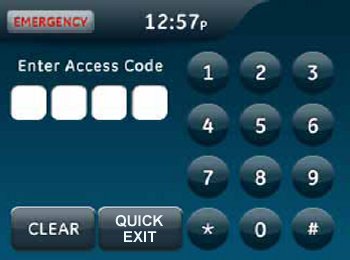
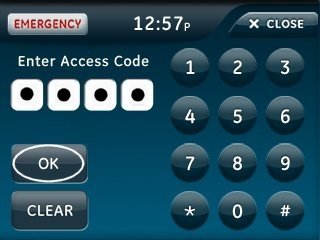
- On-Screen Keypad: Appears when a code is required for disarming or accessing settings.
- Menu Navigation: Uses on-screen buttons like "Enter," "Close," scroll arrows, and back arrows to navigate through options.
Basic Operations: Arming, Disarming, & Bypassing
Learn the essential functions for daily use of your Simon XTi system.
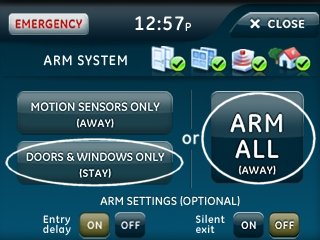
Arming Away
Use when everyone is leaving the home (activates all sensors).
- From the Home screen, press the Lock icon.
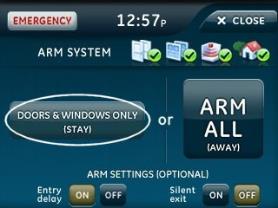
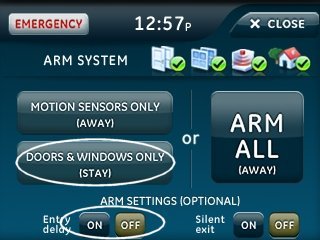
- Press Arm All.
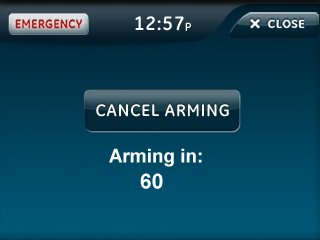
- The exit delay countdown will begin. Exit before it ends.
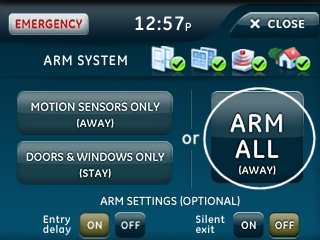
Arming Stay
Use when people are home (arms perimeter, interior motions off).
- From the Home screen, press the Lock icon.
- Press Arm Doors & Windows Only (Stay).
- The exit delay (if programmed for Stay mode) will begin.
Arming Stay Instant (No Entry Delay)
Arms perimeter sensors immediately with no entry delay.
- Press the Lock icon (Arm).
- Press Off next to the Entry Delay option to toggle it off (it should then show Entry Delay: Off).
- Press Doors & Windows Only (Stay).
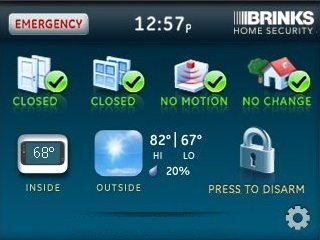
Disarming the System
To turn off your armed system or silence an alarm.
- Press the Lock icon on the Home screen (it will show current armed status).
- Enter your User Code or Master Code when prompted.
- The panel will announce "System Disarmed." If disarming an active alarm, this will also silence the siren. Be prepared for a call from Brinks Home to verify.


Bypassing Sensors
Allows you to arm the system while temporarily ignoring specific sensors.
Force Bypassing (during arming):
- Open the door(s) or window(s) you wish to bypass.
- Press the Lock icon to begin arming.
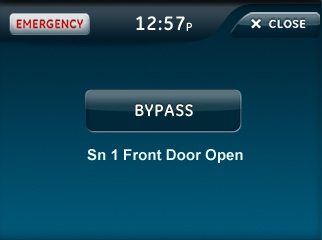
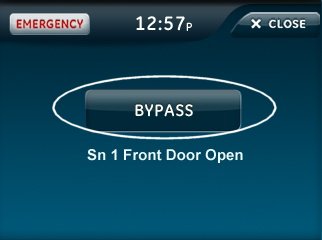
- Select your arming mode (e.g., Arm All). The panel will beep and display the open sensor(s).
- Press Bypass. The panel will bypass all currently open sensors and proceed to arm.


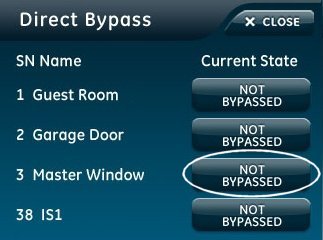
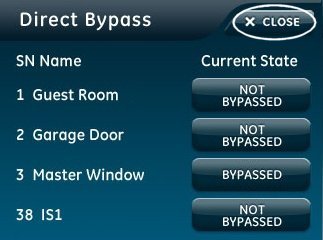
Direct Bypassing (proactive):
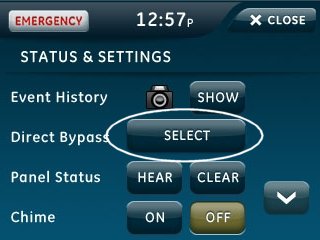
- Press Settings (gear icon, often bottom right of home screen).
- Press Select next to Direct Bypass.
- The panel lists sensors. Press Not Bypassed next to a sensor to change its status to Bypassed. Repeat for all sensors you want to bypass.
- When done, press Close.
- Press Close again to exit to the home screen.
- Now, arm your system as usual by pressing the Lock icon, then selecting Arm All or Doors & Windows Only (Stay).


System Status, Alerts, and Chime Settings
Checking status, understanding alerts, and managing chimes on your Simon XTi.
Checking Your System Status
To see open sensors or trouble conditions:
- If your panel is armed, first press the Lock icon and enter your User Code or Master Code to disarm.
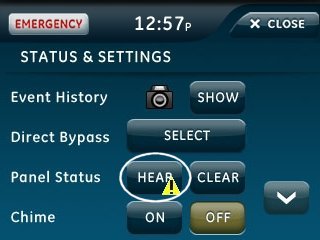
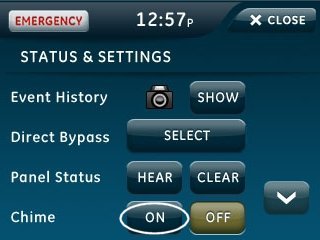
- Once disarmed, press the Settings gear icon (often bottom right of the Home screen).
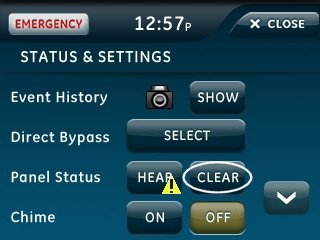
- Press the Hear button next to "Panel Status" (or similar wording) to hear any open zones or trouble conditions. The screen will also display this information.
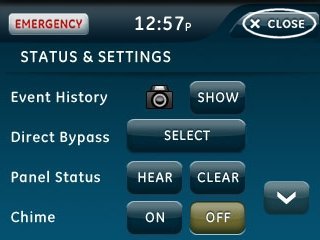
- To clear acknowledged alerts from the display (if the condition is resolved), press Clear, then Close to exit.
Managing Chime and Voice Settings
The Simon XTi panel can provide an audible chime or voice announcement when doors/windows are opened while the system is disarmed.
Quick Toggle for Chime (User Setting):
- Press the Settings gear icon on the bottom right of the Home screen.
- You should see an option for Chime (it may show "On" or "Off"). Press the button next to Chime to toggle it between On and Off.
- Press the Close button to exit.


Detailed Voice Chime Setup (Installer Programming):
To select the type of chime (voice, bell, etc.) for sensors, you typically need to access installer programming.
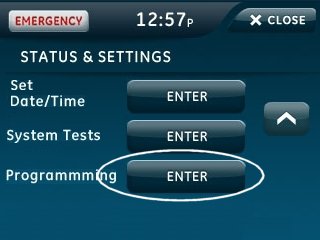
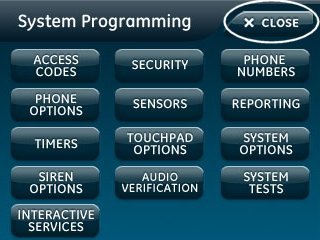
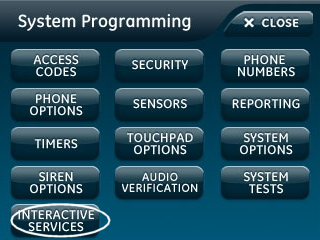
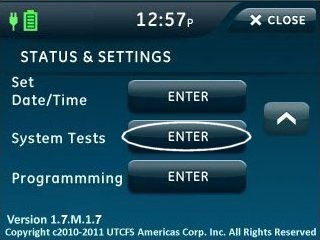
- Press the Settings gear icon, then press the Down Arrow several times until you get to Programming. Press Enter next to Programming.
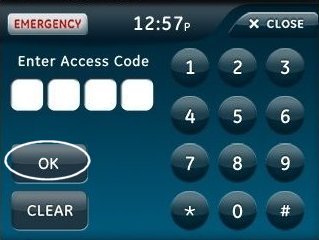
- Enter the default Installer Code (4321), then press OK.
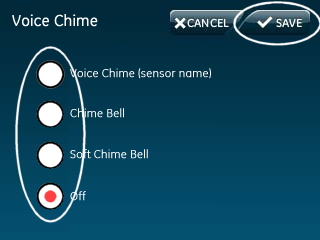
- Press Siren Options, then press Voice Chime.
- Select your preferred sound setting (e.g., for voice, specific bell tones, or off), then press Save. Press Close to exit Siren Options.
- Press Close again to exit Programming.


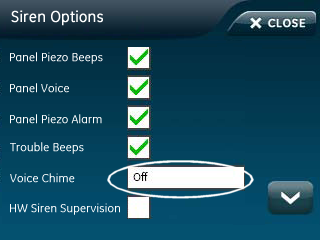
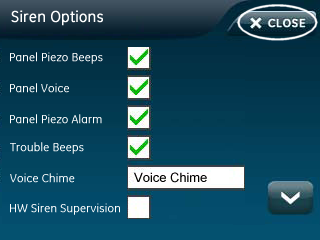
Similarly, other sound settings like "Trouble Beeps" can be disabled via Installer Programming > Siren Options if desired, but it's generally recommended to leave trouble beeps enabled so you are alerted to system issues.
System Testing Procedures
Regularly test your system to ensure it's working correctly.
Note: While these are local panel tests, if your system is professionally monitored by Brinks Home, it is a good practice to be mindful that some tests (like a full Communication Test) will send signals. For routine user-initiated sensor tests, placing the system on an official "Test Mode" with Brinks Home might not always be required if you are just verifying local sensor response, but for full communication path tests, it's advisable if you want to avoid potential follow-up calls.
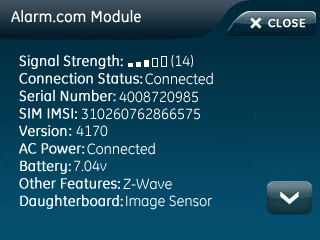
Checking Cellular Signal Strength
This test checks the quality of your panel's cellular connection (if a module is installed).
- Press the Settings gear icon, then press the Down Arrow several times until you can access Programming or System Information.
- Press Enter by Programming, enter the default Installer Code (4321), then press OK.
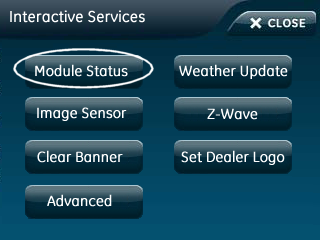
- Press Interactive Services, then press Module Status.
- The signal strength should be 2 bars minimum. Press Close several times to exit.


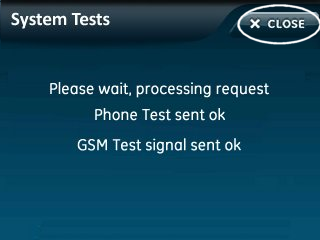
Communication Test
Sends a test signal to Brinks Home to verify the communication path.
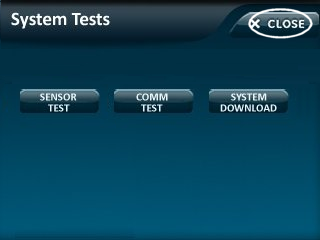
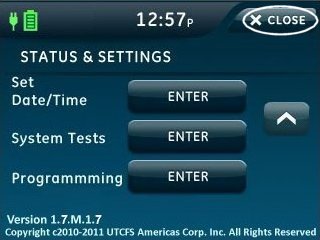
- Press Settings (gear icon), then press the Down Arrow until you get to System Tests.
- Press Enter next to System Tests, enter your Master Code, then press OK.
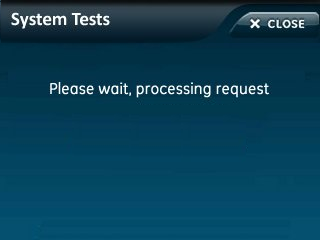
- Press Comm Test to begin the phone line or cellular test.
- If successful, "Test Signal Sent OK" or similar will display. Press Close twice to exit.


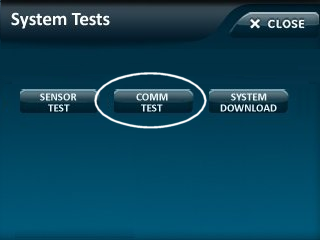
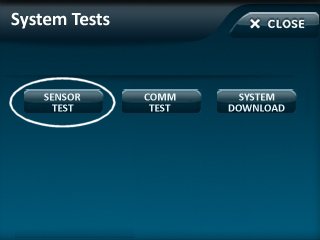
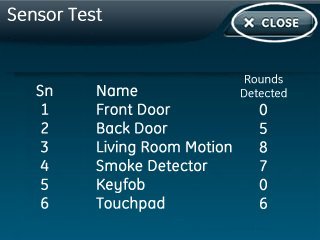
Sensor Test (Check Sensor Status)
Tests communication of individual sensors with the panel.
- Press Settings (gear icon), then press the Down Arrow until you arrive at System Tests.
- Press Enter beside System Tests, enter your Master Code, then press OK.
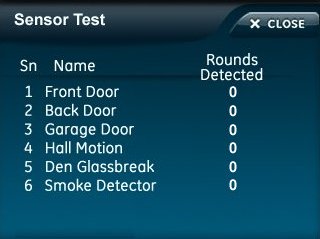
- Press Sensor Test, then activate all sensors individually (open/close doors/windows, walk past motions, press test buttons on life safety devices).
- The Simon XTi beeps on activation and displays the signal strength for each sensor triggered. Press Close when done.
- Once all sensors are tested, press Close twice to exit.


Using the Panic Feature
How to manually send an emergency alarm using your Simon XTi panel's on-screen panic icons.
Your Simon XTi panel typically has on-screen panic icons for quickly alerting Brinks Home in case of a police, fire, or medical emergency.
- From the Home screen, press the Emergency or Panic icon (often a "+" or shield icon that expands to show panic options).
- The panel will display icons for Police, Fire, and Medical/Auxiliary panic.
- Press and hold the desired panic icon for at least two seconds to activate the alarm.
- The panel will immediately send an alarm signal to Brinks Home. Depending on programming for that panic type, the siren may or may not sound locally.
Important: Use panic icons only in genuine emergencies. Accidental activation should be reported to Brinks Home immediately if they call, to help prevent unnecessary dispatch.
Basic LED Status Reference
Understanding the status indicator lights on your Simon XTi panel.
The Simon XTi panel has LEDs that provide quick status. Common interpretations:
Always refer to messages on the touchscreen for the most detailed status information.
Troubleshooting Common Issues (incl. Power Cycle)
Addressing basic problems with your Simon XTi panel.
Panel is Beeping or Showing a Trouble Message
- Tap the status area or message icon on the touchscreen. The panel will display the specific trouble condition(s).
- Common troubles include "AC Power Failure," "System Low Battery," "Sensor X Low Battery," or "Communication Failure."
- Address the specific cause (e.g., check transformer, allow battery to recharge, replace sensor battery, troubleshoot communication path).
- Acknowledge the alert on the panel to silence beeping (often by pressing "OK" or disarming).
Panel Not Arming
- Check the panel display. It will usually indicate why it cannot arm (e.g., "Front Door Open," "System Trouble").
- Ensure all protected doors and windows are closed.
- If a sensor is open and cannot be closed/fixed immediately, you may need to bypass it (see "Bypassing Sensors" under Basic Operations).
- Resolve any system troubles before attempting to arm.
Communication Test Fails
- If using cellular, check signal strength (see System Testing Procedures). If low, address interference or panel placement.
- Ensure your cellular module is modern (LTE) and your service plan with Brinks Home is active.
- If using IP communication (via a module), ensure your internet service and router are working.
- Perform a panel power cycle (see below).
How to Power Cycle the Simon XTi Panel
A power cycle can resolve temporary glitches or unresponsiveness.
-
Disarm the System: If possible, enter your Master or User Code to disarm the panel.
-
Disconnect AC Power: Unplug the panel's power transformer from the electrical outlet.

-
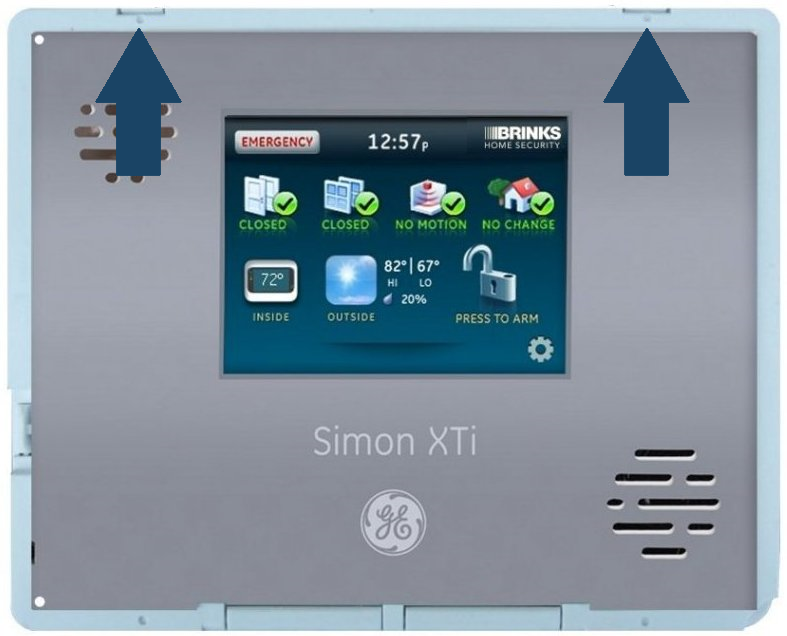
Open the Panel: For the Simon XTi, you might need to insert a coin or flat tool into a slot (often bottom right) and twist to pop the front faceplate off. Alternatively, look for tabs (often at the top) to press while gently prying or pulling the front cover away from the backplate. Be careful as it may be hinged or attached by a strap.
-
Disconnect the Backup Battery: Inside, locate the backup battery pack. Unplug its wire connector from the circuit board.
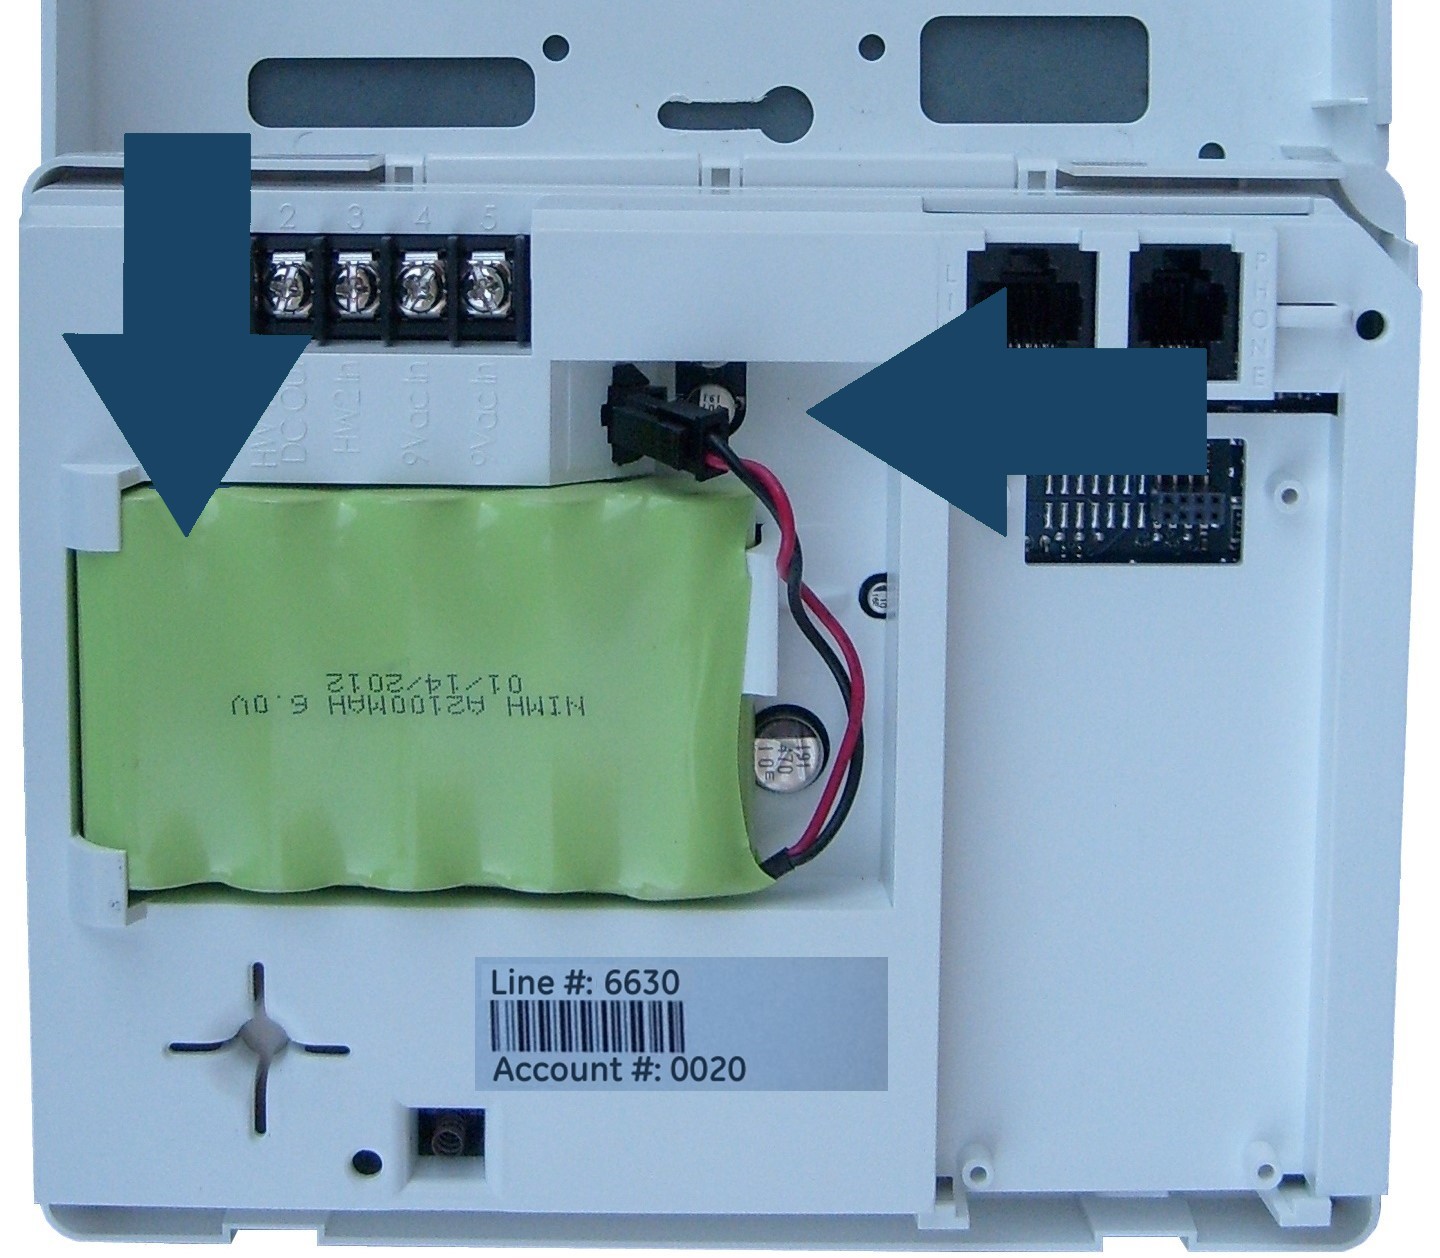
-
Wait: Leave the panel completely without power (both AC and battery) for at least sixty seconds to two minutes.
-
Reconnect Power:
- First, plug the backup battery connector back into the circuit board.
- Carefully close the panel cover, ensuring it snaps securely in place and any tabs engage. Replace any securing screws if applicable.
- Finally, plug the AC power transformer back into the wall outlet.
-
The panel will boot up. This may take several minutes. Check if the issue is resolved. You might need to set the date/time.
Advanced Options (e.g., Factory Reset)
Information on more advanced panel operations.
Warning: A factory reset erases all programming (sensors, codes, etc.) and should only be a last resort performed by a technician or with direct support guidance. Your system will require complete reprogramming. Contact us before attempting: 469-513-8685.
If basic troubleshooting fails, contact Brinks Home support before considering a factory reset.
Further Assistance & Resources
How to get more help with your Simon XTi panel.
If you need additional support with your Simon XTi panel, you can text a Support Representative any time at 469-513-8685.
For more detailed information, refer to the Simon XTi User Manual.