Qolsys IQ Panel Guide
Specifications
- • LCD touchscreen display: 7-inch LCD with 800x480 resolution
- • Audible alert: built-in 91 dba security siren
- • Internal memory: 4GB NAND flash
- • Microphone: embedded omni-directional mic with + high gain for 2-way voice
- • Battery type: lithium-ion 2500mAh capacity

Features
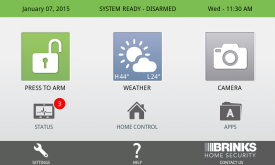
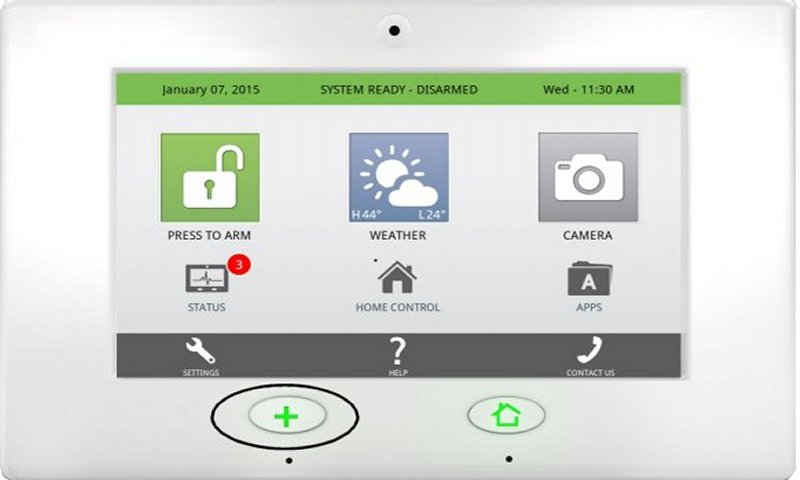
- • Touchscreen arming
- • Hi/lo temperature and precipitation 4-day forecast
- • 3MP disarm camera captures photos upon disarm
- • SD card slot enables your panel to scroll images while idle
- • Home controls including locks, lights, thermostats, and smart plugs
User Functions
Arm Away: arm away is used when you plan on arming the system and leaving the home.
- Select Press to Arm, then press Arm Away.
- A countdown timer appears during the exit delay.


Arm Stay: arm stay is used when you plan on arming the system while staying home. This option is best to arm all perimeter sensors and bypass any internal motion detectors.
- Select Press to Arm, then press Arm Stay.
- A countdown timer appears during the exit delay.


Arm Instant: arms all perimeter sensors without entry delay and bypasses interior motion detectors.
- Select Press to Arm, then press Entry Delay On to toggle the entry delay off.
- Press Arm Stay or Arm Away. There should be no countdown timer.


Entry Delay Timer: customize the time allowed between entry and disarm before an alarm is sent.
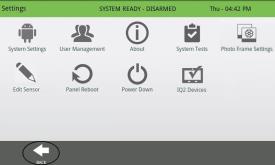
- Press the settings icon (wrench), then enter the default installer code 1111.
- Press Installation, then press Timer.
- Press the pencil icon next to Normal Entry Exit Delay. Select Entry Delay or Exit Delay.
- Delete the number to enter a new time between 30 to 240 seconds. Press Done.
- Press Save, press Back or the Home button to exit.


Silent Arming: useful for arming your system without disturbing other occupants, such as when leaving early in the morning before others wake.
- Select Press to Arm, then press Exit Sound to toggle off.
- Press Arm Stay or Arm Away.


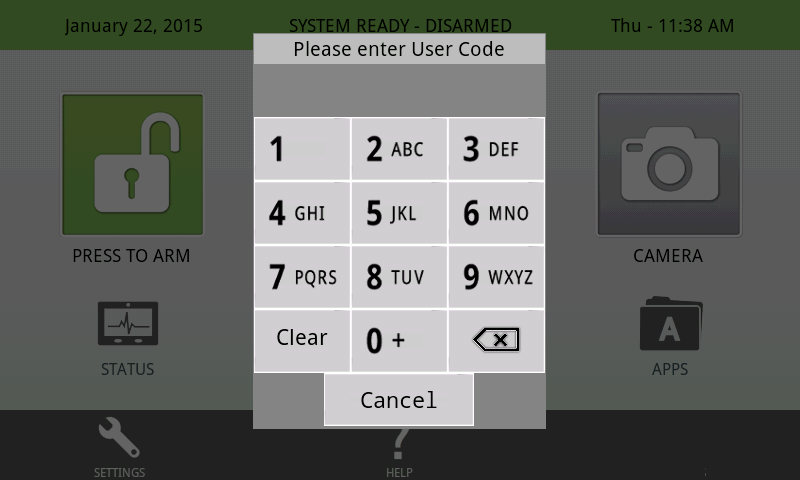
Disarm System: this will disarm your system, and it will silence and reset any active alarm.
- • When your system is in armed away mode, simply enter your user code upon entering the premises.
- • When your system is in armed stay mode, select Press to Disarm, then enter your user code.


Check Your System Status: checking your system's status will display which sensors are currently open or if any of your sensors are experiencing a trouble condition, such as a low battery.
- Press Status to view sensor status, then press Filter to only show open or closed sensors.
- Press Back or Home to exit.
Check Sensor Status: review a list of sensors connected to your system to ensure all are communicating and trouble-free.
- Press Status, then press Current Status to view the sensor status.
- Press Alerts to view recent trouble conditions.
- Press Alarms for the recent alarm history.
- Press History to view recent events, then press Back or the Home button to exit.
Clear Alerts: allows you to clear non-alarm alerts, usually for trouble conditions. Note: these alerts will return until the issue has been corrected.
- Press Status, then press Alerts.
- Press Acknowledge to check all troubles, then press Yes to confirm.
- Press the back arrow or the home button to exit.


Note that alerts will return if the condition has not been corrected with the sensor itself, unless you have opted to bypass the sensor entirely, such as when you are waiting for a replacement.
Silence Reset Alarm: allows you to clear alarms.
- Press Disarm, then enter your user code to disarm and silence the alarm.
- Press Status, then press Alarms.
- Press Acknowledge to select all alarms.
- Press Yes to confirm and delete. Press Back or Home to exit.


Bypass Sensors: allows you to proceed with arming your system while excluding one or more sensors that you temporarily choose to ignore.
- Select Press to Arm, then tap the check boxes next to devices you want to bypass.
- Press Arm Stay or Arm Away. Sensors return to normal when the system is disarmed.


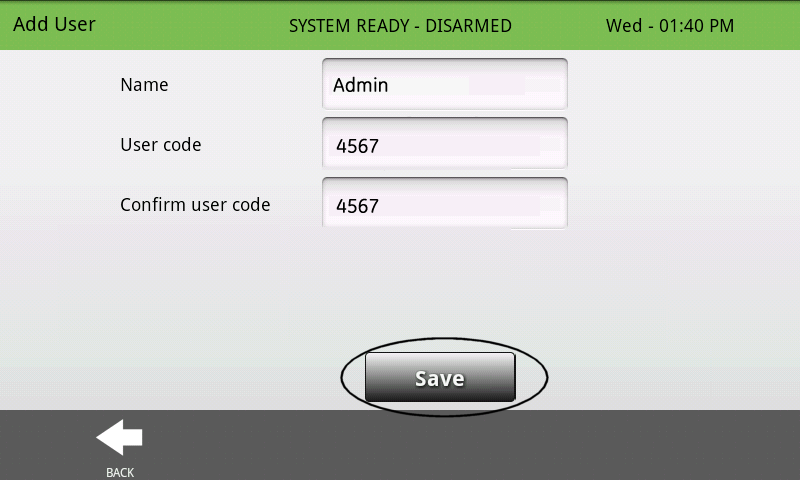
Add User Code: add unique user codes that will be logged upon disarming the system.
- Press Status, then enter your user code.

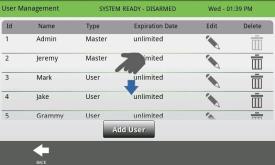
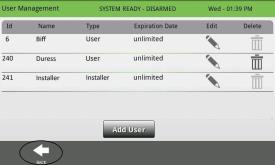
- Press User Management, then press Add User.
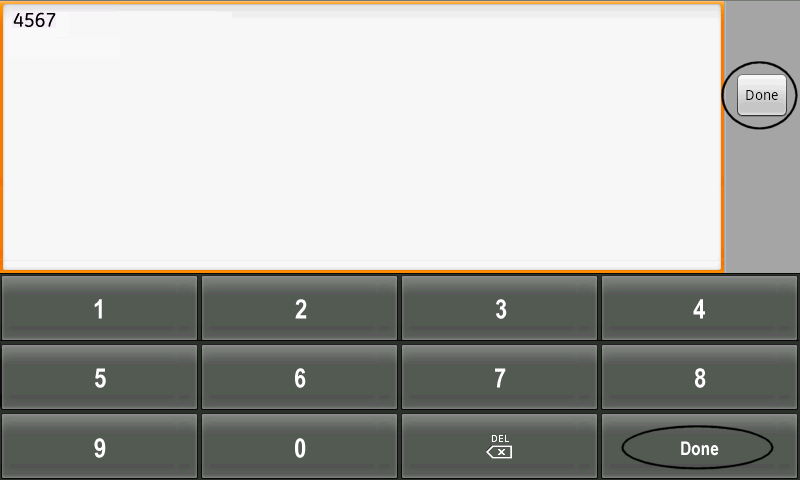
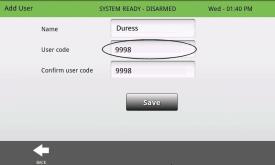
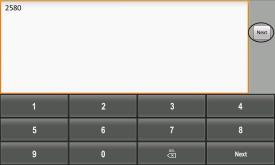
- Press Name, enter a name up to 10-characters, then press Next.
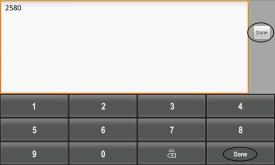
- Enter your user code, then press Next. Enter the user code again to confirm, then press Done.
- Optionally, press Type, then select Master, User, or Guest User.
- • Master: can perform all system functions such as add codes, arm, etc.
- • User: can arm, disarm, and bypass; this level of user cannot change other user codes
- • Guest: can arm and disarm only
- If the code is temporary, press Expiration Date, enter the preferred expiration date, then press Set.
- Press Add User to save, then press Back or Home to exit.


Delete User Code: remove user codes to discontinue allowing that code to disarm the system.
- Press Status, then enter your user code.
- Press User Management, then press Delete (the trash icon) by the user to delete.
- Press Yes to confirm, then press Back or Home to exit.


Change Master Code: updates the code which has master access to your system.
- Press Status, then enter your master code.
- Press User Management, then press Edit (the pencil icon) beside Admin Master.
- Press User Code, enter a new master code, then press Next.
- Enter your new master code, press Done, then press Save to save and exit.
- Press Back or Home to exit.


Lost Master Code: allows you to update your master code in the event that it is lost or forgotten.
- 1. Press Status then enter the default installer code 1111.
- Press User Management, then press Edit (the pencil icon) beside Admin Master.
- Press User Code, enter a new master code, then press Next.
- Re-enter your new master code, then press Done. Press Save to save and exit.


- Press Back or Home to exit.
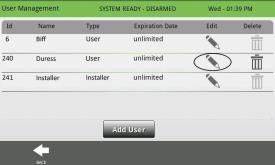
Add Duress Code: a code that will send a silent alarm when entered but appear to disarm the system.
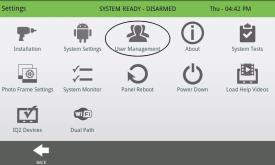
- Press Settings at the bottom left, enter your master code, then press User Management.
- Swipe down to the bottom of the user management list, then press the pencil icon by 240 Duress.
- Press User Code. Select the Delete button to erase any old duress codes, then enter the new duress code. Press Next.
- Press Delete to erase the old code again, then enter the new duress code again. Press Done, then tap Save.
- Press Back twice or Home to exit.


Panic Buttons: quick keys that let you manually send a specified alarm type.
- Press the bottom left Panic button, then hold Police, Fire or Medical 3 seconds to activate.

- To silence the alarm, press Cancel, then enter your user code.


How to Power Cycle the Panel
- Press Settings, then enter your master code.
- Press Power Down, then Ok to confirm and power down.
- Wait 2 minutes, then power up by holding the home button for 5 seconds.


If you need further assistance, you can text a Support Representative at 469.513.8685, 7 days a week from 8 am to 8 pm CT.
For additional information relating to your device, click the following link to view the original manufacturer's user guide or installation manual: IQ Panel User Manual