IQ Panel—Battery Replacement
Summary: This guide provides step-by-step instructions to safely replace the backup battery in your IQ Panel. This process involves powering down the panel, disconnecting all power sources, removing the old battery, installing the new one, and then restoring power. Properly replacing the battery ensures your panel continues to function correctly during power outages. Please note, a low battery alert may persist until the new battery is fully charged, which can take up to 24 hours.
Table of Contents
Quick links to guide you through replacing your IQ Panel's battery.
- Common Terms
- Battery Specifications and Purchasing
- Important Safety Precautions
- Battery Replacement Instructions
- Clearing Panel Alerts After Replacement
- Troubleshooting Post-Replacement
- Further Assistance
Common Terms
Understanding these terms will help you during the battery replacement process.
- IQ Panel
- Your Qolsys touchscreen security and smart home control panel.
- Backup Battery
- An internal rechargeable battery that powers your IQ Panel temporarily if AC power is lost (e.g., during a power outage).
- Master Code
- Your primary 4-digit or 6-digit security code used to access system settings on your IQ Panel.
- Power Down (Software)
- Using the panel's menu to shut down its operating system before physically interacting with internal components.
- Transformer (Power Brick / Power Supply)
- The external device that plugs into an electrical outlet and converts your home's AC power to the low-voltage DC power required by your IQ Panel. This is the panel's main power source.
- AC Power
- The standard electrical power from your wall outlets, supplied to the panel via its transformer.
- Home Button
- A physical button on the IQ Panel, typically on the right side, used for various functions including powering the panel on.
- Alerts/Troubles
- Notifications displayed on the IQ Panel to indicate system events or issues, such as a low battery or power loss.
- Acknowledge
- A function on the panel to confirm you have seen an alert or trouble condition. This often silences associated beeping.
Battery Specifications and Purchasing
Information on the required battery type for your IQ Panel and where to get it.
Your IQ Panel requires a specific type of battery for proper operation and backup. Using an incorrect battery can damage your panel or provide insufficient backup time.
- Required Battery Type: 7.4 Volt, 2500 mAh (Lithium-Ion or Lithium-Polymer, check your existing battery or panel manual for specific chemistry if unsure, but voltage and mAh are key).
You can typically purchase this battery at local hardware stores, mass retailers, specialized battery stores, or online. You may also text a Support Representative at 469-513-8685 to inquire about ordering one, or order online from your preferred retailer (ensure the specifications match).
Important Safety Precautions
Read these safety tips before you begin the battery replacement.
- Prevent Static Discharge: Before touching any internal components, discharge any static electricity from your body by touching a grounded metal object.
- Handle Batteries Carefully: Do not puncture, crush, short-circuit, or expose the old or new battery to fire or high temperatures. Dispose of the old battery according to local regulations for lithium batteries.
- Use Correct Tools: If a screwdriver is needed, use one that fits the screw properly to avoid stripping it.
- Do Not Force Components: Connectors and parts should fit together smoothly. If you encounter resistance, double-check alignment and refer to the instructions.
Battery Replacement Instructions
Follow these steps to safely power down the panel, remove the old battery, and install the new one.
-
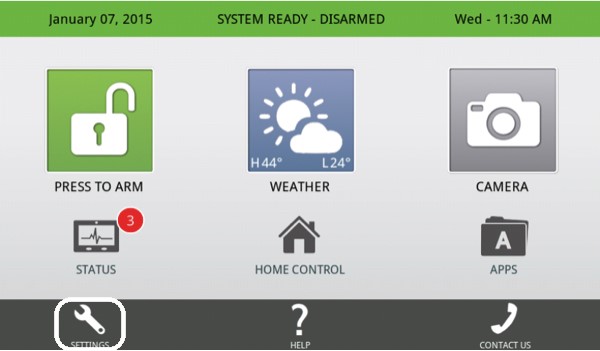
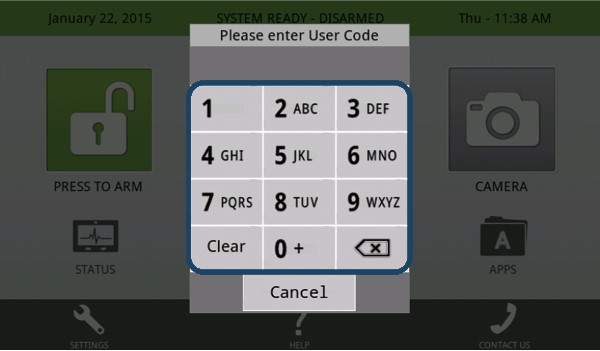
Initiate Software Power Down: At your IQ Panel, press Settings, then enter your Master Code.
-
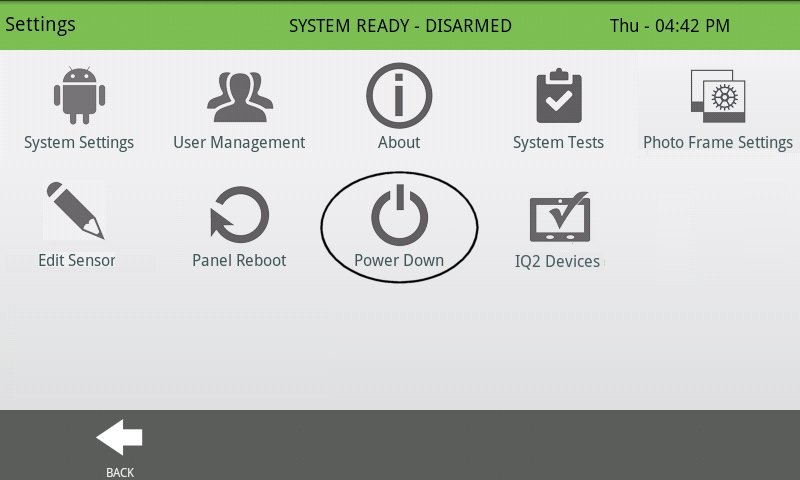
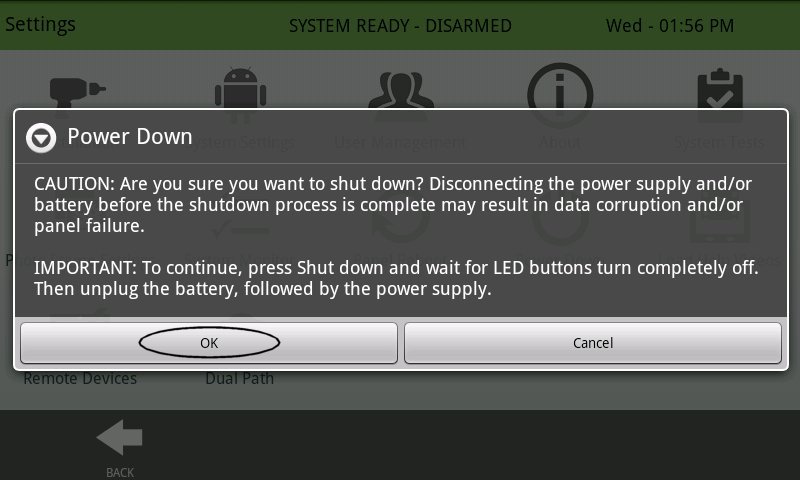
Navigate to the power down option. This is typically found under Advanced Settings (you may need your Installer or Dealer code) or a direct Power Down option if available with Master Code access. The images show "Power Down" accessible after navigating through settings. Press Power Down, then press OK to confirm. Wait for the panel screen to go completely blank, indicating it has shut down its operating system.
-
Disconnect AC Power: Locate the panel's power transformer (the plug in your wall outlet) and unplug it. This ensures no electrical power is flowing to the panel while you work inside it.
-
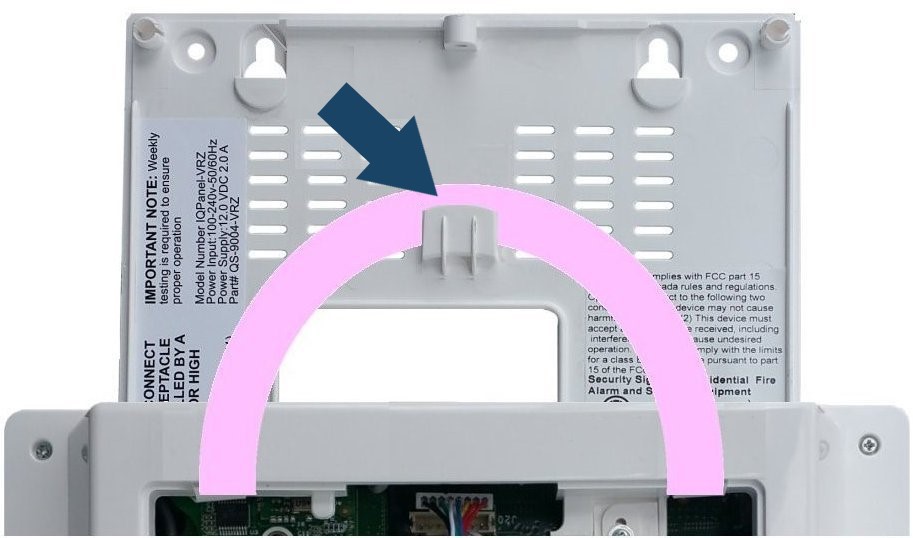
Remove Panel from Backplate: Loosen or remove the locking screw that secures the panel to its backplate. This screw is often located at the bottom edge of the panel. Once the screw is dealt with, gently slide the panel upwards and then pull it away from the backplate.

-
Secure the Panel Temporarily: Use the plastic tether strap (if present and long enough) to hang the panel from the top of the backplate. This prevents stress on any internal wires while you work.
-
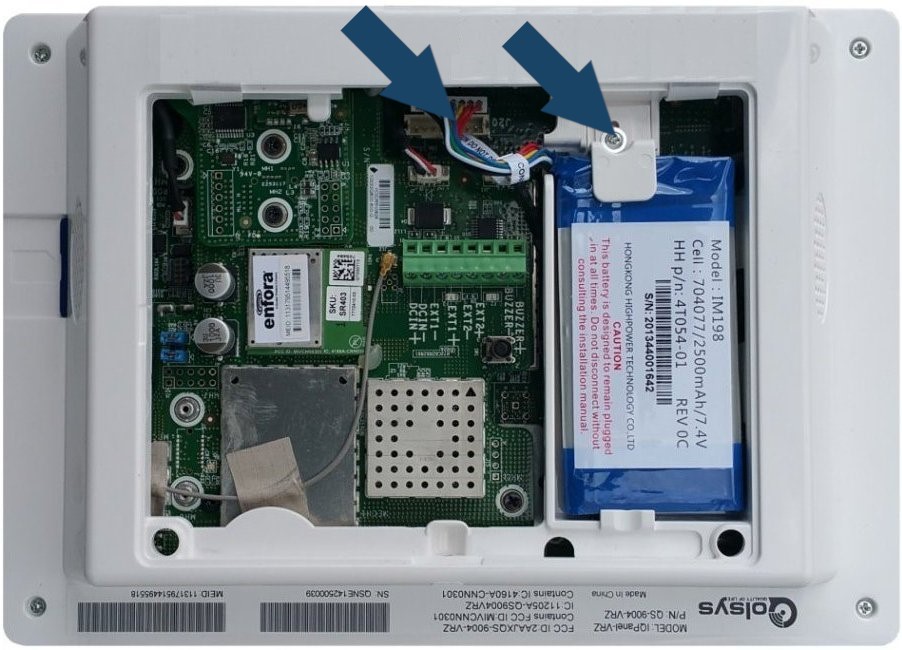
Access and Unplug Old Battery: Locate the battery compartment. You may need to remove a small screw securing the battery holder or cover. Carefully identify the battery's connector plug on the main circuit board and gently unplug it. Grip the plastic connector, not the wires, to avoid damage.
-
Remove Old Battery and Install New One: Remove the old battery from its compartment.
Note: The battery may be anchored with double-sided adhesive tape. If so, gently pry it loose, being careful not to use metal objects that could puncture or damage the battery casing. Avoid excessive force.
Place the new, fully charged (or as-received) battery into the compartment, ensuring correct orientation if applicable. Connect the new battery's plug to the circuit board securely. Replace the battery holder screw/cover if one was removed.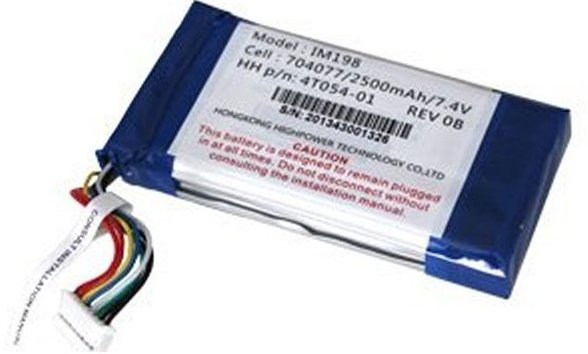
-
Close Panel and Restore AC Power: Carefully re-seat the panel onto its backplate, ensuring it's properly aligned, then slide it down to engage the securing tabs. Replace the locking screw if applicable. Plug the panel's power transformer back into the electrical outlet.
-
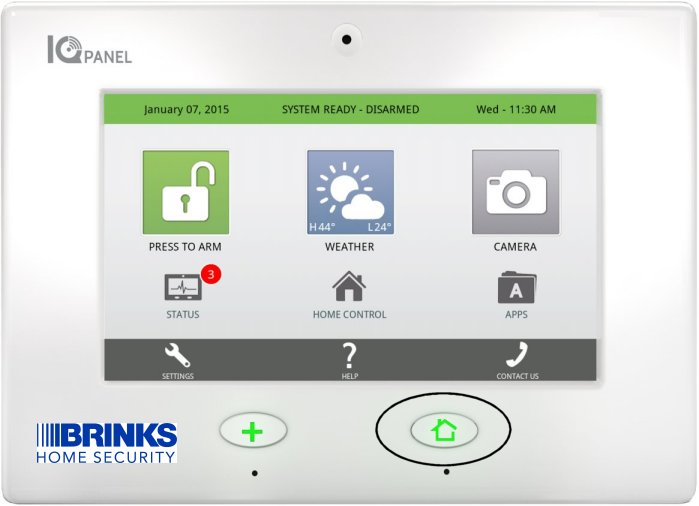
Power Up the Panel: Press and hold the Home button (side button) for approximately five seconds. The panel should begin to power up. Release the button once the screen illuminates or shows signs of booting.
-
Allow the panel several minutes to fully boot and connect to any services. It is normal for a "Low Battery" alert to be present initially with a new battery, as it may not be fully charged out of the box. This alert should clear within 24 hours as the battery charges.
Clearing Panel Alerts After Replacement
After replacing the battery and powering up, you may need to acknowledge system alerts.
Follow these steps to view and acknowledge any trouble alerts, such as "Panel Battery Low" or "AC Power Loss" (which would have occurred during the replacement):
-
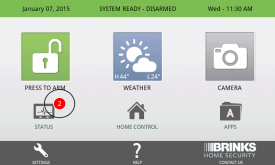
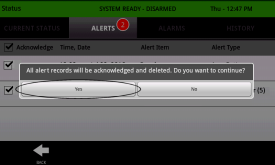
After the panel has fully booted, look for a status icon, often at the top of the screen (it might be a small circle or triangle, sometimes with a number). If there are active troubles, this icon will usually be red or yellow. Tap this Status Icon or message area.
-
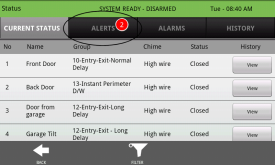
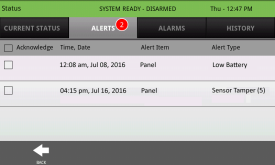
In the status menu, tap Alerts or Troubles to view the list of active conditions.
-
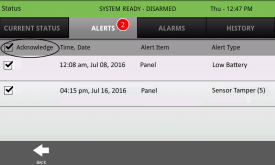
To acknowledge the alerts, check the box next to each one (or a "select all" option if available), then tap Acknowledge. You may be prompted to confirm; tap Yes or OK.
-
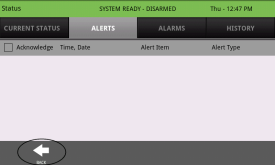
Once acknowledged, the panel should stop beeping for these specific alerts (if it was). Press the Back icon or the Home button to exit to the main screen. The trouble icon should clear or change color if all conditions are resolved (though a low battery alert for a new battery may take time to clear).
Note: Alerts related to the battery (e.g., "Panel Battery Low") may reappear if the new battery requires charging. It can take up to 24 hours for a new battery to reach its full charge capacity while the panel is powered by AC.
Troubleshooting Post-Replacement
Addressing common issues that may occur after replacing the IQ Panel battery.
"Low Battery" Alert Persists After 24 Hours
- Verify Charge Time: Ensure the panel has been continuously powered by AC for at least 24 hours to allow the new battery to fully charge.
- Check Battery Connection: Power down the panel completely (software power down, then unplug AC transformer, then disconnect battery) and double-check that the new battery is securely plugged into the mainboard. Ensure the connector is fully seated.
- Confirm Correct Battery: Verify that the replacement battery matches the required specifications (typically 7.4V, 2500 mAh). An incorrect or faulty battery may not charge properly or report its status correctly.
- Acknowledge Alert Again: After 24 hours of charging, try acknowledging the trouble alert again as described in the "Clearing Panel Alerts" section.
- Potential Faulty Battery or Panel Issue: If the alert still persists after these steps, the new battery itself might be faulty, or there could be an issue with the panel's charging circuitry. In this case, please contact us for further assistance.
Panel Does Not Power On After Battery Replacement
- Check All Connections:
- Ensure the new battery is correctly and securely plugged into the panel's circuit board.
- Verify the AC power transformer is firmly plugged into a working electrical outlet and that its wire is securely connected to the panel (if it's a direct wire connection block).
- Outlet Has Power: Confirm the electrical outlet the transformer is plugged into is actually working by testing it with another device (like a lamp).
- Initiate Power On: Press and hold the panel's side Home button for at least 5-10 seconds to ensure the power-on sequence is initiated.
- Try Old Battery (Temporarily): If the old battery had any remaining charge, you could (after fully powering down again) temporarily reinstall it to see if the panel powers on. This can help determine if the issue is with the new battery (e.g., dead on arrival) or the panel itself. If it powers on with the old battery, the new battery is likely the problem.
- If the panel still does not power on, please contact us.
Panel Beeps Continuously After Battery Replacement
- Acknowledge Trouble Alerts: This is the most common reason for beeping after a power event. Follow the steps in the "Clearing Panel Alerts After Replacement" section.
- Check Panel Cover/Tamper: Ensure the panel's front cover is properly closed and secured onto the backplate. If the panel detects that its casing is open (tamper switch), it will typically sound an alert and may beep. Make sure any locking screws are fastened.
- Review All Alerts: If beeping continues after acknowledging, go back into the Alerts/Troubles menu to see if new or different alerts have appeared that need attention.
Further Assistance
How to get more help if you encounter issues during or after the battery replacement.
If you have followed these instructions and are still experiencing problems with your IQ Panel's battery, or if you are uncomfortable performing any of these steps, please don't hesitate to contact us. You can text a Support Representative anytime at 469-513-8685. Please be ready to describe the issue and the steps you've already taken.