Kwikset 910 Smart Door Lock Guide
Specifications
- • Door prep: 2-1/8” diameter face hole & 1” diameter latch hole
- • Backset: adjustable to 2-3/8” or 2-3/4”
- • Door thickness: 1-3/8” to 1-3/4” automatic adjustment
- • Cylinder: smartkey re-key technology
- • Faceplate: 1” x 2-1/4” round corner standard
- • Strikes: round corner strike 2-3/4” x 1-1/8”
- • Bolt: 1” throw
- • Door handing: reversible
- • Battery requirements: 4 AA batteries—batteries last for approximately 1 year
- • Communication: Z-Wave wireless protocol

Features
- • Simplify security system control through lock keypad
- • Directly control locks from security system to lock/unlock door while arming/disarming
- • Single button security system arming via lock keypad
- • Customize lighting scenes for convenience through lock keypad
- • Initiate thermostat away mode when leaving home and locking door
- • Save money while conserving energy usage through home/away modes via lock keypad
- • Lock/unlock doors via smart phone or internet connection while away
- • Receive remote notification when door lock is accessed
- • Check lock status remotely to see if doors are locked
- • Motorized locking mechanism— enables true remote locking & unlocking
- • Includes SmartKey® re-key technology with BumpGuard™ protection
- • Revolutionary tapered deadbolt design—enables misaligned doors to lock without pulling & pushing your door shut
- • Full 128-Bit encryption security
- • One touch locking
- • Replaces existing door hardware with just a screwdriver
- • No hard wiring needed
Installation
Video Instructions:
Step-by-Step Instructions:
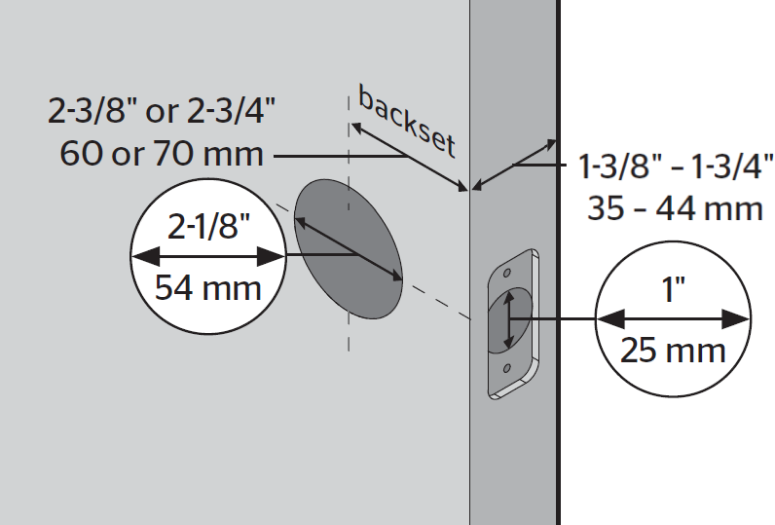
- Prepare the door and check dimensions.
- • Measure to confirm that the hole in the door is 2 and 1/8 inches.
- • Measure to confirm that the backset is either 2 and 3/8 inches or 2 and 3/4 inches.
- • Measure to confirm that the hole in the door edge is 1 inch.
- • Measure to confirm that the door is between 1 and 3/8 inches and 1 and 3/4 inches.
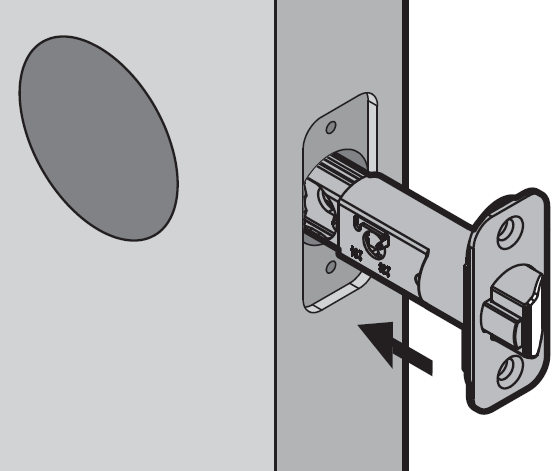
- Install the door latch ensuring the slant of the latch bolt faces the door frame.
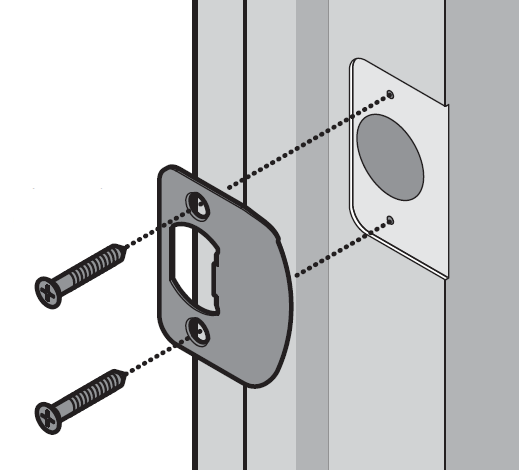
- Install the strike plate on the door frame.
- Install the exterior keypad.
- Install the mounting plate, then secure in place with screws. Ensure the edge of the mounting plate is parallel to the edge of the door.
- Install the spindle.
- Prepare the interior assembly, removing the battery cover, removing the battery pack, and installing 4 AA batteries into the battery pack.
- Connect the cable, ensuring a tight cable connection.
- Install the battery pack, then push the interior assembly onto the mounting place, ensuring any excess cable is clear, then secure with screws.
- Install the interior lever.
- Install the exterior lever.
- Add the lock to your smart home system. The following links provide detailed instructions on adding a Z-Wave device to some of our most common panels:
Note: If you are installing this lever below an existing lock or you plan to install a lock above this lever, make sure that the distance between holes is at least 6 and 1/2 inches.


- • IQ Panel 2 - Add Z-Wave Device
- • GC2 GoControl - Add Z-Wave Device
- • Simon XT - Add Z-Wave Device
- • Simon XTi - Add Z-Wave Device
For additional information relating to your device, click the following link to view the original manufacturer's user guide or installation manual: Kwikset 910 Door Lock Manual