Simon XT Panel Guide
Summary: This guide helps you get started with your Interlogix Simon XT security panel. We cover its key features, common user functions like arming and disarming, basic system testing, adjusting essential settings, and how to power cycle the panel for troubleshooting.
Table of Contents
Navigate through the sections to learn about your Simon XT panel.
- Common Terms
- Panel Overview: Specifications & Key Features
- Understanding Your Panel's Interface & Buttons
- Basic Operations: Arming, Disarming, & Bypassing
- System Status and Alerts
- System Testing Procedures
- Managing User Codes and Key Panel Settings
- Using Panic Buttons
- LED Status Reference
- Troubleshooting Common Issues (incl. Power Cycle)
- Advanced Options (e.g., Factory Reset)
- Further Assistance & Resources
Common Terms
Understanding these terms will help you use your Simon XT panel.
- Simon XT Panel
- Your Interlogix security system's main control unit, featuring buttons and an LCD display.
- Sensor/Zone
- Devices that detect events (e.g., door/window opening, motion). Each is a "zone."
- Arm (Away/Stay/Stay Instant)
- To activate the security system. "Arm Away" activates all sensors. "Arm Stay" typically activates perimeter sensors, leaving interior motion sensors off. "Arm Stay Instant" is similar to Stay but with no entry delay.
- Silent Arming
- Arming the system without the usual exit delay beeps.
- Disarm
- To deactivate the security system using a valid user code.
- User Code
- A 4-digit or 6-digit personal code used to arm, disarm, and access some panel functions.
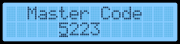
- Master Code
- The primary user code with privileges to manage other user codes and access more system settings.
- Installer Code
- A special code (default 4321 for Simon XT) used by technicians or for homeowner access to certain advanced settings to access deep system programming.
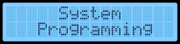
- System Programming
- The menu accessed typically with the Installer Code to change panel operational settings like timers or siren options.
- Exit/Entry Delay
- Programmable time periods allowing you to leave after arming (exit) or disarm after entering (entry) without triggering an immediate alarm.
- Status Button
- A button on the panel used to check the current state of the system and any trouble conditions.
- Trouble Condition/Alert
- A notification from the panel about a system issue (e.g., low battery, AC power failure, sensor malfunction).
- Cellular Module/Communicator
- An optional internal component that allows the panel to communicate with Brinks Home over cellular networks.
- Two-Way Voice
- A feature enabling voice communication with Brinks Home personnel through the panel's microphone and speaker during an emergency (requires compatible cellular module and service).
- Transformer
- The external power supply that plugs into a wall outlet to provide main power to the panel.
- Power Cycle
- Restarting the panel by removing all power (AC and battery) and then restoring it.
- Panic Buttons
- Dedicated buttons or a feature to manually trigger an immediate alarm for police, fire, or medical emergencies, signaling Brinks Home.
- Bypass Sensors
- Temporarily deactivating a sensor so it won't trigger an alarm during an arming period.
Panel Overview: Specifications & Key Features
Learn about the capabilities of your Interlogix Simon XT panel.
Specifications
- Firmware Compatibility: 3G models require panel firmware version 1.2+; 4G models require panel firmware version 1.3+.
- Sensors/Zones: Supports up to 39 wireless sensors.
- Sensor Frequency: 319.5 MHz.
- User Codes: Up to 9 user codes (4 or 6 digits), programmed locally.
- Communication: Supports optional cellular modules (3G/4G LTE). Some LTE modules offer Ethernet for Dual-Path. Landline capable.
- Display: 3.5-inch color LCD screen.
- Audio: Built-in speaker and microphone.
Key Features
- Two-Way Voice: Allows emergency voice communication with Brinks Home personnel (requires compatible module/service).
- User-Friendly Display: Shows system status and allows easy arming/disarming.
- Wireless Design: Primarily for wireless sensors, simplifying installation.
- Cellular Reporting: Supports cellular communication for reliability.
- Basic Interactive Services: May support features like weather display (requires active communication module and service).
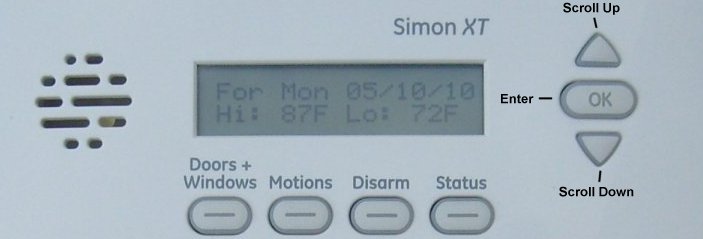
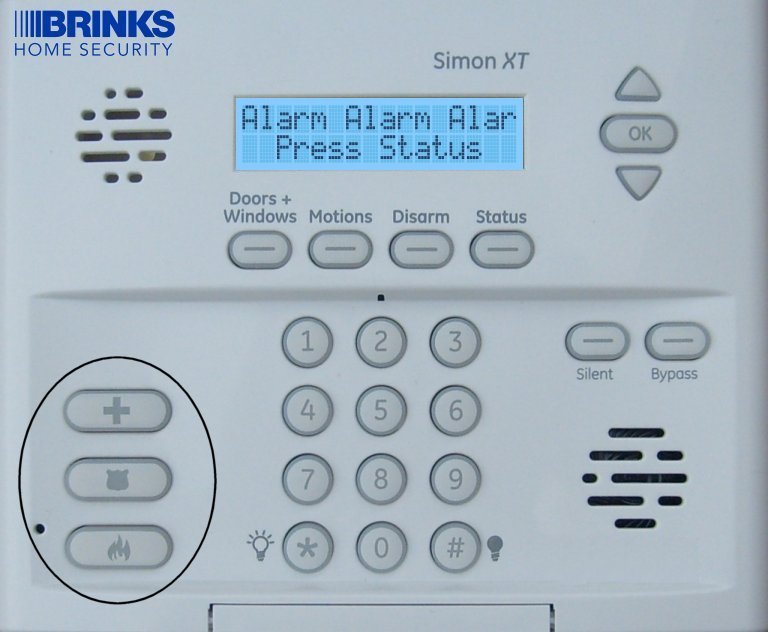
Understanding Your Panel's Interface & Buttons
Get to know the main buttons and display on your Simon XT panel for confident operation.
The Simon XT panel uses an LCD screen and physical buttons. Key elements include:
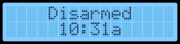
- LCD Screen: Displays system status, date/time, menu options, and messages.
- Arming Buttons (Doors + Windows, Motions): Dedicated buttons to arm in different modes.
- Disarm Button: Turns off the system with a user code.
- Status Button: Press to check system status and troubles.
- Numeric Keypad (0-9): For entering codes and values.
- OK Button: Confirms selections.
- Scroll Arrows (Up/Down): Navigates menus.
- Panic Buttons: For police, fire, or medical emergencies (activation method varies).
Basic Operations: Arming, Disarming, & Bypassing
Learn the primary functions for daily use of your Simon XT system.
Arming Away
Use when leaving and you want all sensors active.
- Ensure all doors/windows are closed.
- Press Doors + Windows AND Motions buttons together.
- The panel will announce "Arming Away" and start the exit delay.

Arming Stay
Use when people are inside; arms perimeter, interior motions usually off.
- Ensure perimeter doors/windows are closed.
- Press Doors + Windows button once.
- Panel announces "Arming Stay."
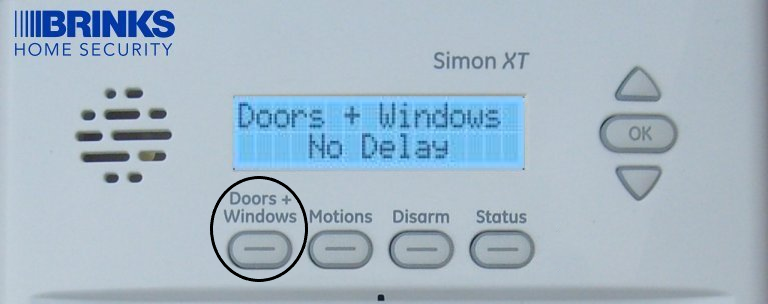
Arming Stay Instant (No Entry Delay)
Arms perimeter sensors without entry delay.
- Ensure perimeter doors/windows are closed.
- Press Doors + Windows twice quickly.
- Panel announces "Arming Stay, No Delay" or similar.

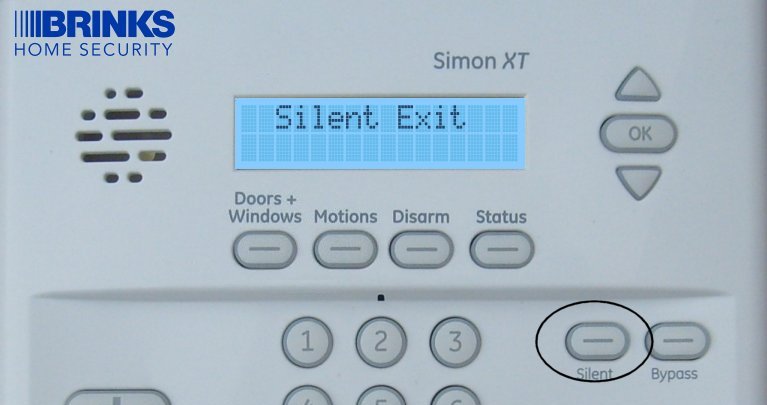
Silent Arming
Arms the system without exit delay beeps.
- Initiate Arm Away or Arm Stay.
- While exit delay is beeping, press the Silent button (or relevant option).
- Beeps stop; system continues arming.
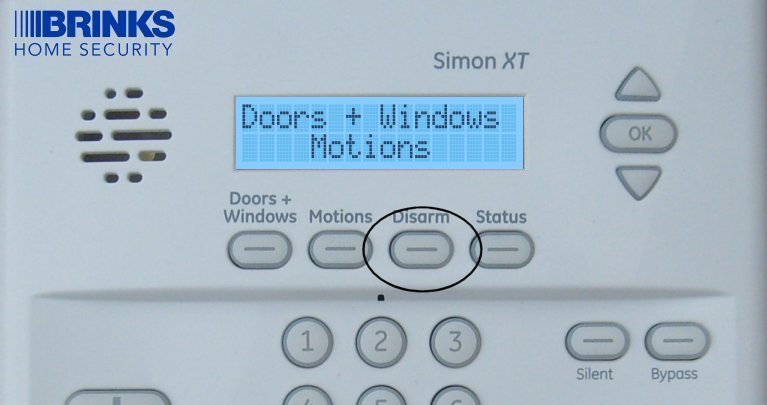
Disarming the System
To turn off your armed system.
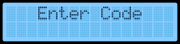
- Upon entering (if entry delay starts), press Disarm.
- Enter your User Code or Master Code.
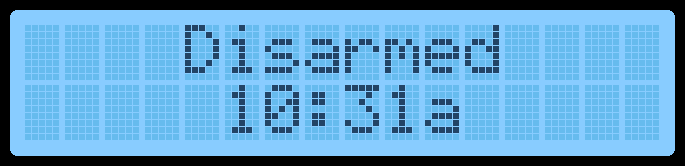
- Panel announces "System Disarmed."
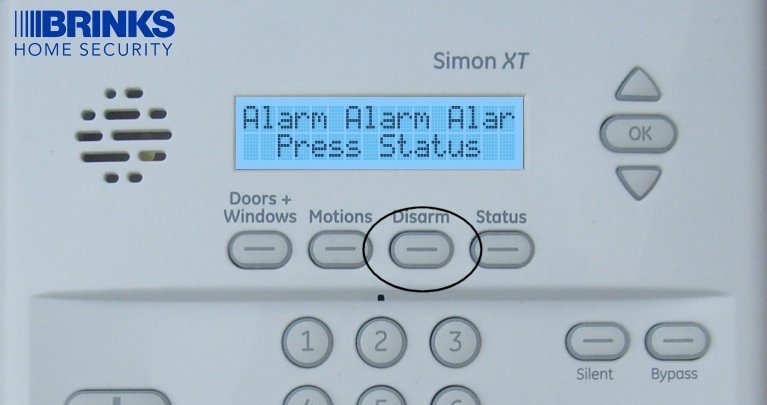
Disarming During an Alarm
To silence and reset an active alarm.
- Press Disarm.
- Enter your User Code or Master Code.
- Siren stops, system disarms. Expect a call from Brinks Home.
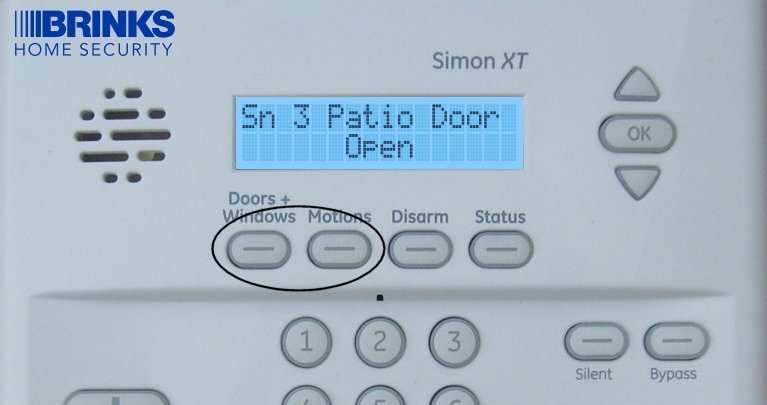
Bypassing Sensors (Force Bypass Method)
To arm with a sensor intentionally left open or malfunctioning.
- Ensure the system is disarmed. Have the specific door or window open.
- Press Doors + Windows (or your intended arming sequence).
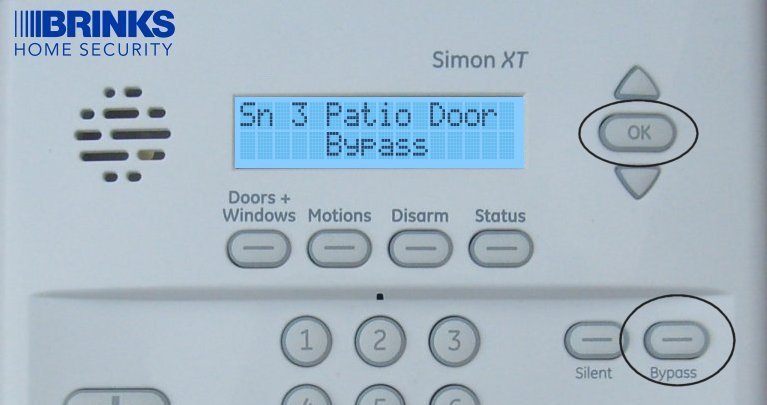
- The panel will announce the open sensor(s) and may display "BYPASS?" or a bypass option. Press the Bypass button or OK. Enter your User Code if prompted.
- Panel announces "Sensor Bypassed" and arms. This bypass is for one arming period only.
System Status and Alerts
Learn how to check your system's status and understand alerts.
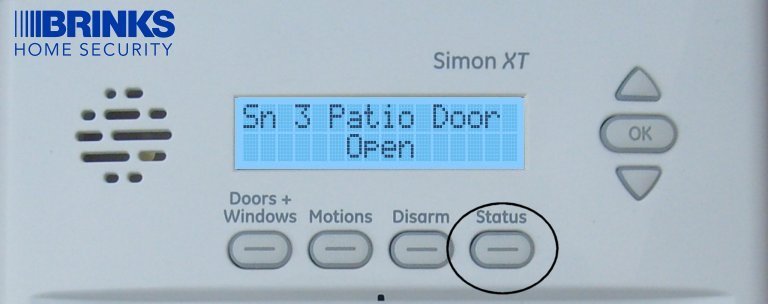
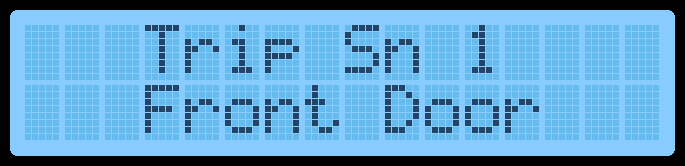
Checking Your System Status
Displays open sensors or trouble conditions.
- Press the Status button.
- Panel announces status and any open/troubled zones. Scroll if needed.
System Testing Procedures
Regularly testing your system components is crucial for reliability.
Checking Cellular Signal Strength
This test determines the quality of the panel's cellular connection (if module installed).
- Ensure system is disarmed.
- Press and hold 5 on the keypad for ten seconds.
- Panel displays cellular signal strength (usually bars). Minimum 2 bars recommended.
- Panel usually exits this display automatically or press Status.

Communication Test (Test Signal to Brinks Home)
Verifies the communication path to Brinks Home.
-
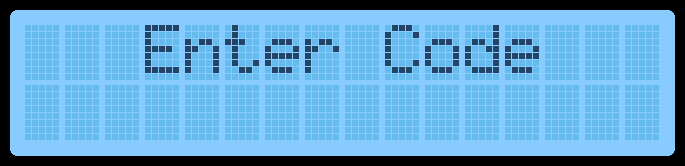
Disarm system. Scroll to System Programming (or System Tests if available), press OK.

-
Enter Master Code, press OK.


-
Scroll to Comm Test, press OK.

-
Panel sends test signal. Wait for result.


-
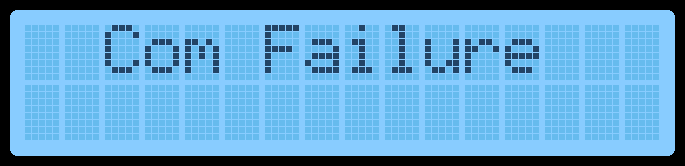
Display shows Test Signal Sent OK or Com Failure. Press OK.

- Press Status to exit.
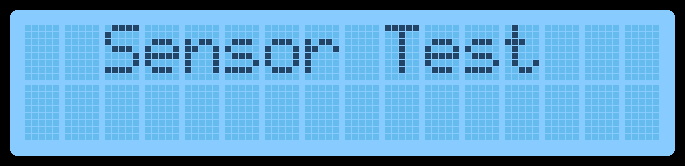
Sensor Test (Check Sensor Status)
Tests communication of individual sensors with the panel.
-
Disarm panel. Scroll to Sensor Test (or via "System Tests"), press OK.
-
Enter Master Code, press OK.
-
Trigger each sensor (open doors/windows, walk past motions, press test buttons on life safety devices).
-
Panel beeps to indicate signal strength (1-3=Poor, 4-5=Marginal, 6-8=Excellent).

-
Test ends automatically or press Status to exit.
Managing User Codes and Key Panel Settings
Learn how to change your Master Code and adjust some common panel settings. For other settings like timers, volume, or date/time, access "System Programming" with your Installer Code (default 4321) and follow on-screen prompts, or refer to your user manual. You can also text us for assistance with these advanced settings.
Change Master Code
Updates the primary code for your system.
-
Disarm system. Scroll to "System Programming", press OK.

-
Enter current Master Code, press OK. ("Access Codes" displays).
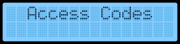
-
Press OK. Scroll to "Master Code" (or "User 0"), press OK.

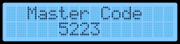
-
Enter new Master Code, press OK.

-
Press Status repeatedly to exit.


Summarized Settings Adjustments (Refer to Manual or Contact Us for Full Steps):
- Adjusting Timers (e.g., Exit Delay): Access System Programming > Enter Installer Code (4321) > Select Timers > Select Exit Delay. Enter a value (45-240 seconds), press OK. Press Status to exit.
- Adjusting Volume and Voice Settings: Access System Programming > Enter Installer Code (4321) > Select Siren Options. Scroll to options like Piezo Beeps, Panel Voice, Trouble Beeps, Voice Chime, Status Beep Volume, or Speaker Volume. Press OK on desired option, adjust value/setting, press OK. Press Status to exit.
- Setting System Date and Time: From disarmed state, scroll to Set Clock, press OK. Enter Master Code, press OK. Press OK to edit. Adjust Hour, Minutes, AM/PM using arrow buttons and OK. Press Status to exit.
Using Panic Buttons
Learn how to manually send an emergency alarm using your Simon XT panel's panic feature.
Your Simon XT panel has dedicated panic buttons (or a panic function activated by pressing specific keys simultaneously) to quickly signal Brinks Home in case of a police, fire, or medical emergency.
- Locate the panic buttons on your panel. These are often clearly marked with icons (e.g., a police badge, flame, cross).
- To activate a panic alarm, press and hold the desired panic button (Police, Fire, or Auxiliary/Medical) for two seconds, or press the two panic buttons indicated on your panel simultaneously (this method varies by specific Simon XT version and programming).
- The panel will immediately send an alarm signal to Brinks Home. Depending on programming, the siren may or may not sound locally.
Important: Use panic buttons only in genuine emergencies, as they trigger an immediate response protocol from Brinks Home.
LED Status Reference
Understanding the indicator lights on your Simon XT panel.
The Simon XT panel has several LEDs that provide quick status information:
Always refer to the messages on the LCD screen and any voice prompts from the panel for the most detailed status information, as LED behavior can vary slightly based on specific panel firmware and configuration.
Troubleshooting Common Issues (incl. Power Cycle)
Addressing basic problems with your Simon XT panel.
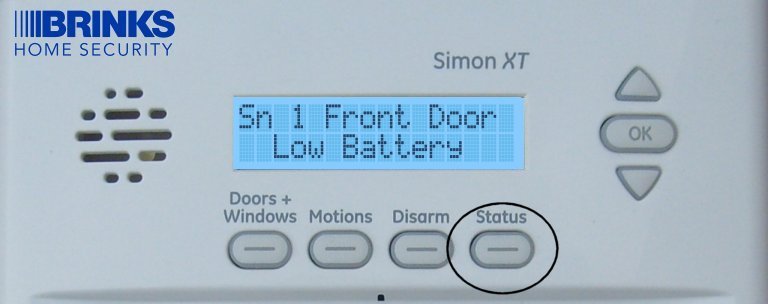
Panel is Beeping or Showing a Trouble Light/Message
- Press the Status button. The panel will announce or display the specific trouble condition(s) (e.g., "AC Power Failure," "System Low Battery," "Sensor X Low Battery," "Communication Failure").
- Based on the reported trouble, take corrective action:
- For "AC Power Failure": Check that the panel's transformer is securely plugged into a working wall outlet and that the outlet has power (test with a lamp). Check your home's circuit breakers.
- For "System Low Battery": If AC power was recently lost, allow the backup battery up to 24 hours to recharge after AC power is restored. If the alert persists after 24 hours with stable AC power, or if the battery is old (3-5+ years), the backup battery likely needs replacement.
- For "Sensor X Low Battery": Identify the specific sensor (the panel usually announces its name or number) and replace its battery.
- For "Communication Failure": Ensure your communication path (cellular module or landline) is active and functional. Perform a communication test if possible (see System Testing Procedures).
- After addressing the cause, the trouble alert may clear automatically, or you may need to acknowledge it by pressing Disarm then your code, or through specific menu options if the trouble persists.
Panel Not Arming
- Press the Status button. The panel will announce any open sensors (zones).
- Ensure all protected doors and windows are fully closed and latched.
- If a sensor is reported as open but is physically closed, it might be misaligned, damaged, or have a low battery. Troubleshoot that specific sensor.
- If a sensor is intentionally open (e.g., a window for ventilation) and cannot be closed, you will need to bypass that sensor before the system can arm (see "Bypassing Sensors" under Basic Operations).
- Check for other system troubles (like AC Failure or Panel Low Battery) that might be preventing arming. Resolve these first.
Communication Test Fails
- If using a cellular module, ensure it has an active service plan with Brinks Home and is not an outdated technology (e.g., 3G modules will fail as 3G networks are shut down; an upgrade to LTE is required).
- Check the cellular signal strength (typically by holding '5' on the keypad for about ten seconds). If the signal is consistently low (less than 2 bars), try relocating the panel to an area with better cellular reception if possible (e.g., closer to an exterior wall, higher up, away from interference sources).
- Perform a full panel power cycle (see instructions below).
- If the test continues to fail, there may be an issue with the communication module itself, its antenna, or your service account with Brinks Home.
How to Power Cycle the Simon XT Panel
A power cycle can resolve temporary glitches, unresponsiveness, or some communication issues.
-
Disarm the System: If possible, enter your Master or User Code to disarm the panel.
-
Disconnect AC Power: Unplug the panel's power transformer from the electrical outlet.
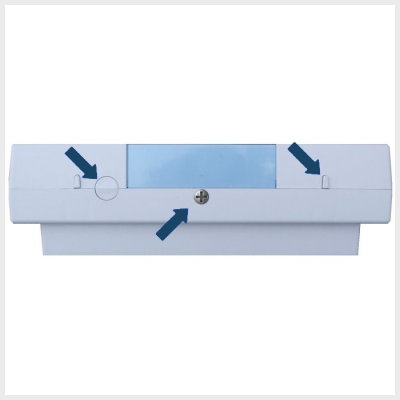
-
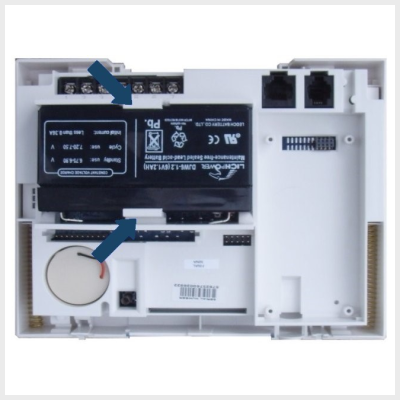
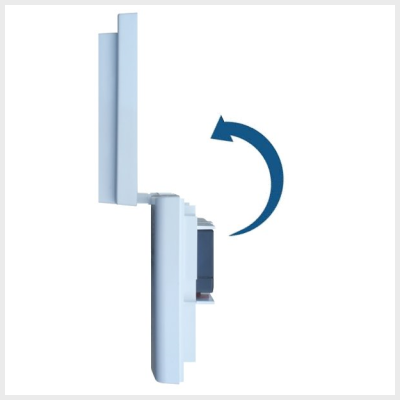
Open the Panel: To access the backup battery, you typically need to open the panel. For Simon XT, this often involves removing a securing screw (if present, usually at the top or bottom) and then pressing two tabs on the top edge of the panel. While pressing these tabs, gently pull the top of the panel cover forward, allowing it to swing down, as it's usually hinged at the bottom.

-
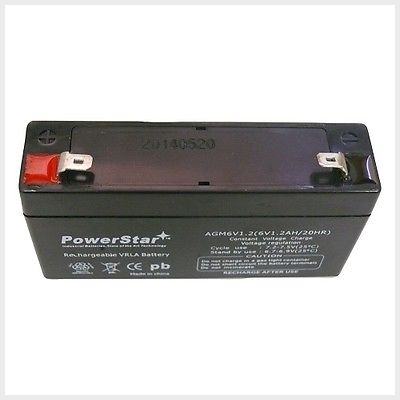
Disconnect the Backup Battery: Inside the panel, locate the backup battery. It is connected to the main circuit board by a wire with a plastic connector, or sometimes with direct red and black wire terminals. Carefully unplug this battery connector from the board, or disconnect the wires from their terminals (noting which wire goes to which terminal - usually red for positive [+], black for negative [-]). Some batteries are held in by plastic clips; you may need to gently spread these to release the battery.
-
Wait: Leave the panel completely without power (both AC and battery) for at least sixty seconds. This allows all internal memory to reset.
-
Reconnect Power:
- First, reconnect the backup battery. Ensure the connector is fully seated or that the wires are reconnected to the correct terminals (red to positive [+], black to negative [-]). Secure the battery in its compartment/clips.
- Carefully swing the front cover of the panel back up and press it firmly until it latches or clicks securely into place. Ensure no wires are pinched.
- Replace the securing screw if your panel has one.
- Finally, plug the AC power transformer back into the wall electrical outlet.
-
The panel will begin its boot-up sequence. This may take several minutes. Once it's fully started, the display should come on. You may need to set the date and time again if it was lost during the power cycle (see "Setting System Date and Time" under Panel Settings). Check if the original issue is resolved.
Advanced Options (e.g., Factory Reset)
Information on more advanced panel operations like a factory reset.
Warning: Performing a factory default reset on your Simon XT panel will erase all custom programming, including all learned-in sensors, user codes, and communication settings. This action should only be taken as an absolute last resort by qualified individuals or under the direct guidance of Brinks Home support, as it will render your system non-functional until fully reprogrammed. You must contact us after any such reset: 469-513-8685.
A factory reset is an advanced procedure typically found within Installer Programming and should not be performed without understanding the full consequences. If you are experiencing severe issues with your panel that basic troubleshooting (including a power cycle) cannot resolve, please contact Brinks Home technical support before considering a factory reset. They can guide you on whether it's appropriate or if other solutions should be attempted first.
Further Assistance & Resources
How to get more help with your Simon XT panel.
If you have questions about any of the features or functions described in this guide, encounter issues not covered, or need support with your Simon XT panel, our representatives are ready to assist. You can text a Support Representative anytime at 469-513-8685.
For additional detailed information relating to your device, you can also refer to the original manufacturer's user guide (example link for Simon XT v1.4): Simon XT User Manual.