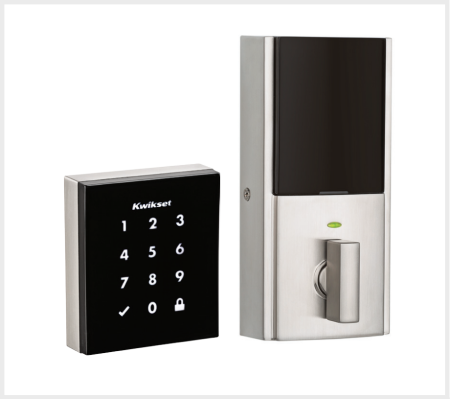
Kwikset Obsidian Smart Door Lock Guide
Specifications:
- • Function: single cylinder deadbolt
- • Door prep: 1 1/2" and 2 1/8" diameter face hole and 1" diameter latch hole
- • Backset: adjustable 2 3/8" or 2 3/4"
- • Door thickness: 1 3/8" to 2"
- • Faceplates: 1" x 2 1/4" round corner standard
- • Strikes: round corner
- • Latch: round corner adjustable 2 3/8" x 2 3/4"
- • Bolt: 1" throw, steel deadbolt
- • Door handling: reversible
- • Battery requirements: 4 AA alkaline batteries required with a 9V battery backup power
Features
- • Sleek, modern design
- • Capacitive touchscreen
- • Complete, keyless system
- • Tamper resistant interior cover
Installation Steps:
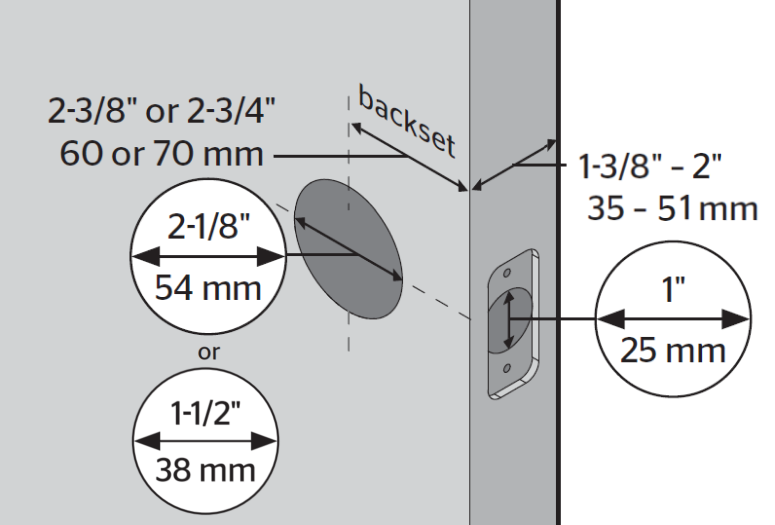
- Prepare the door and check dimensions.
- • Measure to confirm that the hole in the door is 2 and 1/8 inches or 1 and 1/2 inches.
- • Measure to confirm that the backset is either 2 and 3/8 inches or 2 and 3/4 inches.
- • Measure to confirm that the hole in the door edge is 1 inch.
- • Measure to confirm that the door is between 1 and 3/8 inches and 2 inches.
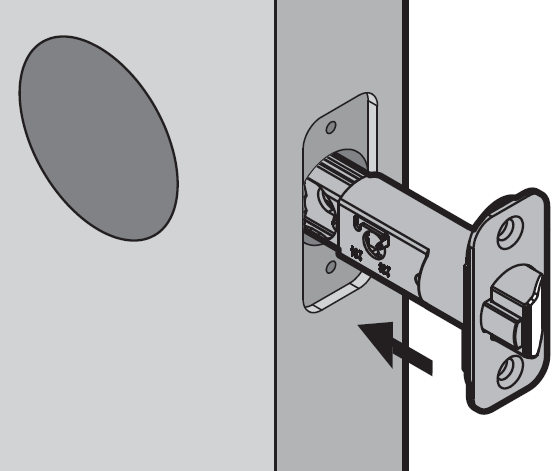
- Install the door latch ensuring the slant of the latch bolt faces the doorframe.
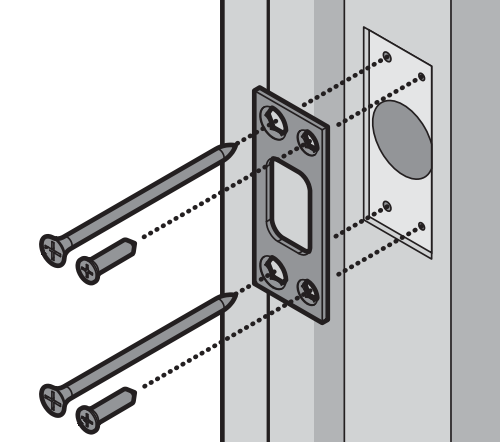
- Install the strike plate on the doorframe with the longer screws installed closest to the door jamb.
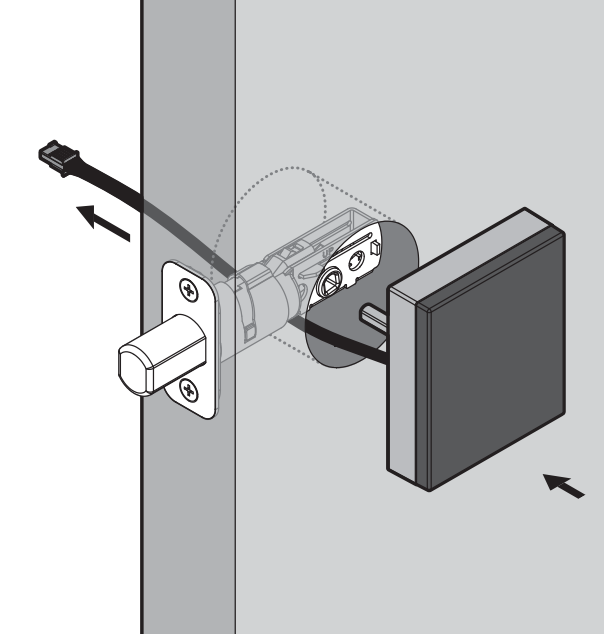
- Measure the diameter of the door knob bore hole. If it is 2-1/8" diameter, fit the adapter ring in the exterior keypad.
- Install the exterior keypad ensuring the cable is threaded underneath the latch.
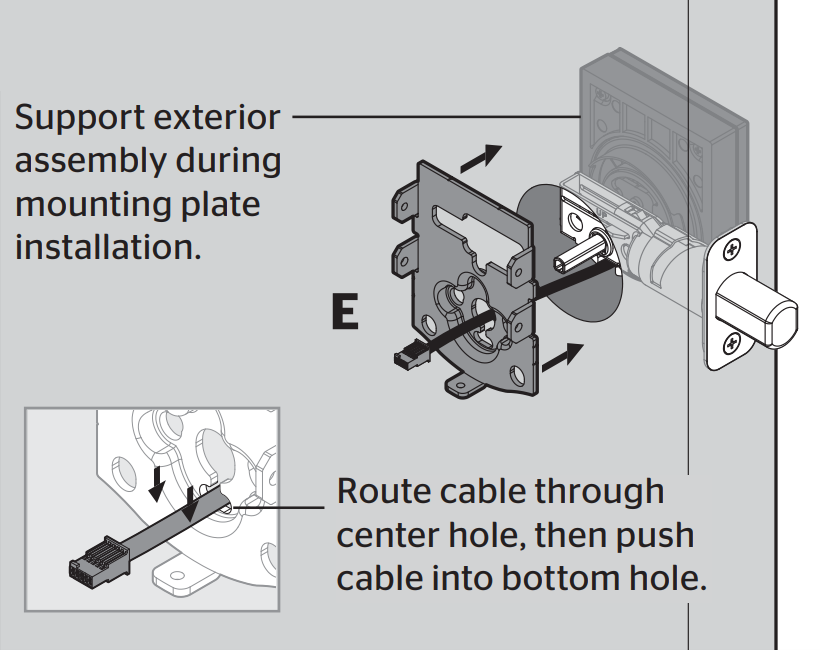
- Place the mounting plate on the interior, routing the cable through the center hole, then push cable into bottom hole.
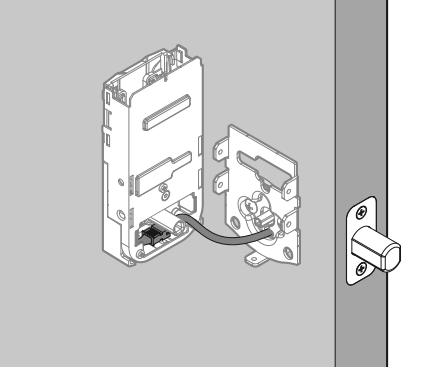
- Complete the interior assembly, ensuring a tight cable connection. Lay any excess cable flat inside the bottom of the interior housing, and secure in place with bolts.
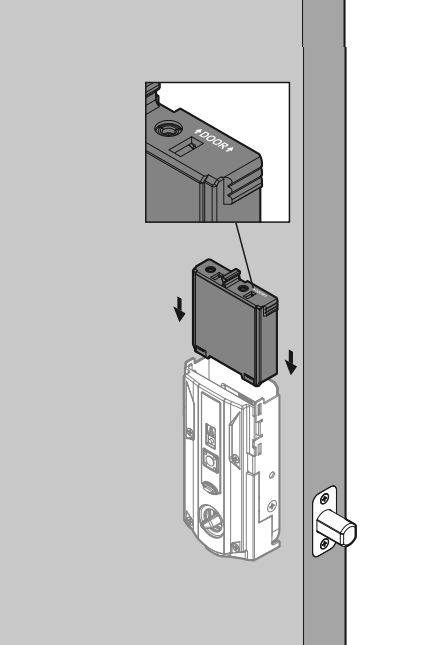
- Install 4 AA batteries into the battery pack. While the door is open, insert the battery pack.
- The latch bolt will retract and extend on its own to learn the orientation of the door, and the status LED will indicate success or failure.
- Add the lock to your smart home system. The following links provide detailed instructions on adding a Z-Wave device to some of our most common panels:

- • IQ Panel 2 - Add Z-Wave Device
- • GC2 GoControl - Add Z-Wave Device
- • Simon XT - Add Z-Wave Device
- • Simon XTi - Add Z-Wave Device
For additional information relating to your device, click the following link to view the original manufacturer's user guide or installation manual: Kwikset User Manual